How to Set Print Area in Google Sheets

Importance of Setting a Correct Print Area for Your Document
Have you ever faced your printed document looking ugly with different print borders? That’s a common headache! Yet, you can master simple steps to adjust your document and forget about wasting tons of paper!
To print your spreadsheets, it is crucial to understand the importance of setting printing margins. By defining the print margin, you do have full control over which parts of your sheet will be printed out, allowing you to exclude unnecessary content and focus only on the data that matters.
This not only saves printing resources but also ensures that your printed sheets are concise and professional-looking. Without setting a print area, you run the risk of printing excessive blank rows and columns or including irrelevant information, which can result in wasted paper and unorganized printouts.
Setting a Print Area for a Specific Range
Setting a print area for a specific range is a simple yet effective way to ensure that only the desired portion of your spreadsheet gets printed. So, follow these steps:
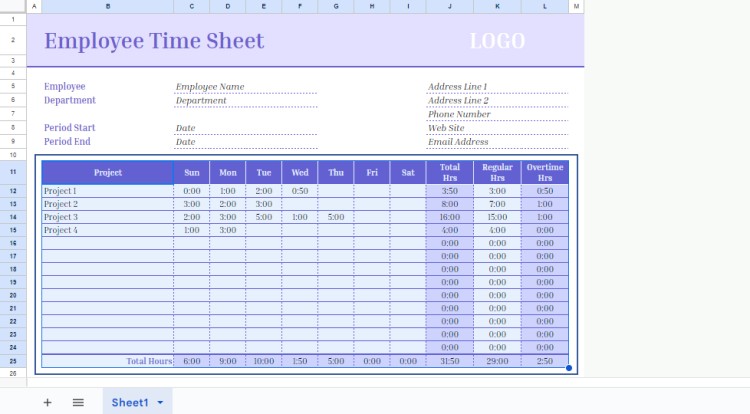
1. Open your document and select the range of cells that you want to include in the print area.
For this tutorial, we will use a template from TheGoodocs.com – Employee Timesheet and select only the data within the table.
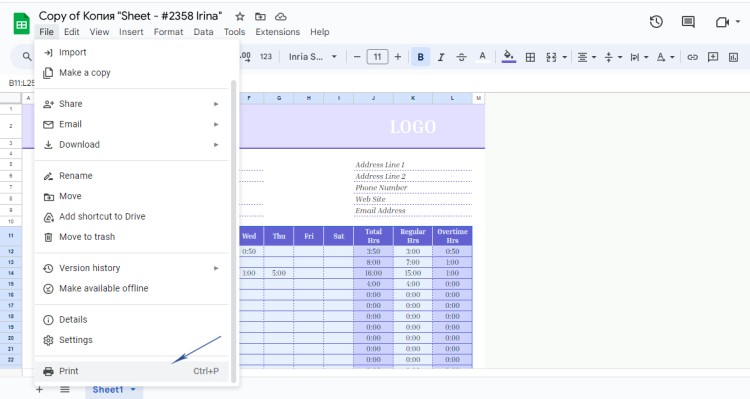
2. Click on the File menu and choose Print.
3. In the print settings panel on the right side of the screen, click on the dropdown menu next to Print and select Selected cells.
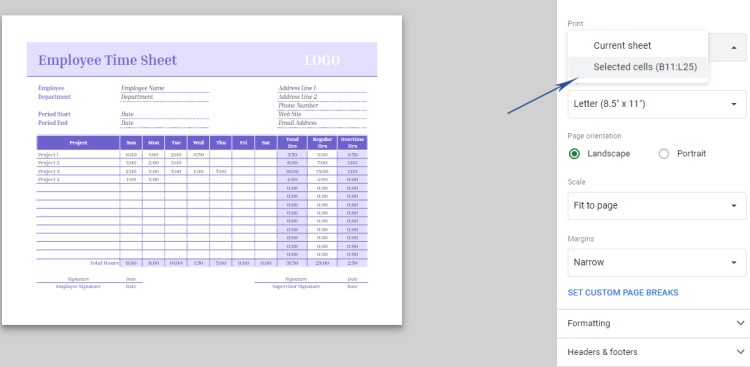
4. Now, you will see that the preview windows show only selected cells to be printed.
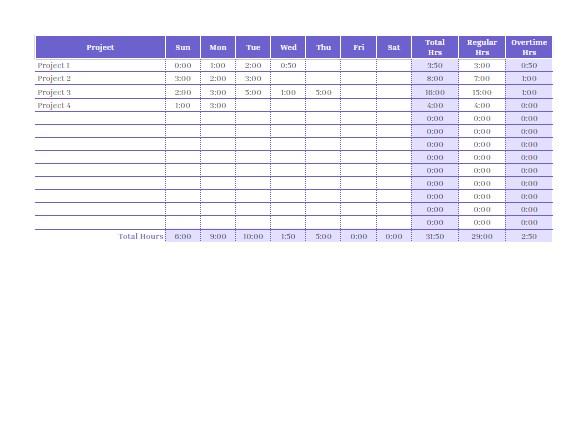
5. Review the print preview to make sure that the selected range is correctly displayed.
6. Click on the Print button to start printing.
Thus, by setting a specific print area for a range in Google Sheets, you have greater control over the information that gets printed, reducing paper waste and improving the overall professionalism of your printed documents.
Setting a Print Area for the Entire Workbook
In addition to setting a print area for a specific range, you can also set a print area for the entire workbook in Sheets. This is useful when you have multiple sheets in your workbook that you want to print together.
Now follow these steps:
1. Open your document and click on the File menu and choose Print.
Follow the steps above.
2. In the print settings panel on the right side of the screen, click on the dropdown menu next to Print and select Current Sheet or Selected Sheets (if you have several pages).
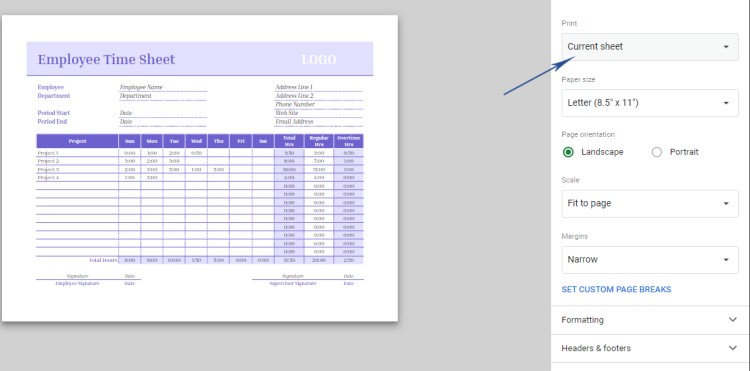
3. Review the print preview to ensure that all the sheets in your workbook are correctly displayed.
In our case, the page has clear borders, thus, it’s fine for us. We don’t need to make any further adjustments.
4. Click on the Print button to start printing.
By setting a print area for the entire workbook, you can print all the sheets in your Google Sheets document in a consistent and organized manner. This is especially useful when you have multiple sheets with related information that need to be presented together.
Tips for Optimizing Your Print Settings
In addition to setting a print area for specific ranges or the entire workbook, there are a few additional tips to optimize your print settings in Google Sheets.
📍 First, utilize the Page setup option to adjust the orientation, margins, and paper size according to your needs. This feature allows you to customize the appearance of your printed sheets and ensure they fit your intended print media.
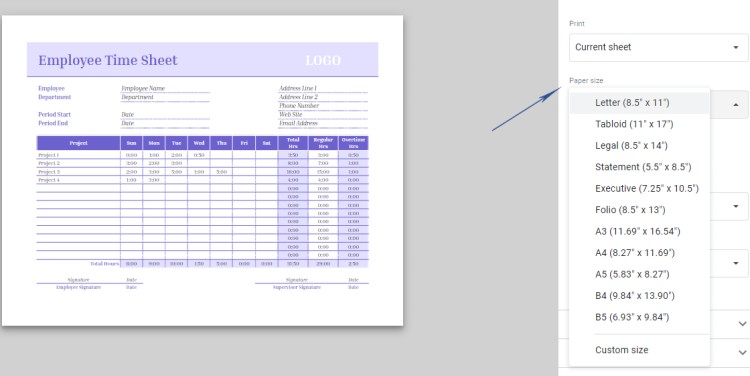
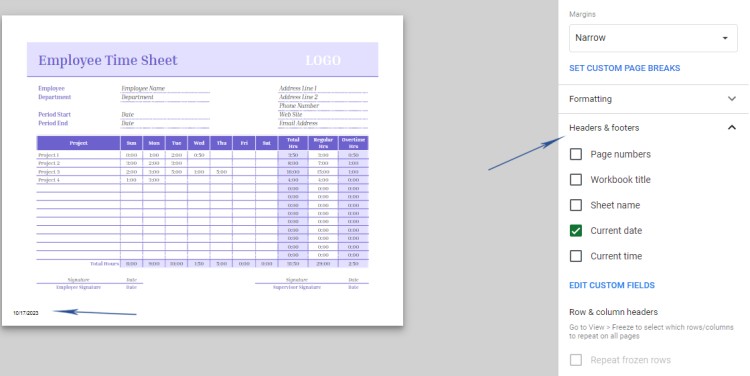
📍 Second, consider using the Headers and footers option to add relevant information to your printouts. You can include page numbers, sheet names, date and time, or custom text. This can be helpful for organizing and referencing your printed sheets.
Let us add a current date print. It may be helpful while arranging information.
📍 Lastly, take advantage of the Formatting and place align the data within the print area to the center, left or right. But in most cases, center alignment is the best choice.
By following these additional tips, you can further enhance the print settings in Google Sheets and create professional-looking printouts for your data.
In conclusion, Google Sheets provides a range of features that allow you to take control of your printing needs. By setting a print area for specific ranges or the entire workbook, adjusting the page setup, and adding headers and footers, you can create professional-looking printouts tailored to your specific requirements.
Whether you need to print reports, spreadsheets, or other types of data, Google Sheets offers the flexibility and customization options necessary to ensure your printed sheets are visually appealing and organized. By optimizing your print settings, you can save time and resources, while also presenting your data in a polished and professional manner.
So, the next time you need to print from Google Sheets, remember to follow these tips and make the most of the available features. Good luck and follow us for more tutorials!

We are a team of creative people who dream of sharing knowledge and making your work and study easier. Our team of professional designers prepares unique free templates. We create handy template descriptions for you to help you choose the most suitable one. On our blog, you'll find step-by-step tutorials on how to use Google Products. And our YouTube channel will show you all the ins and outs of Google products with examples.


