How To Make A Travel Itinerary In Google Docs
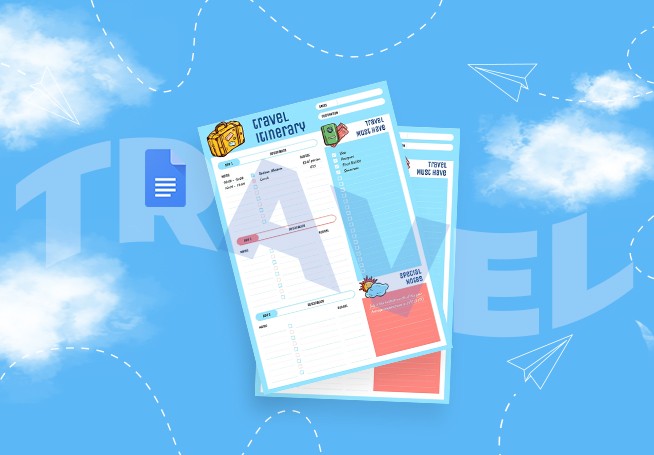
How to plan your vacation right and manage to visit all historical places and shopping malls? The answer is simple – create the travel itinerary and make your dream come true!
Thus, today we will show you how to make the itinerary from our fillable trip itinerary templates and learn how to create one from the blank sheet in Google Docs!
If you are ready, then let’s jump into the process!
Key Elements of Travel Itinerary
Before we start creating an itinerary, we recommend finding out more about the essential key components of a travel itinerary. Whether you are making one for yourself, an adventure tour, or a business trip, make sure that it is descriptive enough and helpful to visit all places in time.
When sitting down to draft an itinerary, think over the following questions or make short notes:
- The main purpose of the trip;
- Do you want to rest more or go for adventurous?
- How long will it take to get to the place and how many days you are staying there?
- Where will you be staying during the trip?
An important step in making an itinerary, especially a digital one, is to gather all information, search for relevant images (if you want to make it more visual), and create a folder with information on your Desktop.
Although there is no “unified” structure for the travel itinerary, we can outline the following key components:
1. The Introduction
An introduction can be a small title, purpose, or a brief statement of the main destination. Describe it shortly so as not to make a messy page. Keep to the point.
Variables to include:
- Title;
- Number of days to stay;
- Brief overview;
- Introduce co-travelers (if you are traveling with family or friends).
For instance, My trip to the city of love – Paris! Or Going to rest in the paradise – Hawaii!
2. Days and Activities Schedule
Here comes the part, where you can experiment with. It is up to you to decide whether it will be an itinerary in the form of a timetable or a separate section for Day 1, Day 2, and so on.
- What to include:
- Day and time;
- Detailed information about activities;
- Budget;
- Links to websites (if you will use only the digital version).
3. Extra Tips and Notes
Some people indeed like to write long detailed descriptions not to forget about all the stages of their trip, like what and where to buy (presents), what dishes to try, what to find out, and so on.
4. Final Part
At the bottom of an itinerary, you can write the motto or highlight the most awaited place to visit or write a final thought.
It is evident that an itinerary can be flexible and shouldn’t be too overloaded. Finally, let’s not forget to add background, vibrant colors, and images.
Making a Travel Itinerary in Google Docs from Scratch
If you are a traveling enthusiast and dream to make your trip perfect from start to finish, you probably would like to craft a personal unique itinerary or at least, learn how to do that.
To guide you through the process of itinerary creation, we have decided to choose Thailand as our prime destination.
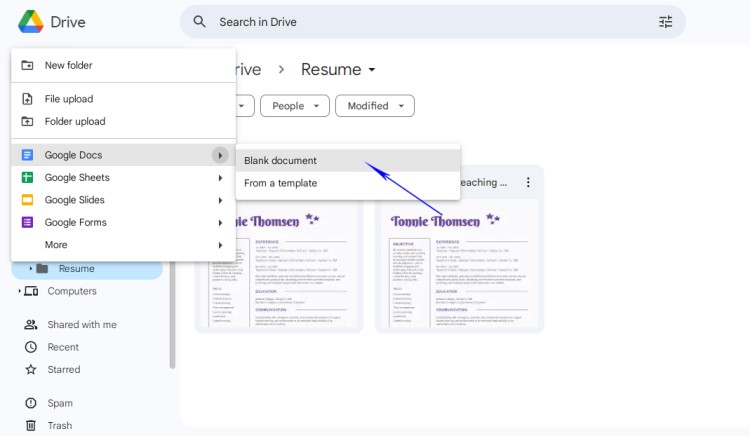
First of all, you should have access to Google Drive, a convenient cloud solution that allows any individual to create and store documents. Now open your Drive and choose Google Docs – New Document just as on the screen.
Step 1. Page setup
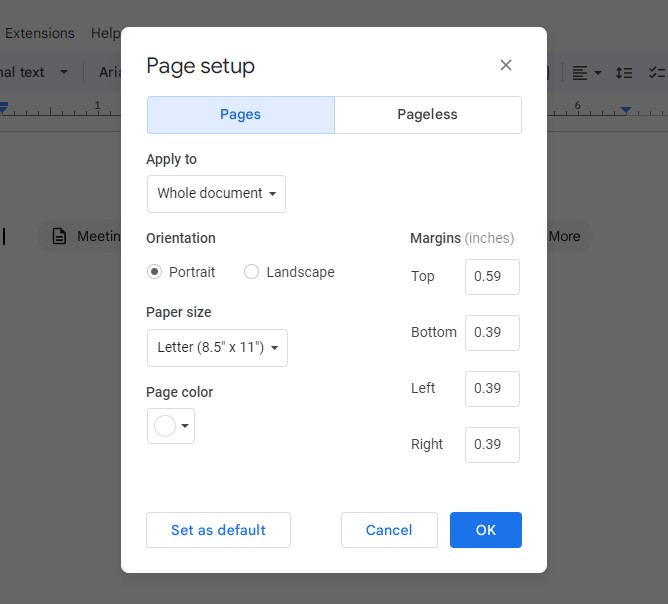
To make a printable vertical itinerary, let’s adjust the Page Setup. Go to File – Page Setup. At the pop-up windows make further corrections: Letter paper size, 0.59 pixels for the top margin, 0.39 pixels for the rest of the sides. Press OK.
Step 2. Choosing a color palette
As we are going to make a travel itinerary that looks attractive and would guide us through the journey, it is essential to make it vibrant and stylized. To choose colors that match our theme, we will head to Pinterest, a platform for creators and art enthusiasts, where we can find inspiration and choose a color palette.
Type in the query to the search bar, and look through color variations. Now save the one for our itinerary to the Desktop or any folder on your PC.

Step 3. Adding background
First of all, we are going to add a background color and probably use either an image or pattern to make a frame. Open our saved color palette and place it in the working space.
To pick the color from the palette, choose the Highlight color from the toolbar and use a Color picker tool. Now you have the samples of the color and they will be stored in the document’s palette.
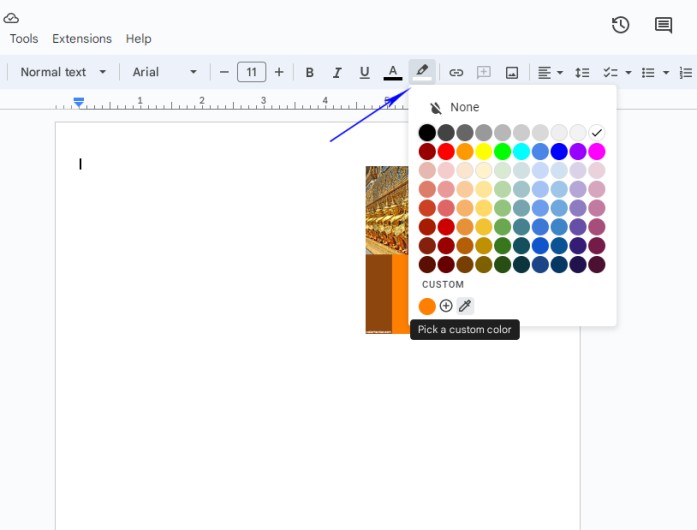
To add the background color, go to File – Page Setup – Page Color. Choose the color we have just picked from the image: #ff7f00. Apply it.
What if we can add a frame or cultural elements? We can go to Insert – Image – Search the Web and type in the query “Thailand illustration”. Let’s see the results and choose any image that may enhance our itinerary.
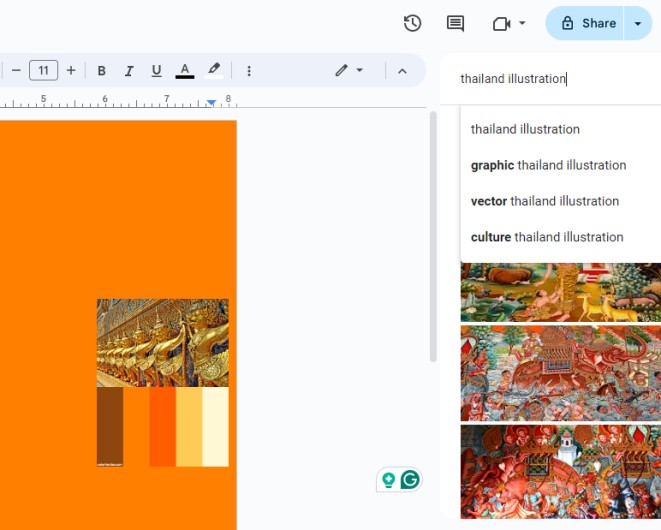
We will add a nice illustration of the ancient sun and are going to make slight adjustments to fit it into the design. Choose the image and go to the adjustments option.
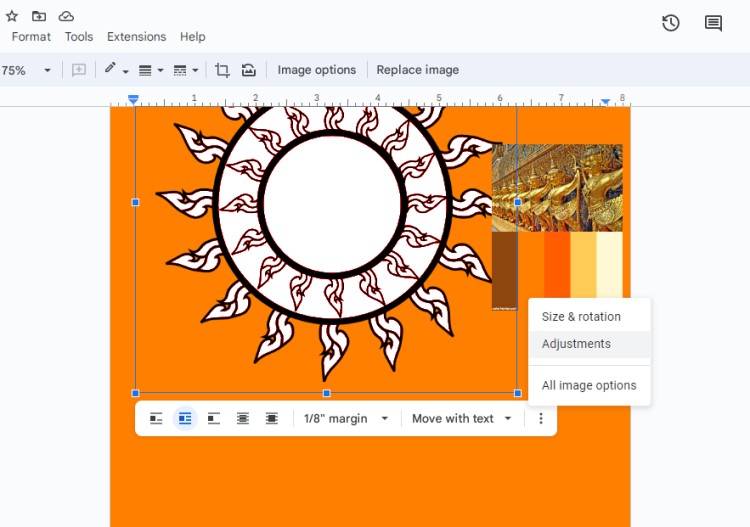
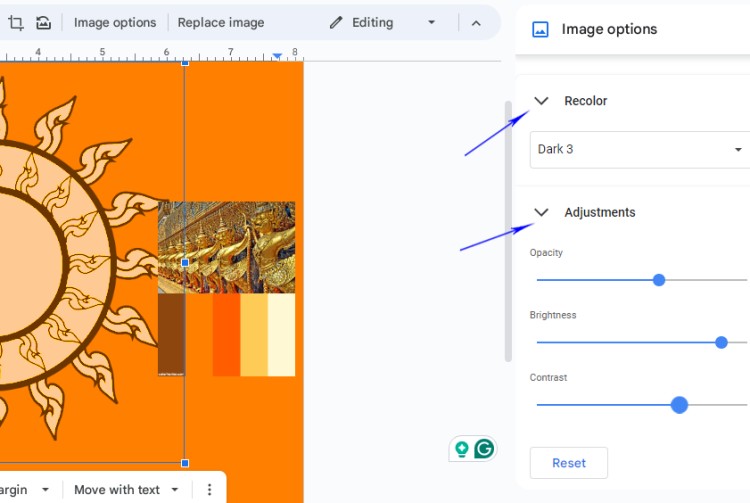
You will see an Image Options bar on the right side of the document. Here we can recolor the illustration and change the opacity, brightness, and contrast. Move the sliders until you get the best result. Place the illustration on the left side of the document to make a pop-out effect.
Step 4. Adding a title
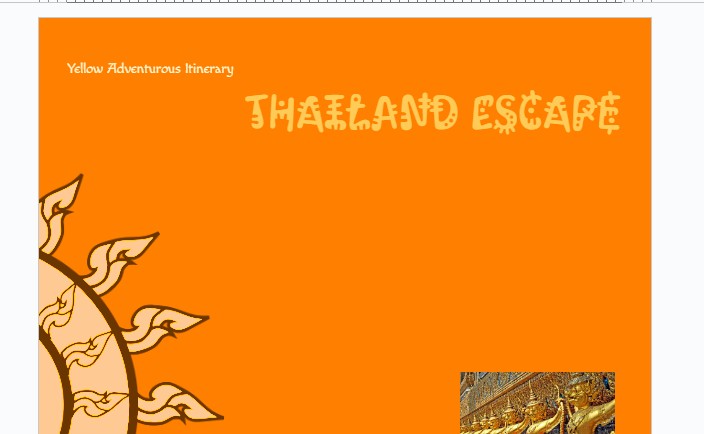
It’s time to add a title. Type in the itinerary title just as we did below. Be creative and brainstorm ideas suitable for your future travel – whether it will be a silent rest on the beach, self-adventure, or a guided tour around temples and famous landscapes.
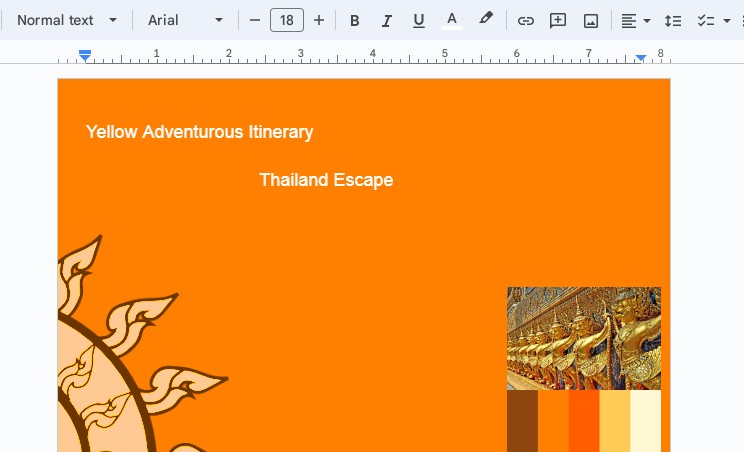
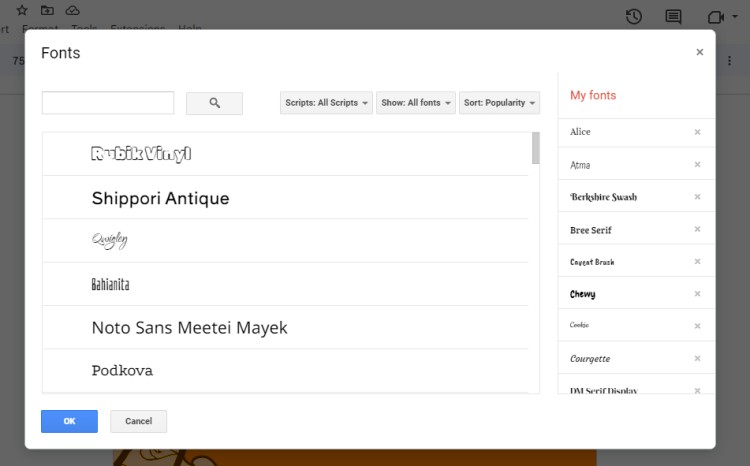
As the text looks plain, we will apply a color from our color palette and try out different fonts to make the title stand out!
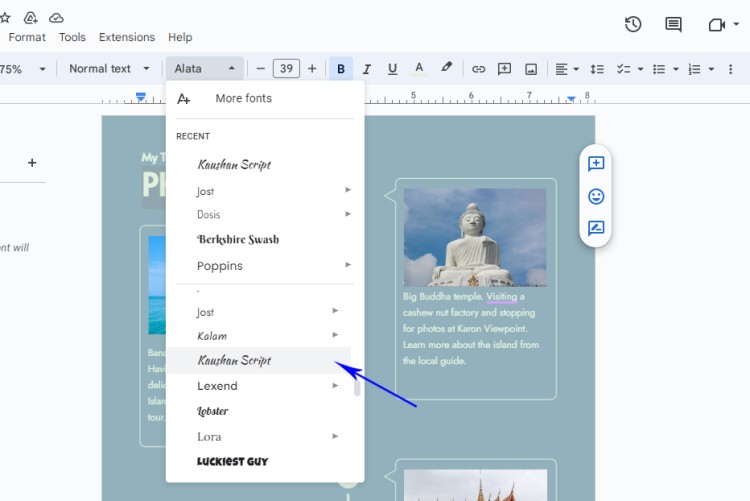
💡 Pro Tip: To get more fonts, click More Fonts, and add those you like to the existing list.
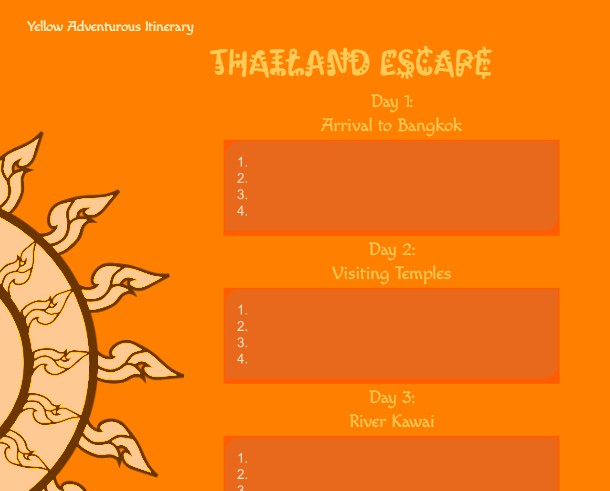
Step 5. Making a layout for Days
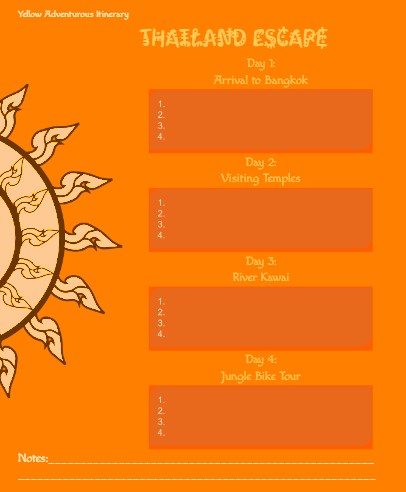
Next, we are going to make the layout for the 4 Day itinerary.
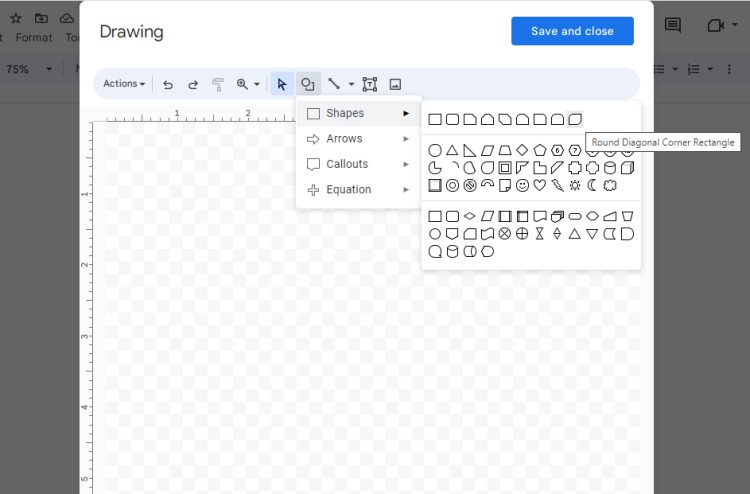
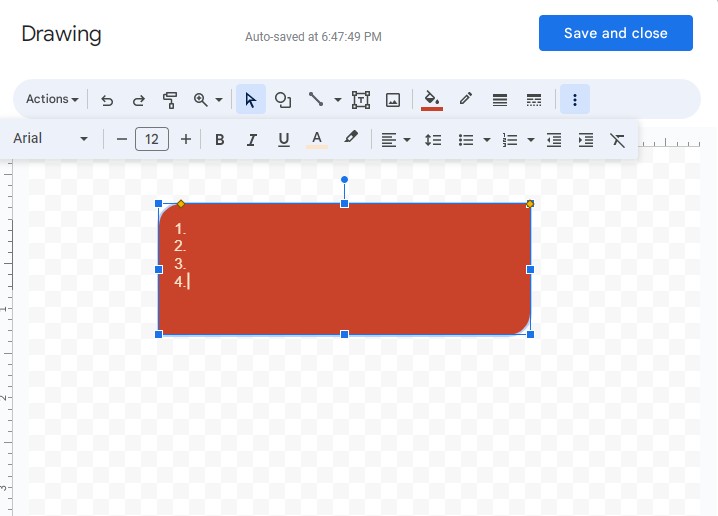
First, we are typing the subtitle with the same color #fecb56, font Macondo. Then we head to Insert – Drawing - New to place the shape for Day 1 activities. Give it a light red color and type in digits or a bulleted list for activities.
Now it is easy to copy this structure from Day 1 to Day 4
We also can add a section for notes. Type in the section subtitle and either add a dotted line or leave the space empty.
Finally, our travel itinerary is ready!
How to Customize Travel Itinerary Template?
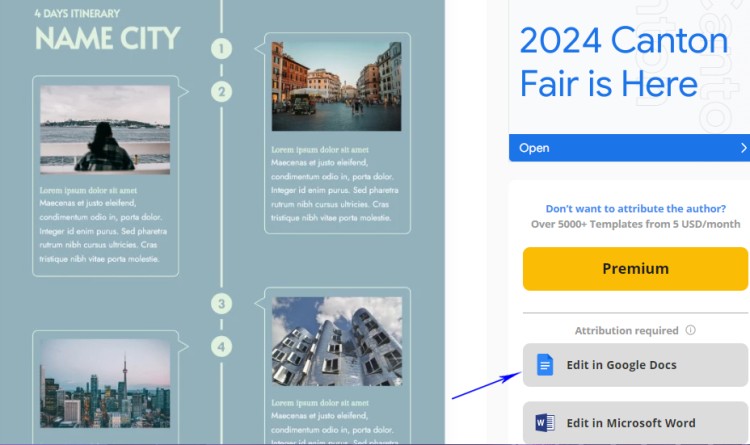
Now let’s imagine the situation that you are in a hurry and don’t have time to learn all the ins and outs of creating an itinerary from scratch. In this case, TheGoodocs team offers a wide range of stylized cute, funny, and eco-friendly travel itinerary templates available at any time of the day. Simply find the template you like, copy the template, and personalize the content: time, date, activities, things to buy, to take with you, gifts to bring to your relatives, and so many other fun staff.
To guide you through the Google Docs travel itinerary personalization, we have decided to use this amazing template in blue silent vibes - 4 Days Itinerary! The great thing about it is that you can download either Google Docs or Word format. But for today, we are working with Google Docs, as it is the most suitable format for travelers!
Step 1. Start with the Header
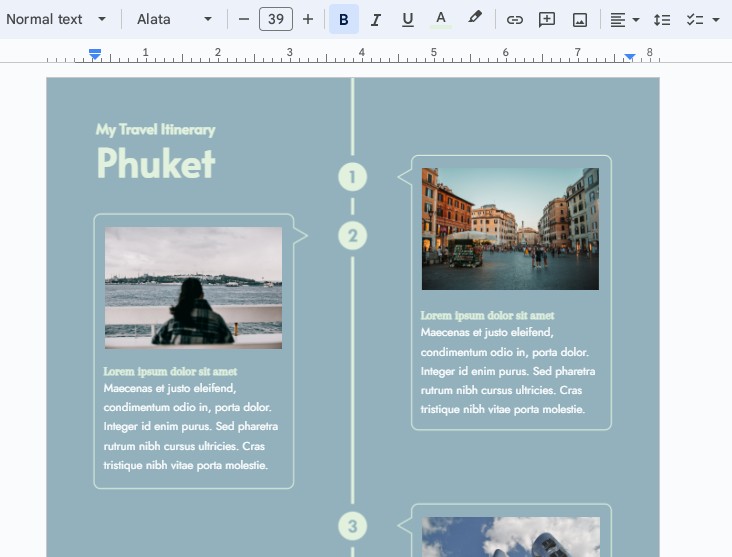
Let’s start with renaming the Itinerary title to make it unique. As our theme is a trip to Thailand, we may call it My Dream Trip to Thailand or name the city or island you go to – My Travel Itinerary Phuket.
To replace the text, put the cursor in the necessary place, delete the existing content, and start typing. The font we are using is Alata, but you can try out any font you like – just experiment.
Step 2. Writing the content for Day 1.
Usually, when we are going to visit a country abroad, we already know what places we want to visit, but it’s all hard to keep in mind, so let’s write the itinerary for Day 1. In pre-designed template, you can see a timeline that shows the day and the relevant section. According to the itinerary, we can insert the image of the place to visit on Day 1 and add a relevant description.
To replace the existing image, highlight the image box, and head to the toolbar with the button Replace Image. Click it.
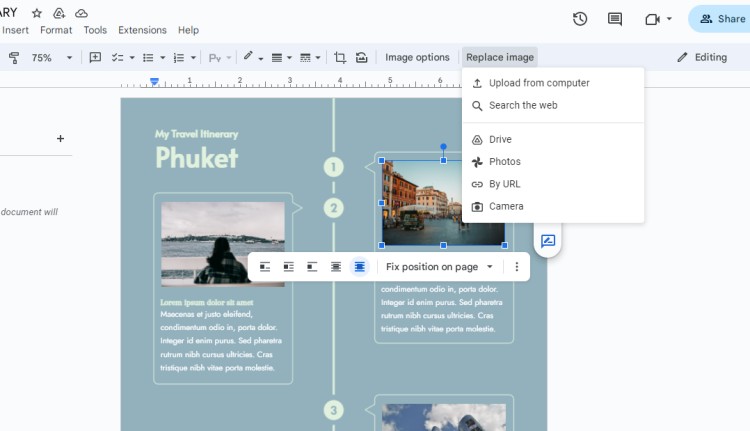
You will see different options for uploading the image – from PC, browser, Drive, by URL, Photos, and Camera. You can choose the one that is suitable for you. We will browse the web and find interesting images to place on our itinerary on Day 1.
Now type in the query – for instance, Big Buddha, Phuket, and look through images. After you have chosen the one that is suitable, click Replace.
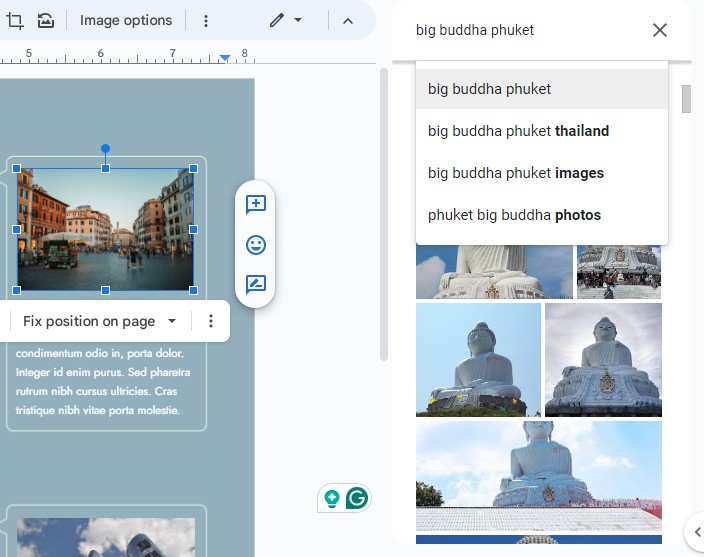
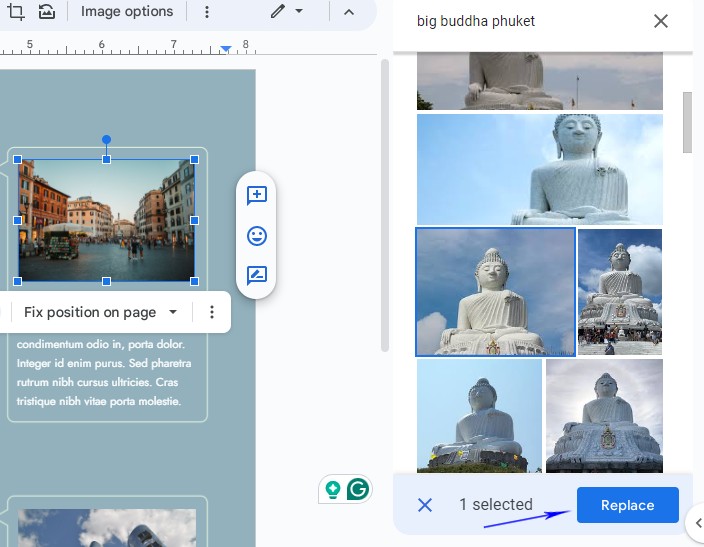
After the image was replaced, it’s time to write a schedule or a summary of places to visit for Day 1. Put the cursor to the text box, remove existing text, and type your content.
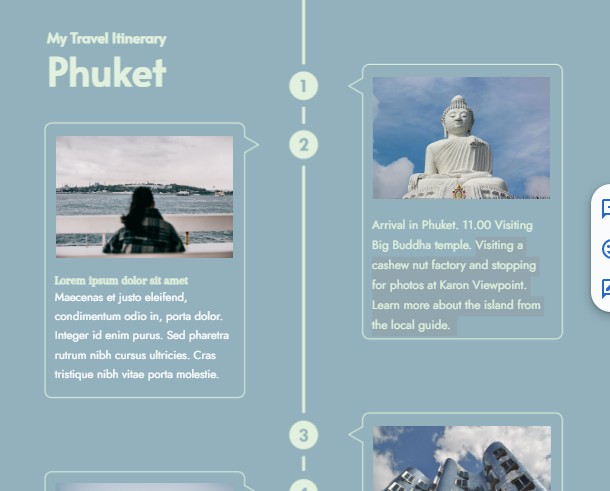
Step 3. Fill out the itinerary for Days 2, 3, 4.
Just like we did in the previous step, it is easy to replace the image and text to fit your dream vacation.
Let’s make amendments for all day, and see what it will look like!
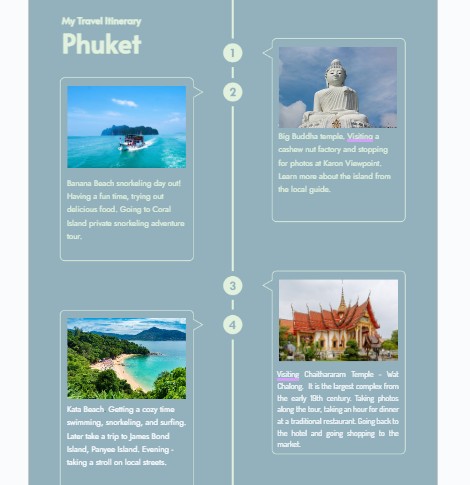
Step 4. Adding a pop of color.
Well, the itinerary is finalized, but the beauty of this fillable travel itinerary lies in changeable features – you can experiment with colors, and fonts, and add one more page for Day 5, 6, and more.
Let’s see what you can do. For instance, let’s change fonts to something more Thai cultural. Highlight the text, go to Fonts, check out the available list, and try out any you like. We applied Kaushan Script, and it looks fantastic!
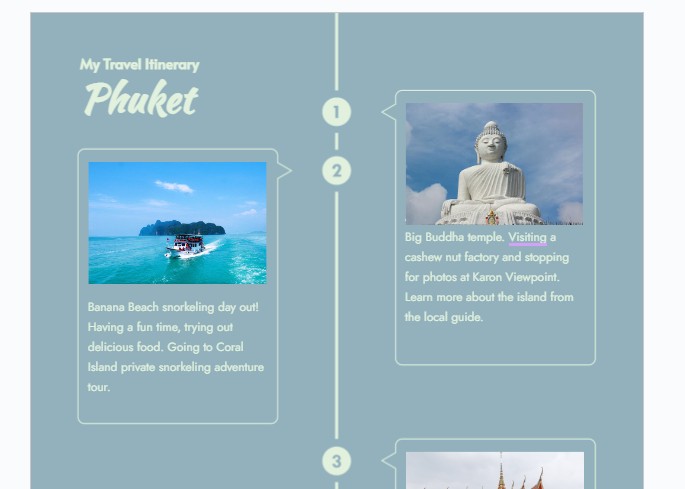
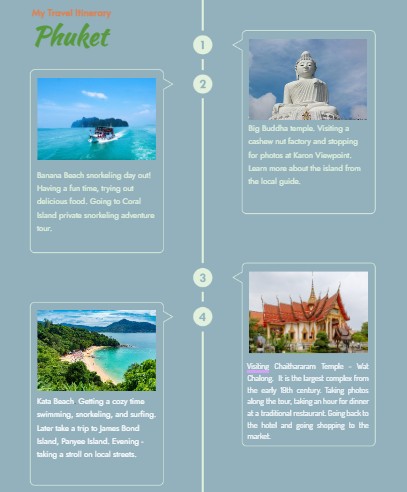
Finally, we tried out different colors and made it look more vibrant. But that’s only advice, you can go with the pre-designed color palette.
Let’s see the final travel itinerary! You also can do this one in just 15 minutes. Try it out.
Final Thoughts
We have reached the end of our tutorial and managed to make two different travel itineraries: one from ready-to-use vacation itinerary templates, and one from the blank sheet. And which method is more convenient for you?
Definitely, learning new tools and skills is a must, like a journey to faraway places to discover unbelievable routes and landscapes. The same goes for mastering digital applications like Google Docs and taking advantage of available resources. Hope our cruise itinerary templates and other options will come in handy!
Make sure your trip is the one you are waiting for and see the places you have never been before. Good luck!

We are a team of creative people who dream of sharing knowledge and making your work and study easier. Our team of professional designers prepares unique free templates. We create handy template descriptions for you to help you choose the most suitable one. On our blog, you'll find step-by-step tutorials on how to use Google Products. And our YouTube channel will show you all the ins and outs of Google products with examples.


