How to Create a Flyer in Google Docs?
In this tutorial, we will guide you through the process of creating a flyer in Google Docs in two variants. The first one includes steps of creating a unique flyer from scratch. The second variant is creating a flyer using a premade template and customizing a design according to one’s needs. Sounds interesting?
Now brew a cup of coffee, feel the aroma of design vibes, and let’s get started!
Creating a Flyer from Scratch
- Sign in to your Google Account
To start creating a flyer, open Google Docs and create a new blank document. Either in the Google search bar type in https://docs.google.com/. The same page will open from your browser.
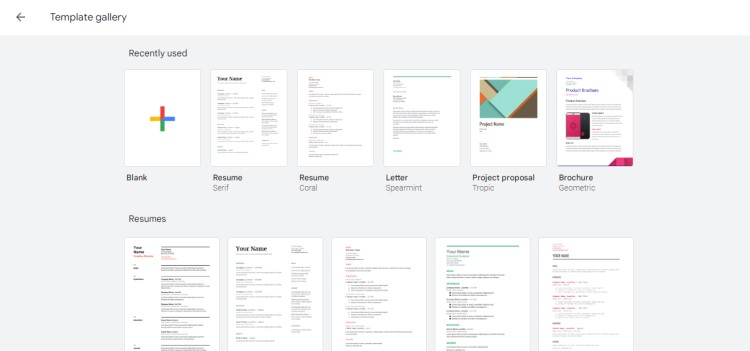
To create a flyer from scratch, choose a Blank template.
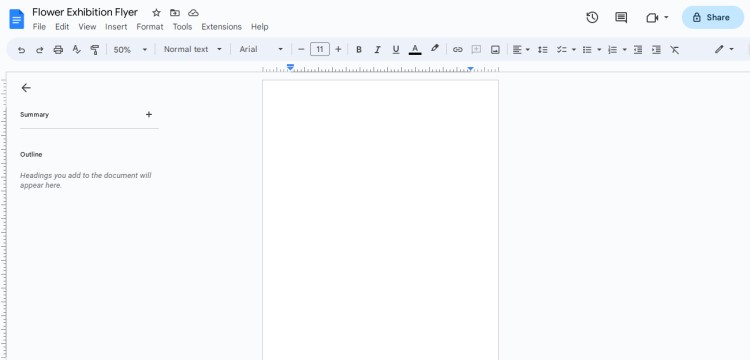
You will see a new blank document as below. Name it according to your project. For this tutorial let’s imagine we need to create a flyer for a Flower Exhibition. Name it Flower Exhibition Flyer.
- Add a colorful background
The first thing you’ll want to do is add a colorful background to your flyer. Click on the Insert menu and select Drawing.
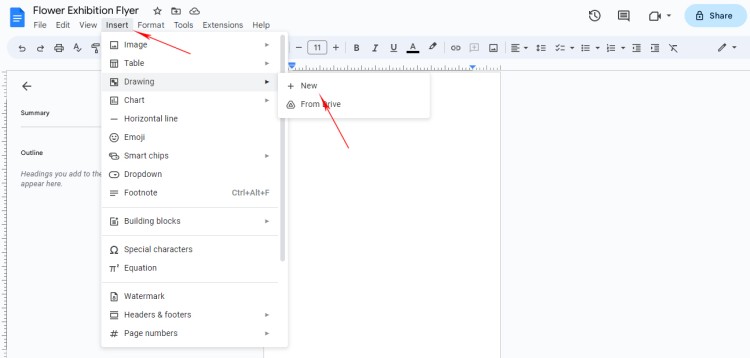
From the drawing editor, select the Shape tool and choose Rectangle from the options. Draw a rectangle, and choose a color for your background by selecting the Fill color option in the toolbar.
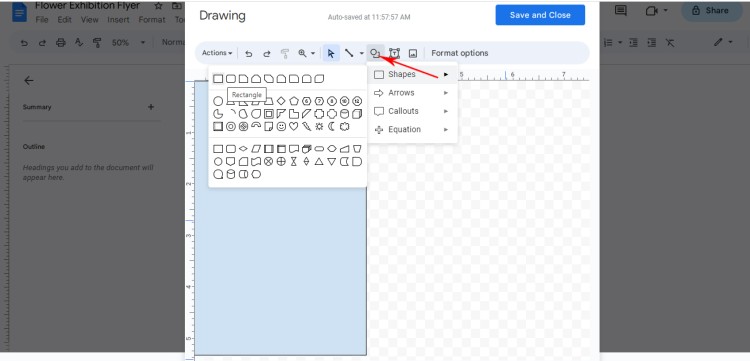
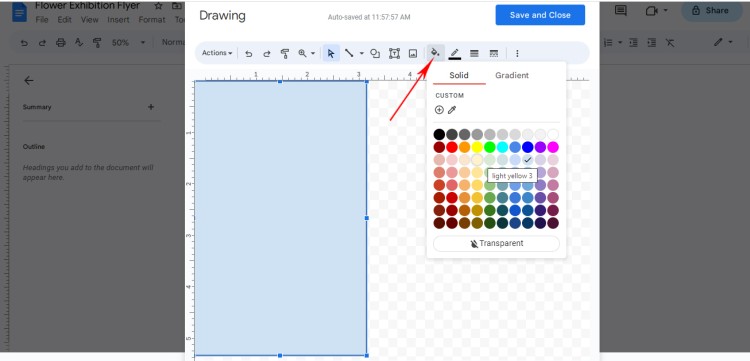
Choose a solid color to fill in the background color.
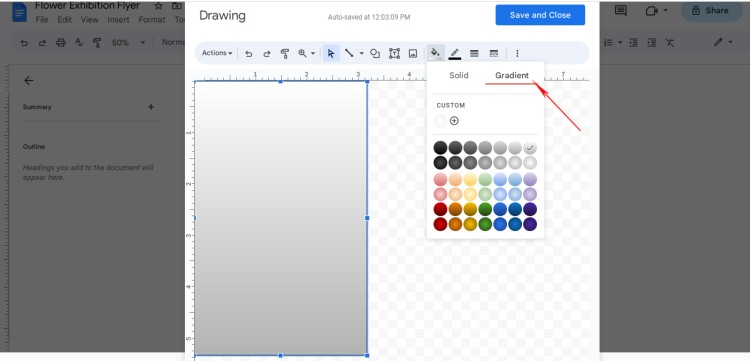
Or choose a gradient to enhance a color grading. It all depends on your preferences. To create a new gradient choose “+” and drag the necessary colors wheel to create a gradient.
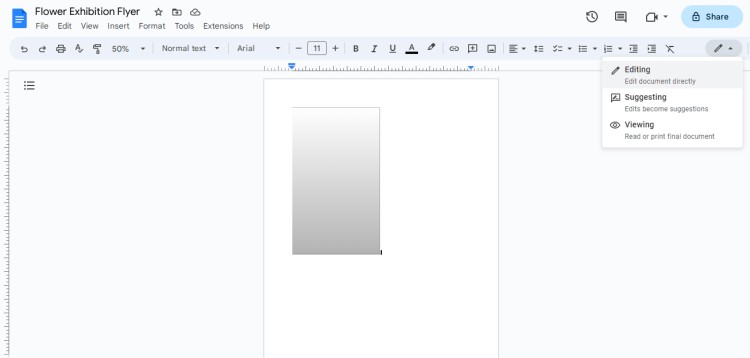
Click Save and Close. You will see a colored rectangle in your main document. To format the rectangle according to your plan, choose the Editing option on the right side of the menu and adjust the rectangle size.
- Insert images
Now it’s time to add images to your flyer. It may be a photo from your PC or a photo/illustration from the Web search option. Click on the Insert menu and select Image to upload or select an image from your Google Drive.
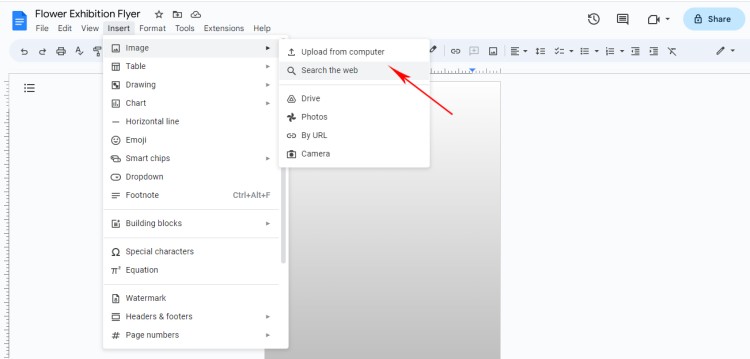
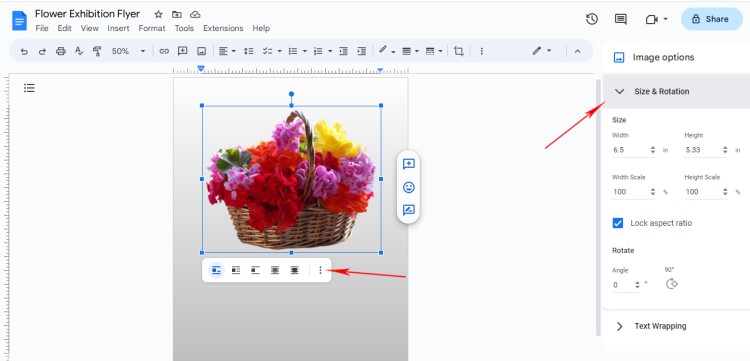
For this tutorial, let’s choose a flower image from the web. Simply write down an inquiry on the search bar and you will see a variety of possible photos and illustrations from the web. Now when you inserted an image, click the Editing option to resize the image.
- Adding text blocks
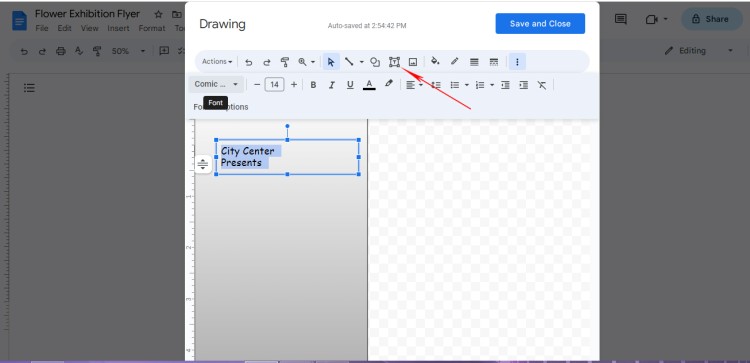
You can also add text by clicking on the Add text box option in the toolbar. Customize the font, size, and color of your text to suit your design needs.
- Use shapes and lines
To add more design elements, use shapes and lines to create borders, arrows, or other decorative elements. From the Insert menu, select Drawing and then choose Line, Arrow, or any other shape option. Customize the color and size of your shapes and lines to match your design. Use gradients to make colors stand out. Click Save and Close.
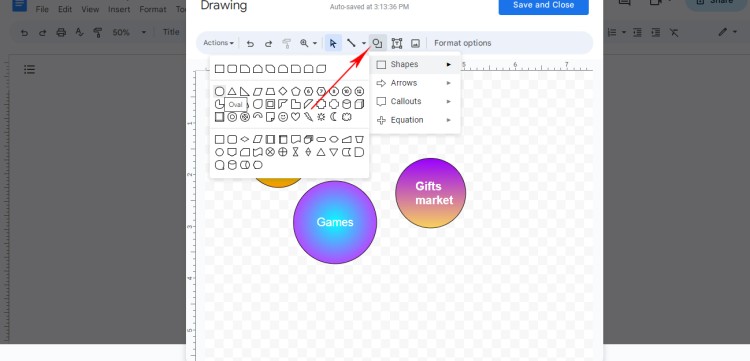
Press Edit to arrange the designed shapes on the layout. Try experimenting to get the maximum effect.
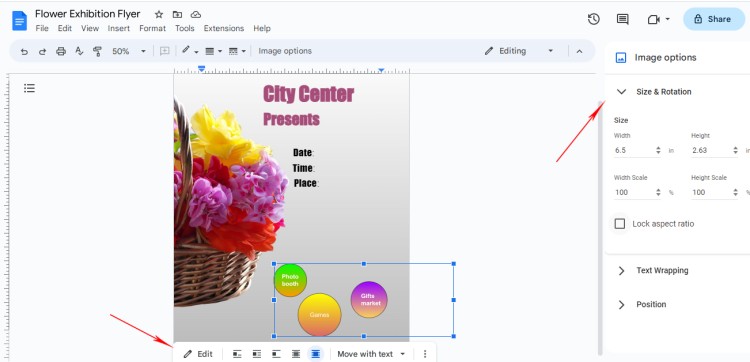
- Add additional graphics/change BG, images
If you want to change the background from solid color to a ready-to-use image, or insert photos or any illustration, simply choose Drawing – Choose from Web. Search for jpg. or png. images.
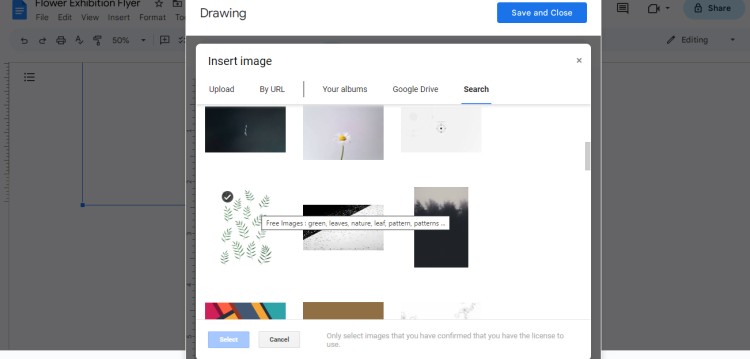
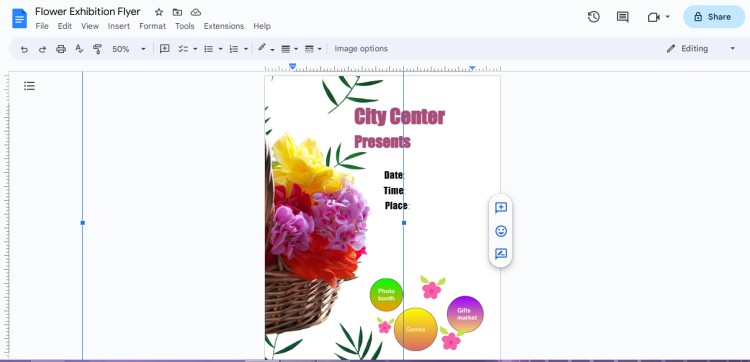
Place a new image or background photo that you think will be more appealing. Now our flyer looks more bright and simple. You are welcome to experiment with different styles: from black elegant themes to funny vibrant themes.
As we simply show how to add elements, we won’t add additional text blocks or complicated graphics.
- Save and export your flyer
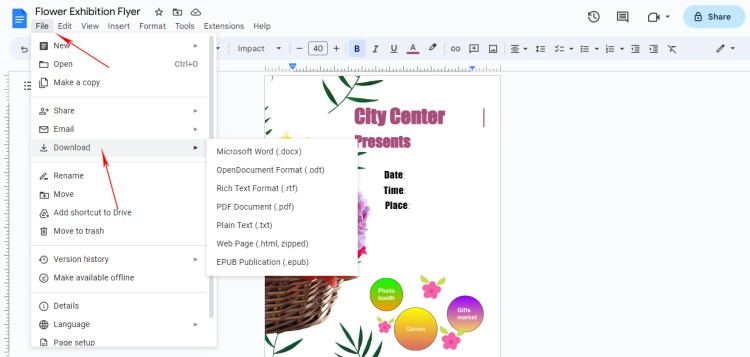
Once you’ve finished designing your flyer, it’s time to save and export it. Click on the File menu and choose Download to select the format you want for your flyer. You can choose between PDF, JPEG, PNG, or other formats.
Creating a Flyer Using Premade Templates
In case you hurry with a task to create a flyer, then using free premade templates would save your day!
- First, open Google Docs and create a new document by clicking on the “+” icon on the left-hand side of the screen. Next, select “Template Gallery” from the menu that appears. In the “Search for Template” box, type in “flyer” and click on the magnifying glass icon. You will be presented with a variety of different templates that you can use to create your flyer. Take some time to browse through the options and choose one that suits your needs.
- In case you have a saved premade flyer template on your Google Disk that suits your theme, you can do slight changes to get your own design.
Let’s take a look at how it can be easy to customize a premade template. In this tutorial, we’ll use a template designed by TheGoodocs team as a sample. You can save this free template to follow our tutorial. We’ll make simple adjustments to give it a minimalist illustration look.
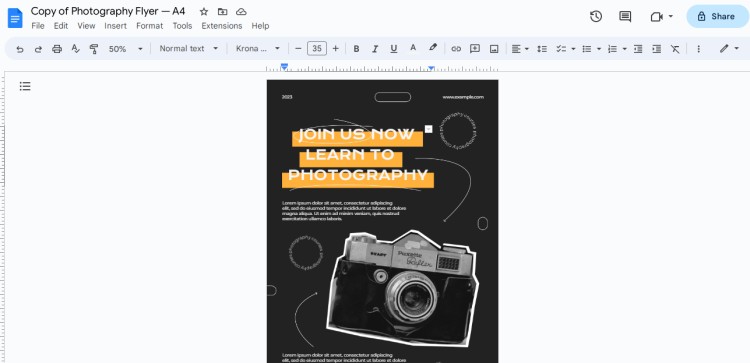
- Once you have selected your template, it's time to start customizing it to create your own unique flyer design. To do this, you will need to replace the existing text and images with your own. You can simply click on the text boxes and images and replace them with your content.
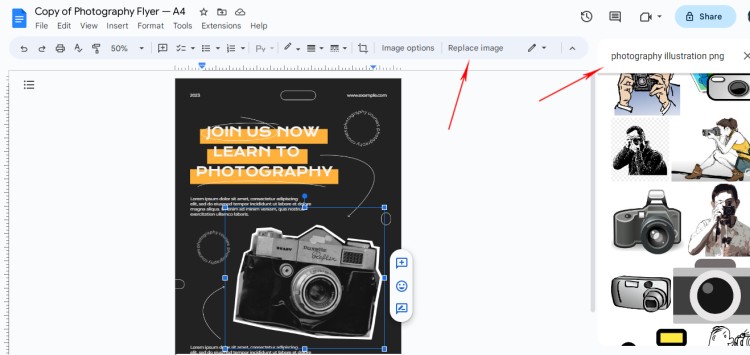
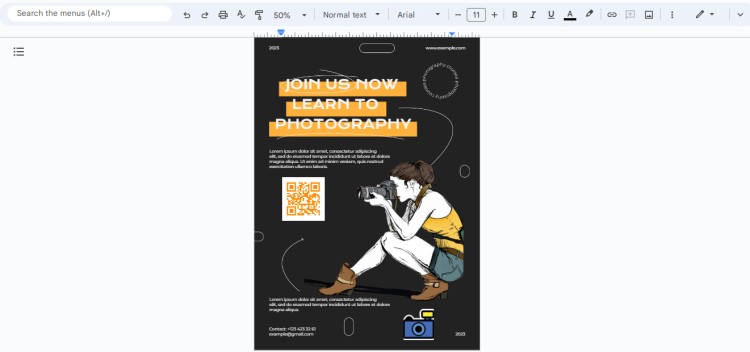
- As a step one, let’s replace the image and insert something different. Choose an image you want to replace and click Replace image on the menu toolbar. Upload your image from a PC or search for a suitable one on the web. To create an illustrated theme, we’ll choose a photographer’s sketch.
Before:
After:
Another important factor to consider when creating a flyer is the color scheme. You want to choose colors that are visually appealing and that match the theme of your event or promotion. You can press the Recolor option to choose colors that complement each other and create a harmonious design.
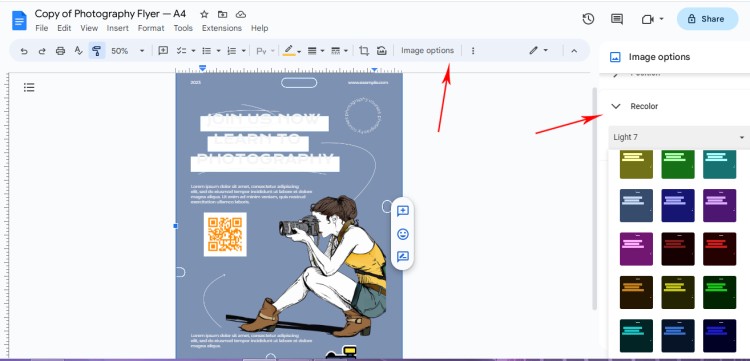
- Now when you changed the BG color, you can also change the color of the text to match your branding or the theme of your event. If the custom color is fine, just leave it as it is.
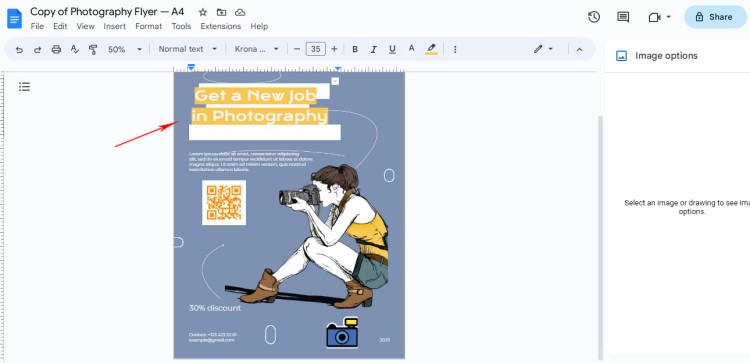
- One important thing to keep in mind when creating a flyer is to keep it simple and avoid cluttering it with too much information. You want your flyer to be eye-catching and easy to read, so make sure to use clear and concise language and don't overcrowd it with text. Use images and graphics to break up the text and make your flyer visually appealing.
- If you want to take your flyer design to the next level, you can change the background from a solid color to any photo or artwork.
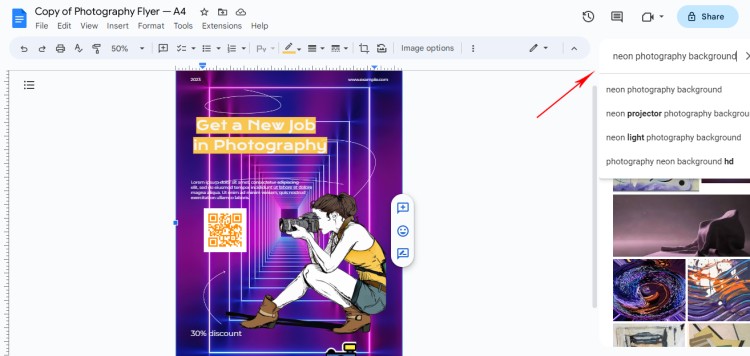
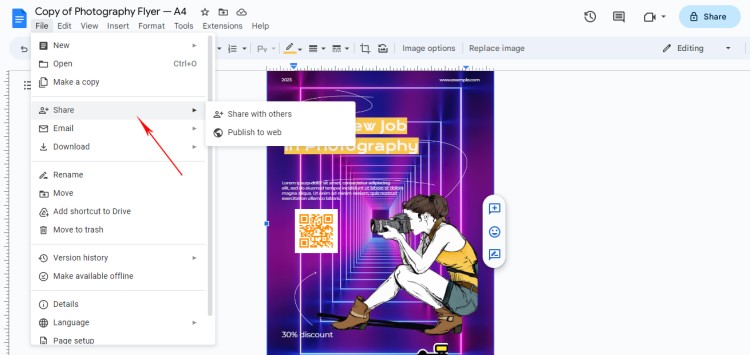
- Finally, once you have finished customizing your flyer, it's time to save and share it. You can download your flyer as a PDF or a PNG file by clicking on File > Download and selecting your preferred format. You can also share your flyer directly from Google Docs by clicking on Share and choosing the sharing options that best suit your needs.
In conclusion, creating an attractive and sophisticated flyer in Google Docs is easy and straightforward. By using templates, customizing them to match your needs, and incorporating some advanced design features, you can produce a professional-looking flyer that will help you promote your event or product effectively.
If you have never tried to design a flyer or poster (any marketing materials), you may need more time to think about the general layout. Still, it’s worth trying!
So, start experimenting with Google Docs today and unleash your design skills!

We are a team of creative people who dream of sharing knowledge and making your work and study easier. Our team of professional designers prepares unique free templates. We create handy template descriptions for you to help you choose the most suitable one. On our blog, you'll find step-by-step tutorials on how to use Google Products. And our YouTube channel will show you all the ins and outs of Google products with examples.


