How to Create a Brochure on Google Docs. Creating a Brochure for the Black Friday Sale.
Creating brochures can be a powerful way to promote your business, showcase your skills, or share important information with an audience. And when it comes to designing and crafting brochures, Google Docs offers a surprisingly nice and user-friendly platform. Whether you're starting from scratch or utilizing pre-designed templates, it provides all the necessary tools to create stunning and professional brochures.
Recently, more and more businesses have chosen to use tri-fold brochures, and today our choice will be the same – to design a tri-fold brochure for the Black Friday sale. But before we get started, let’s find out more about his type of promotional paper.
What is a Tri-Fold Brochure?
A tri-fold brochure is a type of promotional material that is conveniently designed to fold into three sections. It is commonly used by businesses, organizations, or individuals to provide information, promote products, or advertise services. The brochure's structure consists of two outer panels that are folded inward to meet in the middle, creating three separate sections or panels. These panels are printed on both sides, providing ample space to present content and visuals.
✦ The first panel of a tri-fold brochure is typically the cover (front, back, inside), displaying a visually appealing image or the company's logo. It aims to captivate the reader's attention and entice them to explore further.
✦ The interior panels contain information such as details about the organization, key features of a product, or highlights of services offered. These panels are organized in a logical manner, with headings and subheadings to enhance readability.
The design of a tri-fold brochure is crucial for its effectiveness. Visual elements such as colors, fonts, and images are carefully selected to convey the intended message and create an appealing layout. The text is usually concise, using bullet points or short paragraphs to deliver information quickly to the reader. This ensures that the brochure is not overwhelming and maintains the reader's interest.
In terms of size, a tri-fold brochure is typically 8.5 x 11 inches or 11 x 17 inches when unfolded. With its folding structure and spacious panels, it offers an effective way to present information, promote products, or advertise services.
Now let’s jump right into the tutorial!
Easy Guide to Creating a Brochure from Scratch
When it comes to creating brochures, Google Docs offers a convenient way for designers and non-designers to realize their ideas without great effort and make them stand out! Why? You can follow this tutorial and see it by yourself!
In this step, we will design a brochure from a blank page and use licensed-free stock images or images directly from the web in png. or jpg. formats.
1. Setting Up a Document
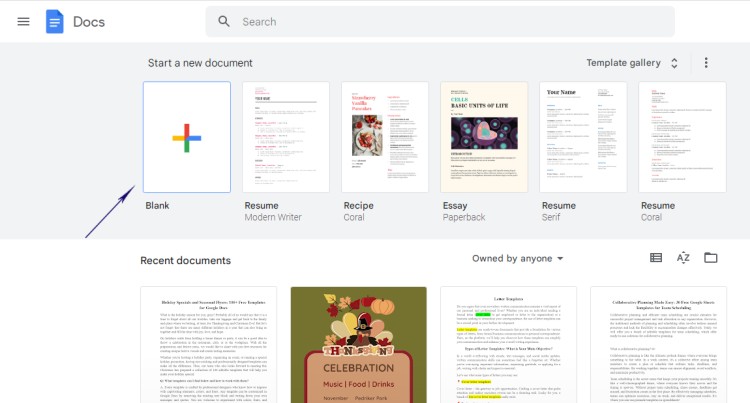
Let’s open up a Google Docs by going to https://docs.google.com/document/u/0/ and choosing “+” for a blank document.
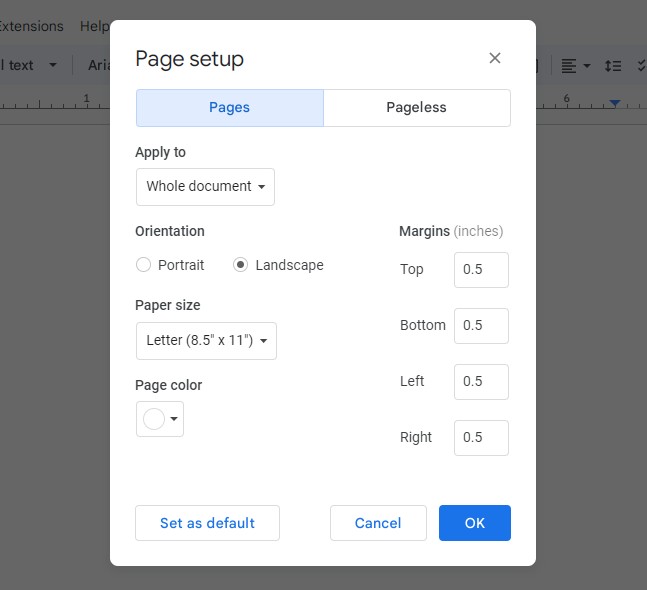
Now go to File – Page Setup. From the occurring window choose a Landscape Orientation and change the Margin to 0.5 inches. Click OK.
2. Choosing the Appropriate Layout
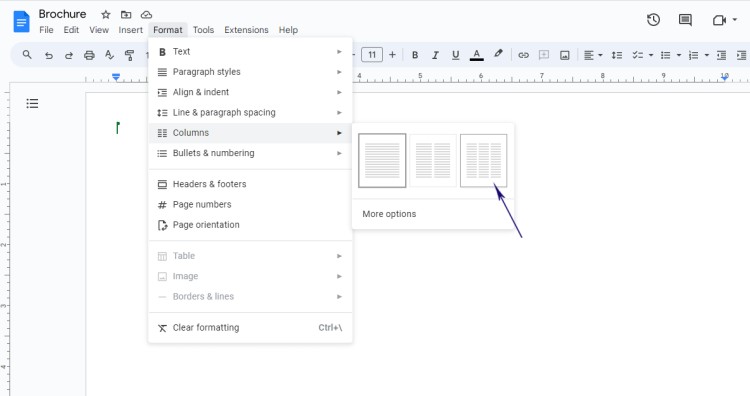
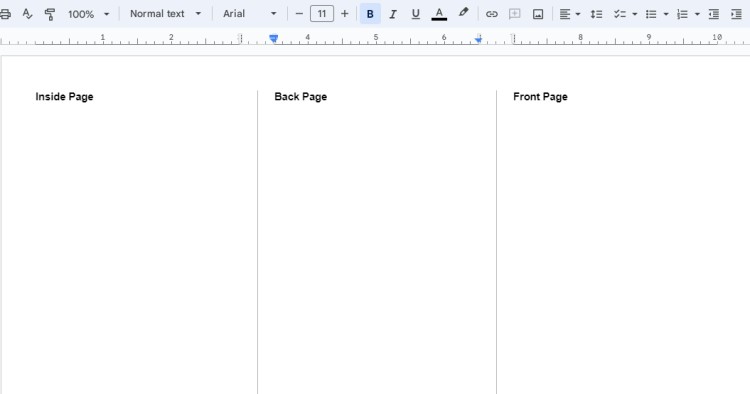
Select a layout for your brochure by adjusting the number of columns. You can choose from one to three columns, depending on the design you have in mind. For this, go to Format – Columns. Choose a three-column layout for the tri-fold brochure.
Here is the layout – if you are not familiar with the tri-fold brochure page structure, we marked up the columns.
3. Choosing an appealing color palette
Selecting an appealing color palette can greatly impact your brochure's visual appeal. Consider your brand identity or the message you want to convey, and choose colors that complement each other harmoniously.
As we are designing a brochure for a Black Friday promotion, our color palette will consist of Black background and White fonts.
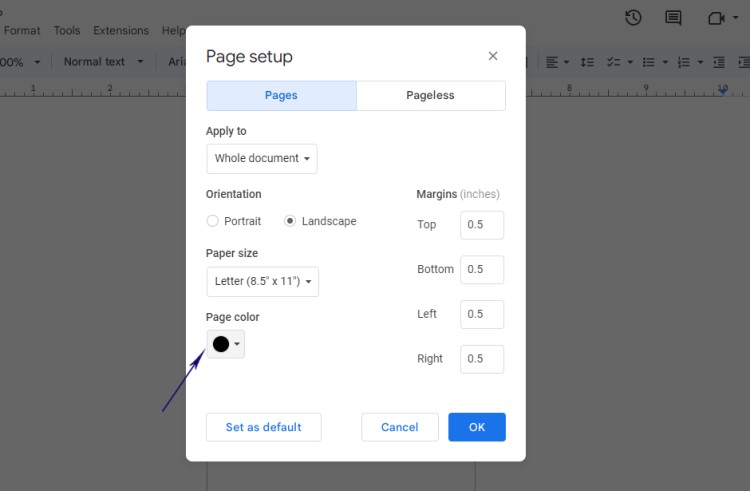
To change the document color, go to File – Page Setup and change the Page color to black.
4. Inserting and Arranging Text Blocks
First of all, let’s add text blocks to the brochure. We will place them strategically to create sections for headings, body text, and further information. This way we will see what the overall design will look like.
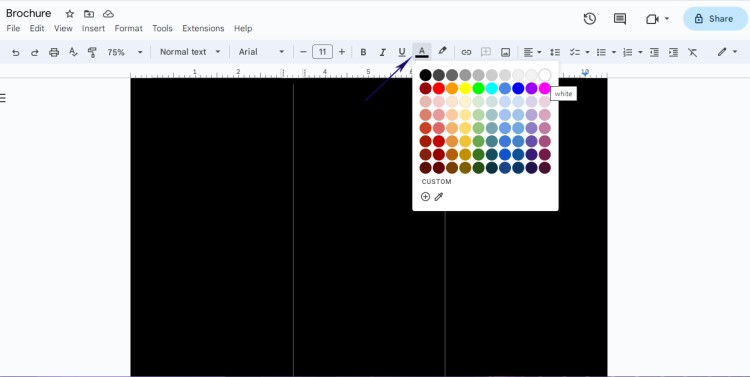
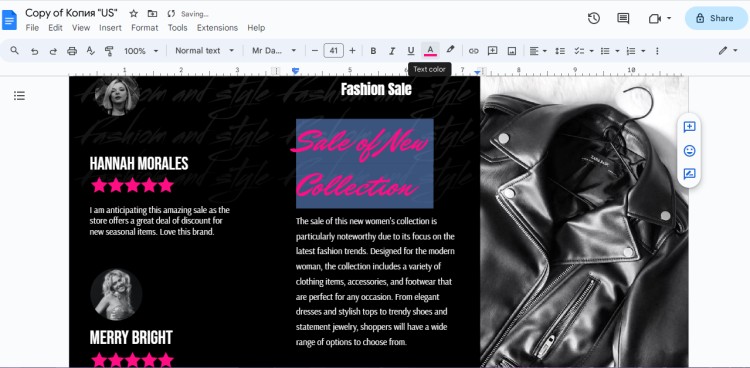
To start typing, choose a white color by clicking on the Text color tab on the toolbar.
Now simply type in the text or paste the text from the document you have prepared beforehand.
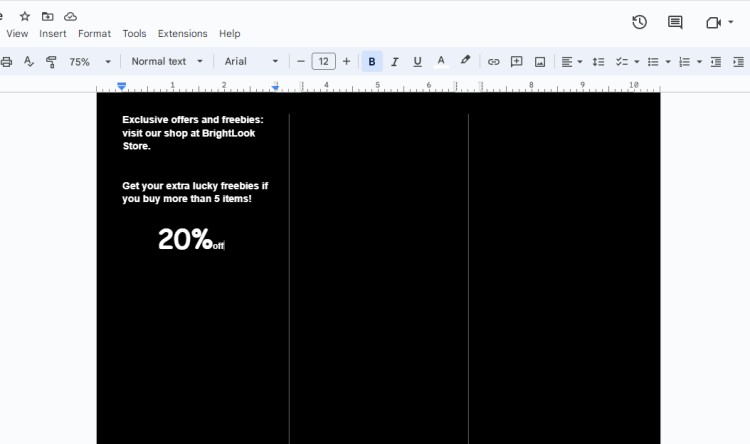
Let’s add more text by moving the cursor to the next column.
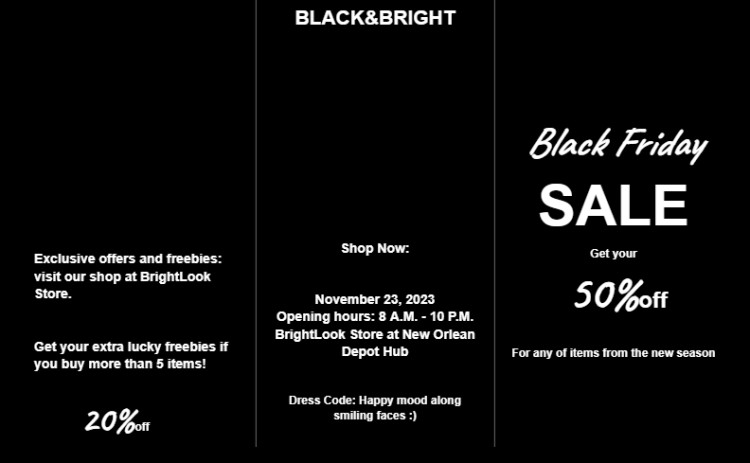
If necessary, we’ll rearrange and resize the text boxes later and change the text colors to make them more eye-catching.
5. Adding Images and Graphics
It’s time to enhance the brochure by inserting images and graphics. Simply go to the Insert menu, choose Image, and either upload an image from your computer or insert one from the web. You can also draw shapes and incorporate icons to make your brochure visually appealing.
Let us add images from the Search engine. We will make an image-clipping mask for the front side of the brochure. To do that, go to Insert – Drawing – New. Choose an Image tab and search for a suitable photo from the browser.
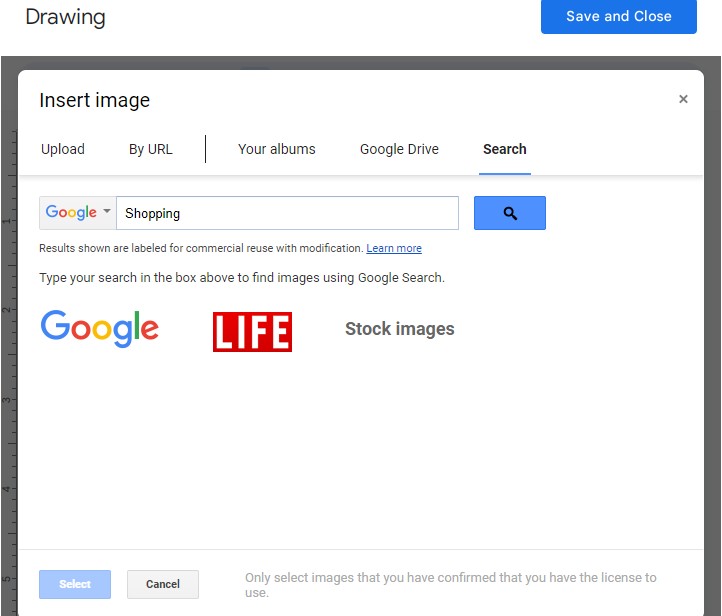
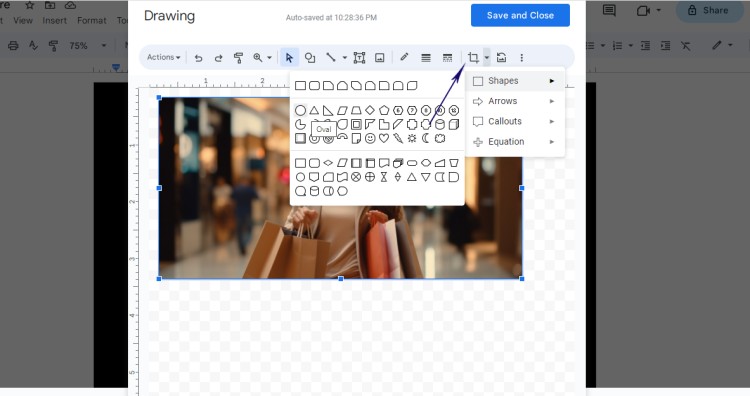
Once the image is selected, choose the Mask image and the shape you want to use as a clipping mask. We will choose an Oval shape.
To add more images, click Insert – Image. If you already have saved photos to your PC or Google Drive, choose the Upload from Computer or from Drive. We will simply search the web.
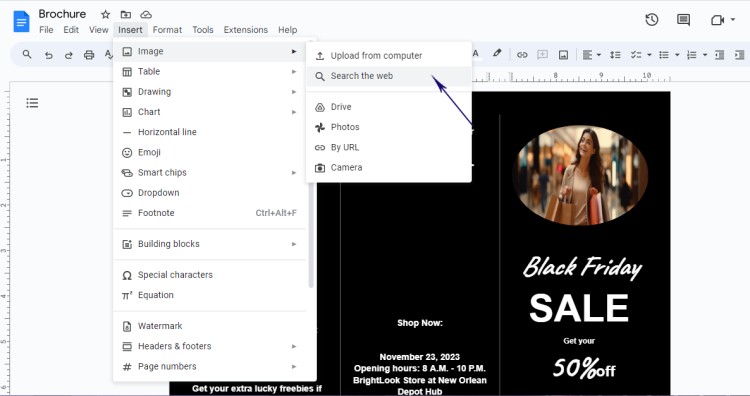
Let’s type in the requests like Black Friday and Shopping Friday to find interesting images or elements. Choose the image you like and click Select. Place the image accordingly.
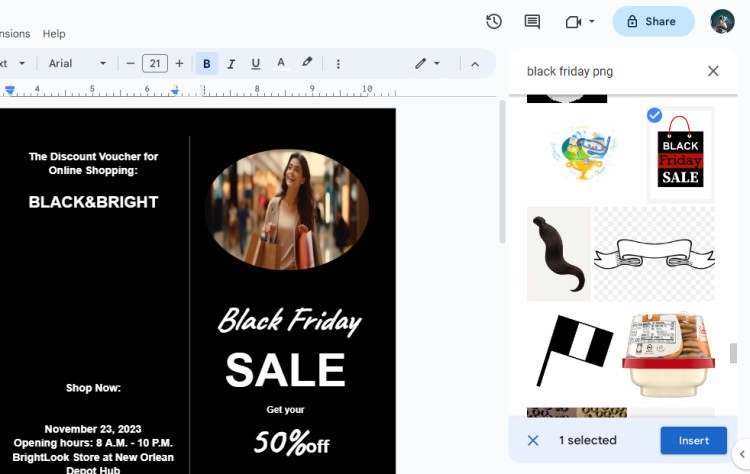
Adding visuals for the inside page:
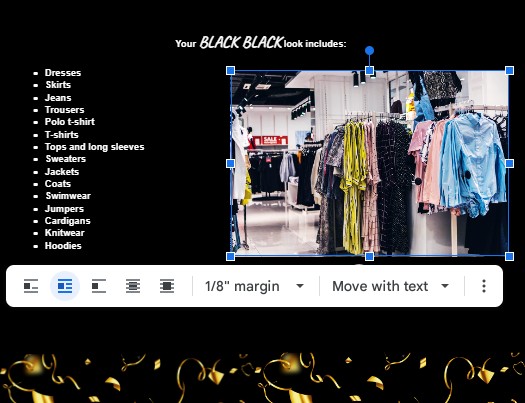
Let’s add more visuals by following the same step.
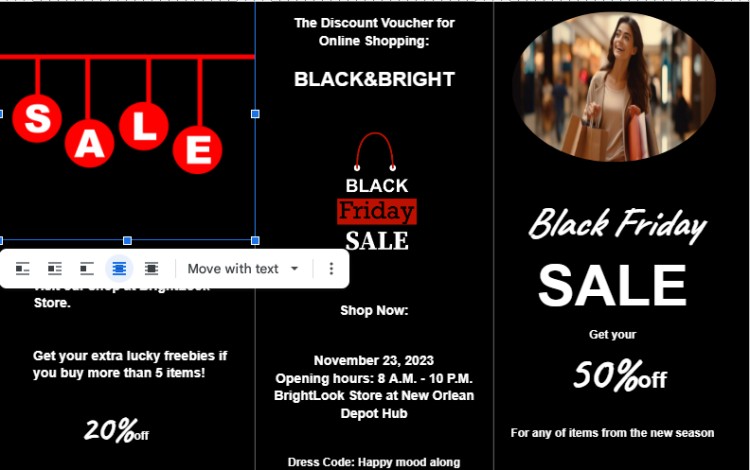
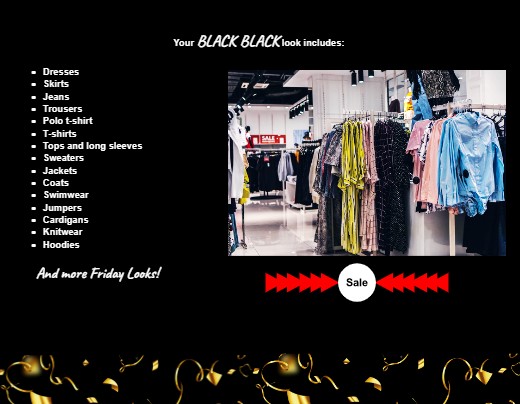
6. Formatting and Styling Your Brochure
Make your brochure visually appealing by applying formatting and styles. Experiment with fonts, sizes, colors, and alignments to create a cohesive and eye-catching design.
Now it’s time to make the brochure more appealing. As we use only white color for the text, we can highlight most essential information in another color like red or orange. You can color-pick any color from the inserted image as well.

Utilizing Google Docs Templates for Brochure Creation
If you prefer to start with a professional pre-designed layout, Google Docs offers a range of brochure templates. This way you don’t have to think of the structure, or color scheme, or struggle with how to place images.
You can access premade templates by going to the Google Docs Template Gallery or browsing through the available options from Thegoodocs website that best fits your needs.
1. Choosing the Right Template for Your Needs
From travel brochures to business brochures, there are templates for various purposes. Consider the content and design elements you require and select a template that aligns with your goals.
To make a brochure for sale promotion, we will choose a template that reflects a shopping theme. We have decided to go with the Fashion Brochure Tri-Fold template and customize it to suit the Black Friday sale.
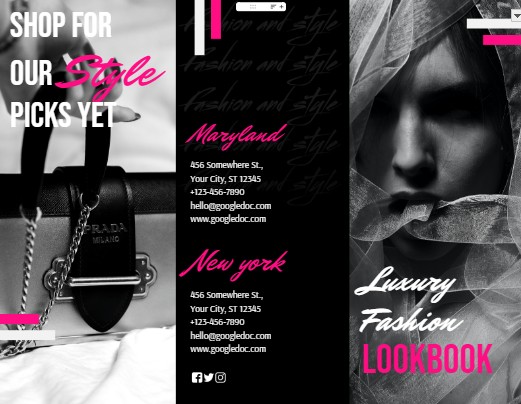
2. Customizing a Template to Fit Your Brand
Once you've chosen a template, you can customize it to reflect your brand identity.
First, let’s change the existing text to the one we have written above. Click on the existing text block and press Delete. Type in: the Black Friday Sale 50 % off.
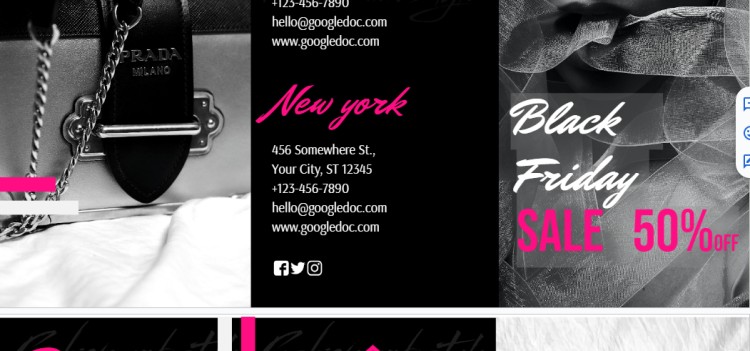
Now let’s move to each section and change the existing text. To change the font color, go to the toolbar and choose Text color.
3. Inserting and resizing images
Adding captivating visuals to your brochure can greatly enhance its overall appeal. But as the template already has eye-catching and elegant images, we won’t change them.
If you are customizing the booklet for your store and you would like to replace existing images, simply go to Insert menu – Image – Upload from the Computer.
4. Incorporating shapes, icons, and symbols
Shapes, icons, and symbols can add visual interest and communicate specific messages in your brochure. To insert a shape in Google Docs, go to the Insert menu, select Drawing, and choose the desired shape. You can customize its size, color, and position to complement your brochure's design.
This template already features nice elements that add a touch of creativity and elegance.
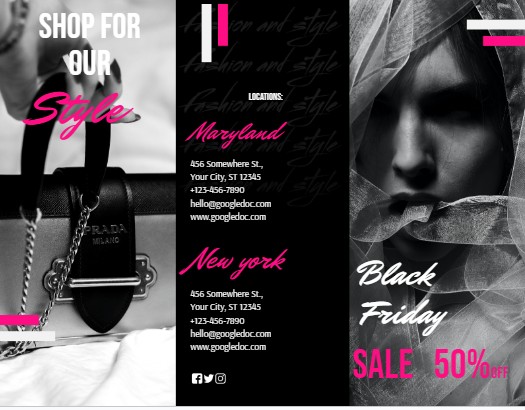
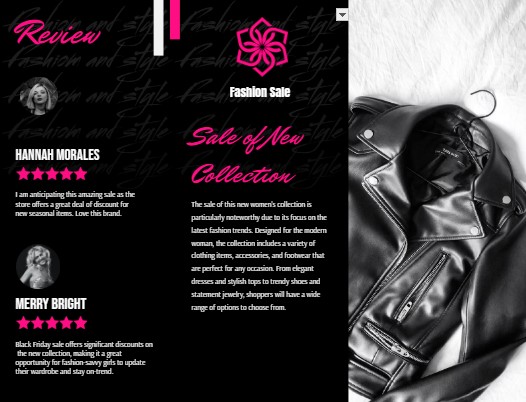
💡As you see, customizing a template is a simple process without getting stuck in details. We welcome you to explore different brochure templates and try customizing in for the real case.
Printing and Sharing Your Brochure
After the brochure is ready, it’s time to think about printing issues. As we daily work with different types of visual document, we recommend you keep up with the following tips, and you will never face troubles like printing on the wrong paper type and mismatched margins.
📍 Preparing your brochure for printing
Before printing your brochure, review the layout, formatting, and content to ensure everything is perfect. Adjust margins and page setup if needed, and double-check that images and text are within printable areas. Proofread carefully to catch any typos or errors.
📍 Exporting your brochure as a PDF
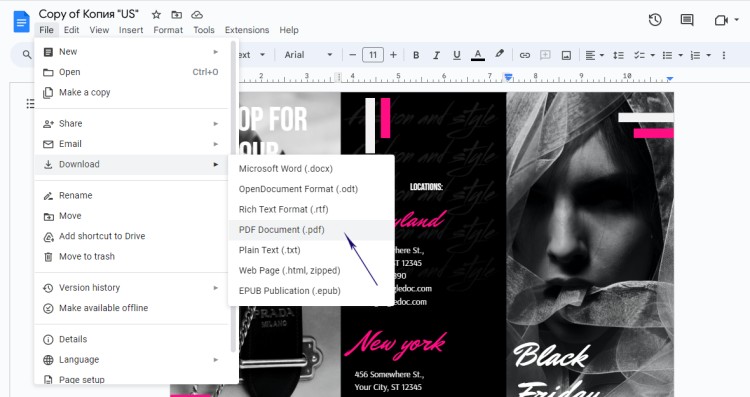
To share your brochure digitally or print it, exporting it as a PDF is recommended. In Google Docs, go to the File menu, select Download, and choose PDF Document. This format preserves the design and ensures compatibility across different devices and software.
📍 Sharing your brochure digitally
To share your brochure digitally, you can upload the PDF to your website, email it to clients or colleagues, or share it via cloud storage services like Google Drive. Consider creating a shortened URL or a QR code for easy access.
📍 Printing and distributing physical copies
To bring your brochure to life in the physical world, print copies using a professional printing service or a high-quality printer. Choose the appropriate paper size and type, and consider folding options like tri-fold or bi-fold to match your design. Distribute your brochures at events, trade shows, or your business location.
Tips and Tricks for Creating Professional-looking Brochures in Google Docs
Creating professional brochures in Google Docs can be a great way to showcase your work or promote your business. As you already have seen, the friendly interface allows adding text, images, artwork, and design elements, and experimenting with typefaces.
Below we gathered general tips for brochure design in Google Docs, yet, you can follow our Tips and Tutorials page for getting more insights into working with documents.
Utilizing advanced formatting techniques
Explore Google Docs' advanced formatting options to add more finesse to your brochure. Experiment with drop shadows, gradients, or even customizing the background color of individual sections. These small details can elevate the overall look and feel of your brochure.
Seeking inspiration from other brochures
Get inspired by checking out other professionally designed brochures. Analyze their layout, color schemes, and typography choices, and adapt elements that resonate with your brand or message. This can help you create a unique and impactful brochure.
Proofreading and editing your brochure for a polished final version
Always proofread and edit your brochure before finalizing it. Check for spelling and grammatical errors, ensure consistency in formatting and font styles, and make sure the content flows smoothly. It's helpful to have a fresh pair of eyes review it as well to catch any mistakes you might have missed.
In conclusion, Google Docs presents a convenient and accessible option for creating eye-catching brochures. Whether you're a business owner, a student, or simply someone looking to share information in a visually appealing way, you can easily create a brochure or customize a template. It’s up to choose the most convenient or creative way!
So, start exploring the possibilities, experiment with different layouts and designs, and let your brochures attract more visitors and customers. Wish you happy hours of the creative process!

We are a team of creative people who dream of sharing knowledge and making your work and study easier. Our team of professional designers prepares unique free templates. We create handy template descriptions for you to help you choose the most suitable one. On our blog, you'll find step-by-step tutorials on how to use Google Products. And our YouTube channel will show you all the ins and outs of Google products with examples.


