How to Work with Images (Photos/Illustrations) in Google Docs?
Images are a powerful tool in making a document visually appealing and effective. They can help convey complex ideas, break up long blocks of text, and add a professional touch to any document. Moreover, adding and customizing images to documents is easy and straightforward. In this article, we will discuss the different options available to work with images, including adding, replacing, and customizing them, as well as how to add links to images.
By the end of our tutorial, you will have the skills to create visually stunning documents with ease. Can’t wait? Then take a cup of coffee and start following our guide :)
Ways to Add an Image
Google Docs provides several ways to add images to a document. Let’s discover all possible methods and you may choose the one that suits your case or is most comfortable for you.
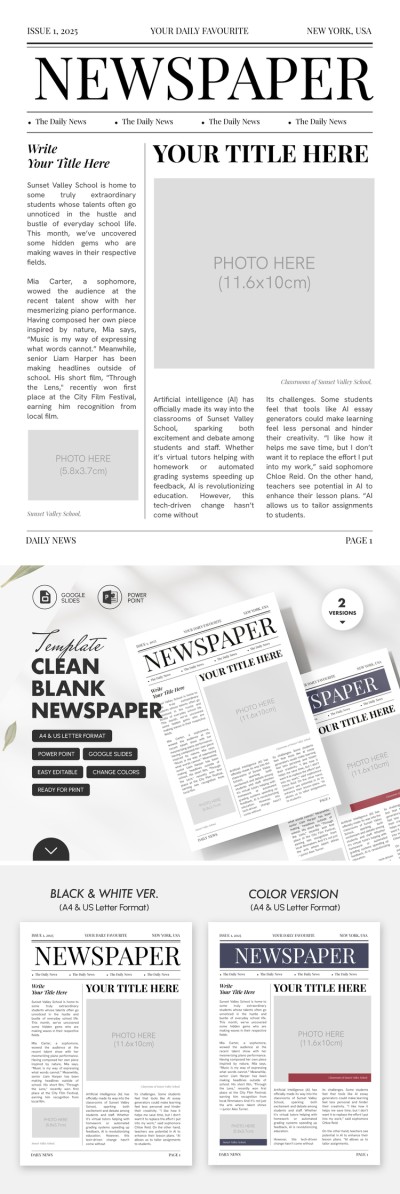
For this tutorial let’s assume we are creating a Newspaper about traveling experiences or guides and we need to add a theme photo. So let’s choose Japan theme!
A. Uploading an image from a PC
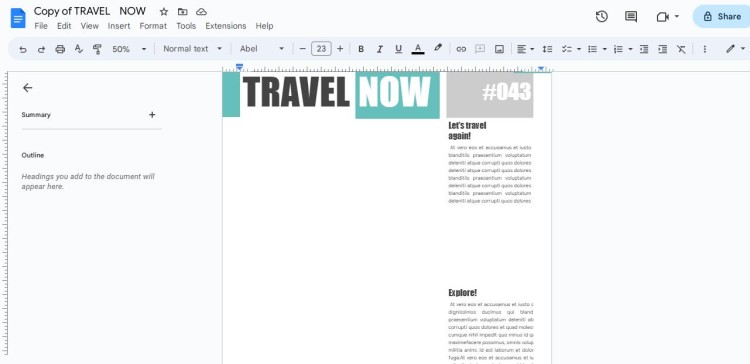
- Open your Google Docs documents/project and choose the template where you need to add an image.
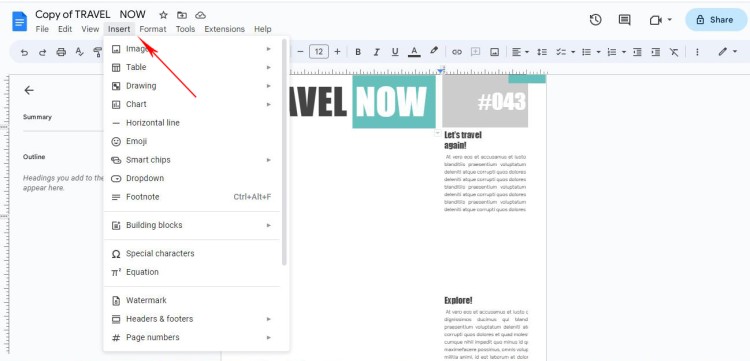
- Click on the Insert menu at the top of the editor.
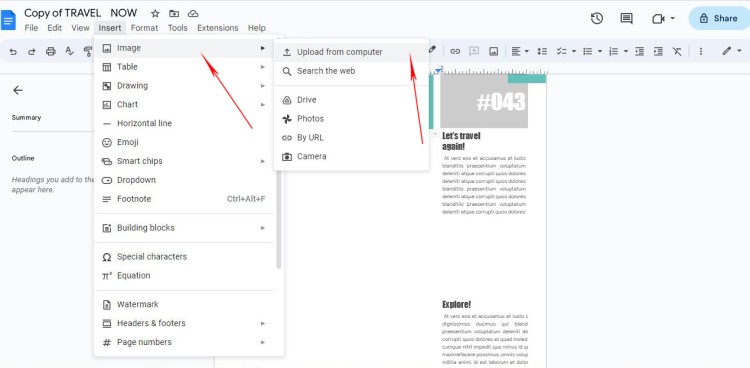
- Choose the Image option from the submenu. Then choose Upload from computer and select the file you want to upload from your computer. Of course, to do so, you should have a saved image or created artwork.
- Congratulations, your first image is successfully uploaded. Once the image is uploaded, you can edit the size using the on-screen controls.
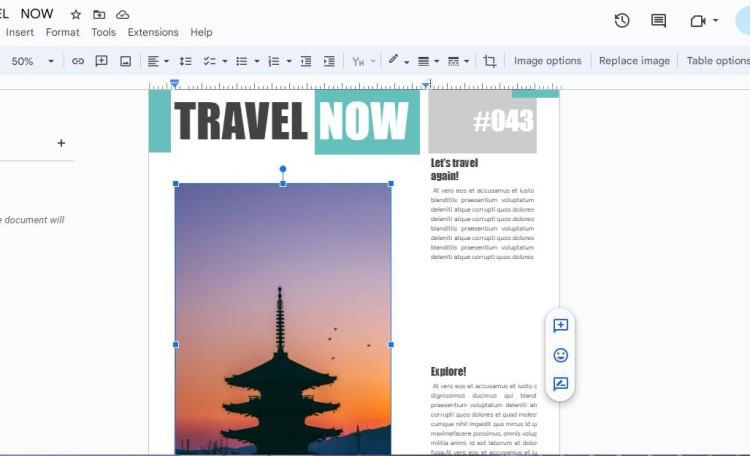
B. Using the built-in search tool
This option is a good choice when you don’t have images on your PC and you need to simply add a custom image to suit your document theme. Of course, it is better to use royalty-free images or images from stock websites (Unsplash, Pexels, Pixabay, and many others).
- Click on the Insert tab at the top of the document and select the Image option from the dropdown menu. Choose "Search the web" or "Search", depending on the version of Google Docs you are using.
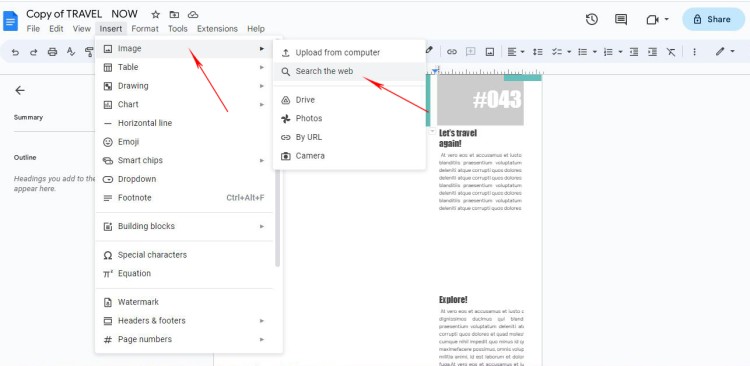
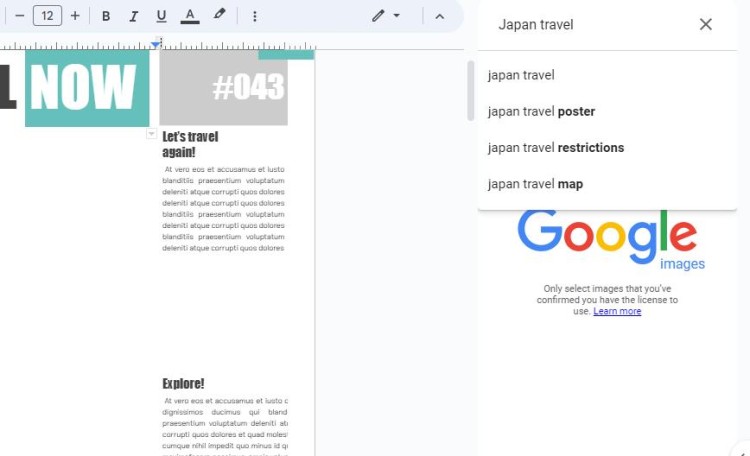
- Type in a keyword related to the image you want to add to the Search bar.
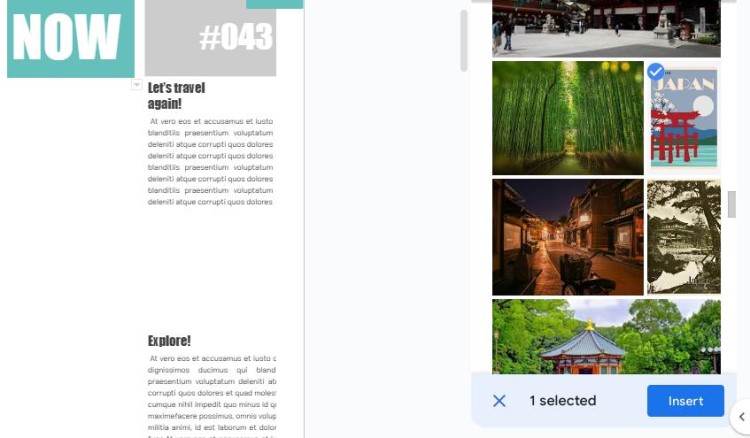
- Browse through the search results and choose the image you want to add. Click Insert to add the image to your document.
- Here is the result. Once the image is added, you can edit the size and shape using the controls.
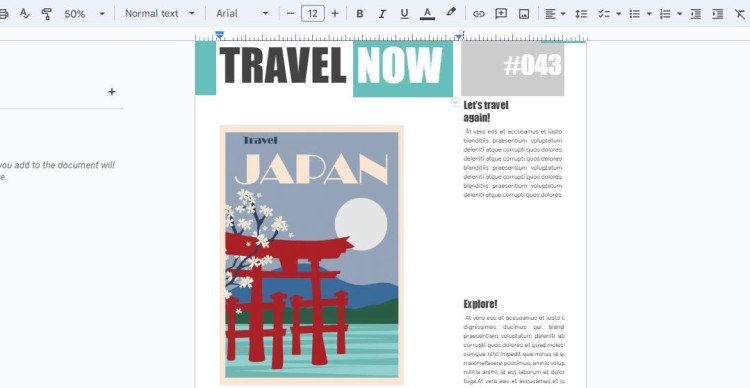
C. Copy-pasting an image:
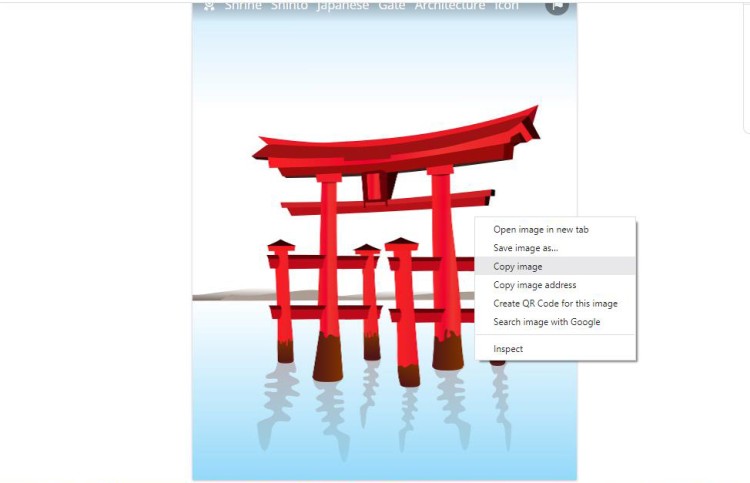
- Open the image you want to add in a separate window or tab. Right-click on the opened image and select Copy or use the Ctrl+C keyboard shortcut (Command+C on a Mac).
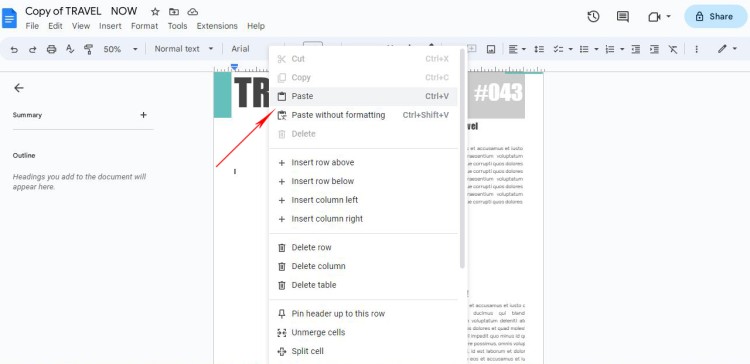
- Go back to your document and right-click on the place you want to add the image. Select Paste or use the Ctrl+V keyboard shortcut (Command+V on a Mac).
- Congratulations! You mastered the third method of adding images. Once the image is pasted, you can customize its size and shape using the on-screen controls.
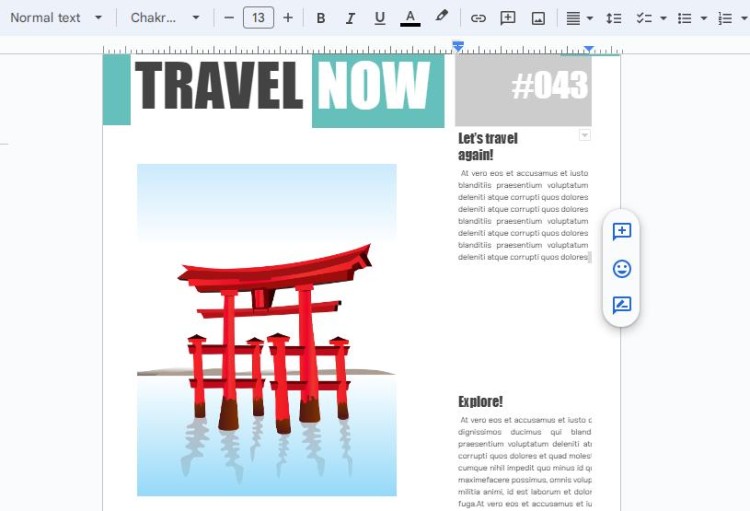
Note: While copy-pasting images can be a quick and easy method, it can potentially impact the quality or resolution of the image, so make sure to preview the image once it's been pasted to ensure it's still sharp and clear.
You may also need to insert the image that is stored on your Google Drive. For that use the same steps and choose From Drive or Google Drive. That’s a rare occasion, but that is also possible!
By using any of these methods, you can add an image to your Google Docs document. Choose the method that works best for you based on the type, source, and quality of the image you want to add.
Replacing Images in Google Docs
One of the useful features is the ability to insert and replace images in the document easily. To replace an image in Google Docs, you can do these simple steps.
- First, open the document in which you want to replace an image. Then, select the image. To do this, click on the image once so that it is highlighted. You will see a small toolbar appear above the image, which contains several options, including the option to replace the image.
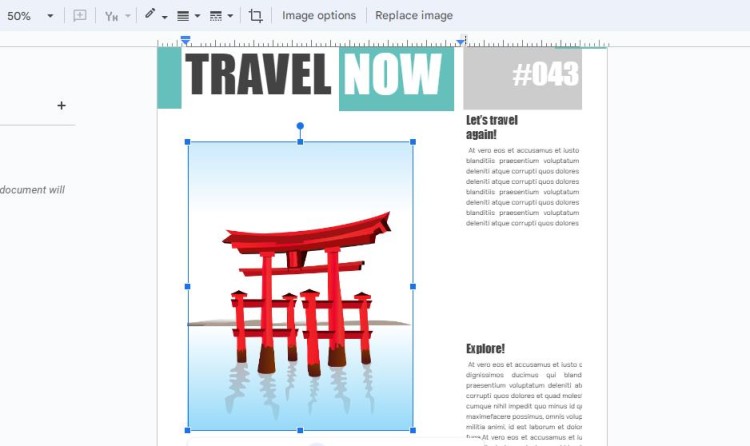
- Next, click on the Replace image option from the toolbar. This will open a new window in which you can choose the new image that you want to insert into your document. You can choose to upload an image from your computer, select an image from your Google Drive, or search for an image using Google Images.
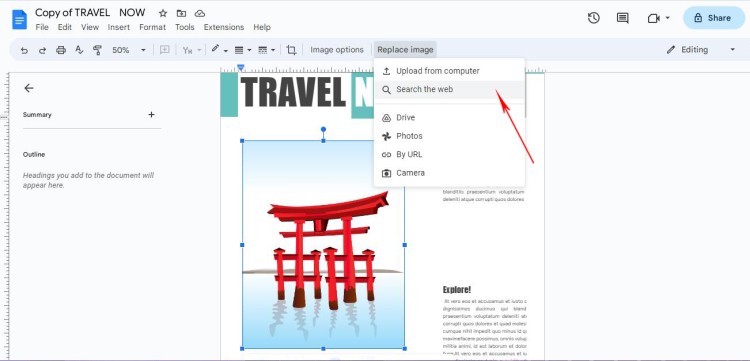
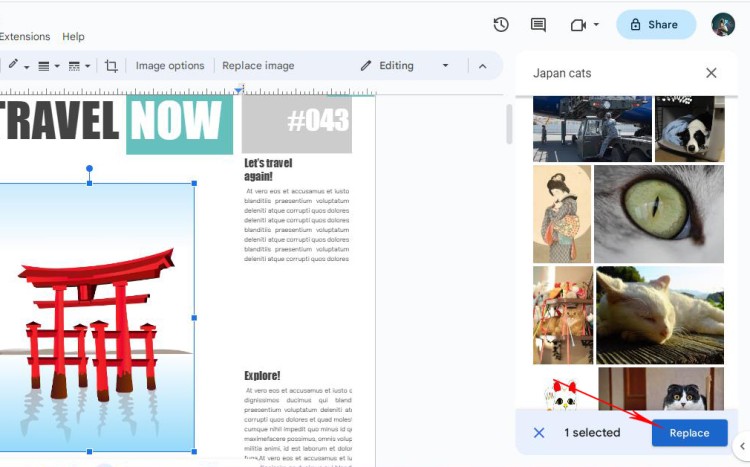
· Once you have chosen the new image that you want to insert, click on the Replace button to add the image to your document.
Before:
After:
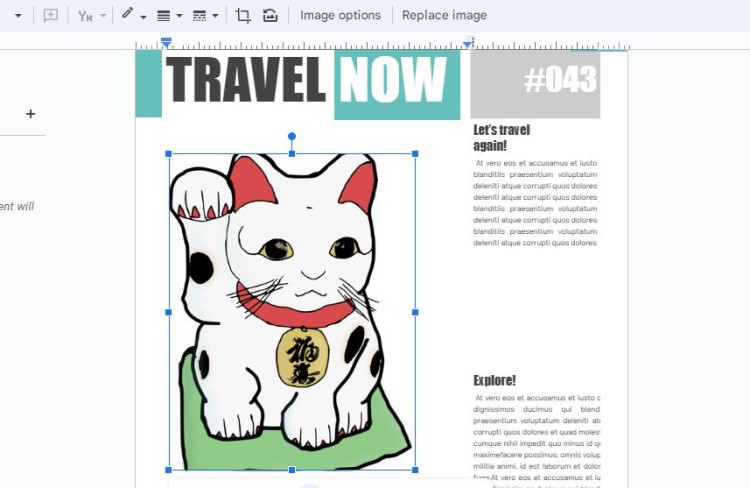
Note: Finally, it is important to remember that if you have shared the document with others, any changes that you make to the document will be visible to them in real-time. This means that if you replace an image in the document, anyone who has access to the document will immediately see the new image. Therefore, before replacing an image in a shared document, it is essential to make sure that the new image is appropriate for all viewers
Customization: Adjust, Move, Add Borders, Brightness
Customizing images in Google Docs is one way to enhance your documents and make them more visually appealing. Thus, let’s keep going and format inserted images to make them pop out!
- Adjusting the size
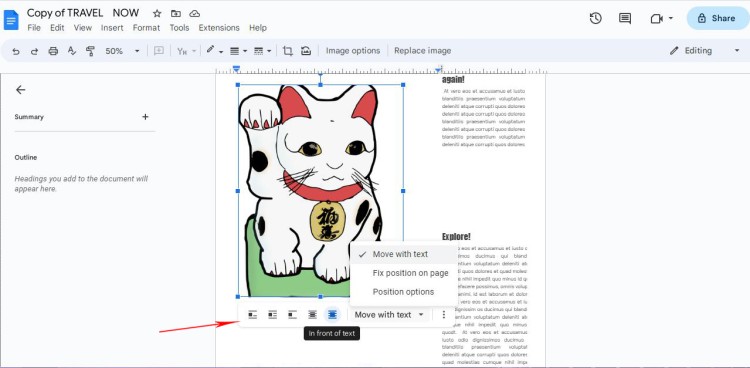
When you add or replace an image, the program will place it by default options. It may go beyond borders or look particularly small or even large. To adjust the size, click on the image and the small toolbar will appear below this image. Choose, for instance, In Front, and move your drag the image handles to the place it should be. Or resize it.
- Brightness, contrast, and transparency
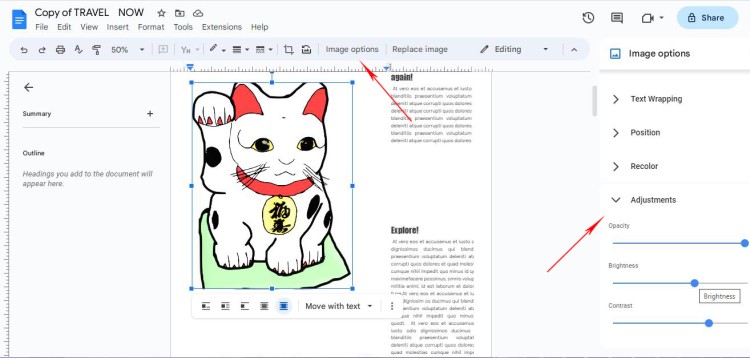
To do this, select the image and click on the Image Options tab that appears. This will bring up a menu where you can adjust the brightness, contrast, and transparency of your image. You can also adjust these settings by clicking on the Format options in the right-click menu.
- Adding a border
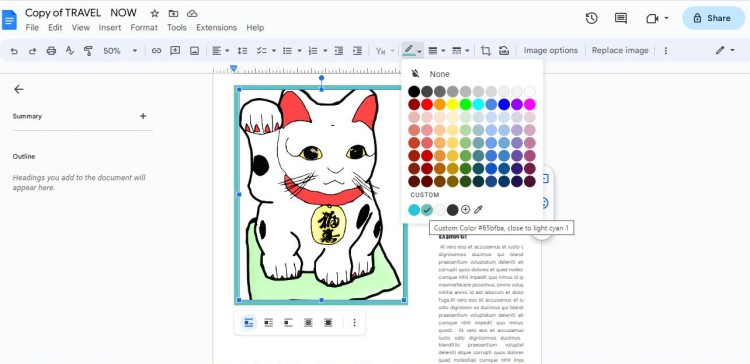
To do this, click on the Format options in the right-click menu and select Borders and Shades or simply choose the upper toolbar Border color/ Thickness. You can then choose the color and thickness of the border. You can also add drop shadows around the image to give it a 3D effect.
- Crop the image
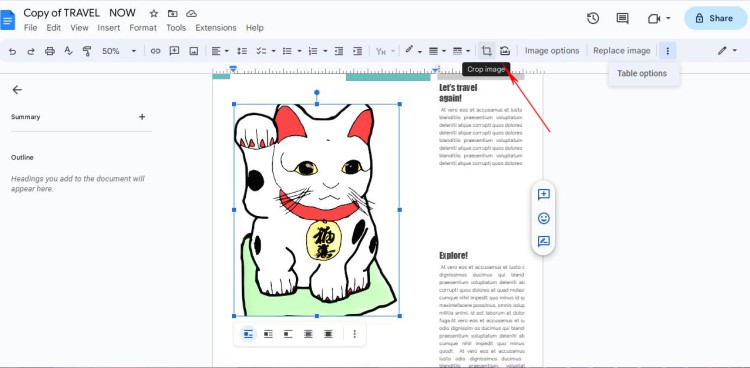
You can also crop your image to focus on a specific area or remove unwanted parts. To crop your image, select it and click on the Crop Image icon that appears. You can then drag the corners of the image to crop it as per your preference.
Customizing your images in Google Docs is a straightforward process that can make your documents more visually appealing and engaging. To customize your image, you can adjust its brightness, contrast, and transparency, add borders and drop shadows, crop the image, rotate it, or add shapes. With these tools at your disposal, you can elevate your documents and create professional-looking documents with minimal effort.
Adding Links to Images
Adding hyperlinks to images in Google Docs can help you to organize your content effectively and make it more interactive. If you want to add a hyperlink to an image in your Google Docs document, you will need to follow the steps outlined below.
- First, you need to insert the image into your Google Docs document (follow the above steps). Now select this image and click the Insert Link button or use the keyboard shortcut Ctrl + K.
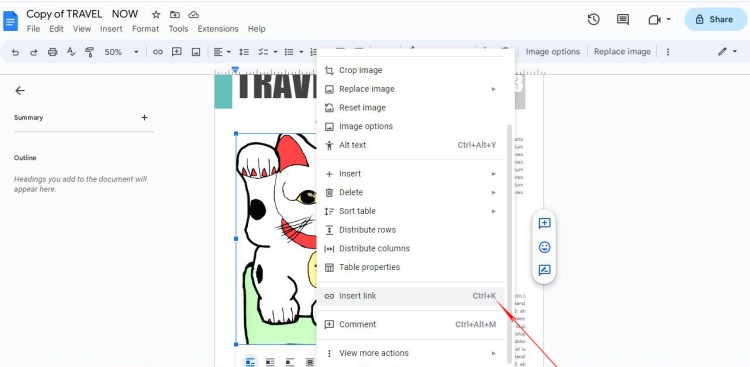
- In the pop-up window that appears, type or paste the URL to which you want to link the image. You can also choose whether you want the link to open in a new tab or in the same tab.
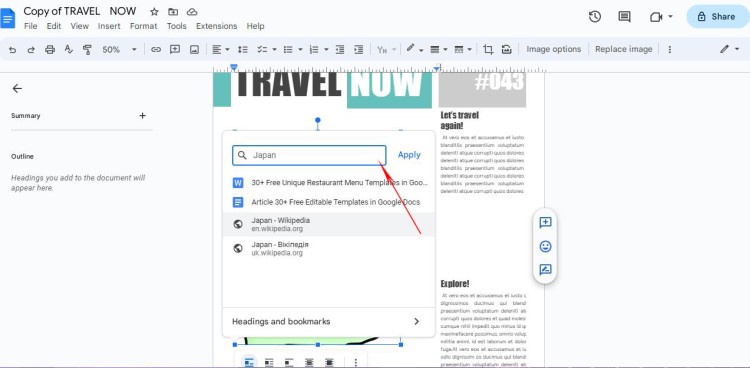
- Finally, click the Apply button, and the hyperlink will be added to the image. You can check whether the link works by clicking on the image and seeing if it takes you to the intended destination.
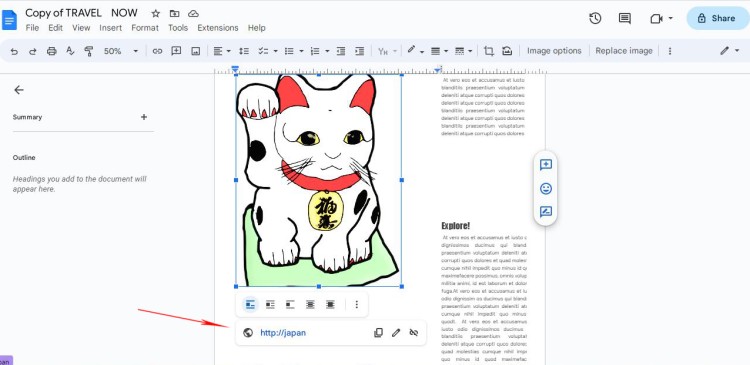
Congratulations! You read till the end and now you know how to add images to Google Docs and even add hyperlinks to redirect your audience to the website resources.
Hope you liked this tutorial and can use this knowledge for your future projects! Follow our blog for new updates as we plan to cover frequently faced issues and guide you through the “ins” and “outs” of working with Google Docs.
Good luck!

We are a team of creative people who dream of sharing knowledge and making your work and study easier. Our team of professional designers prepares unique free templates. We create handy template descriptions for you to help you choose the most suitable one. On our blog, you'll find step-by-step tutorials on how to use Google Products. And our YouTube channel will show you all the ins and outs of Google products with examples.


