How to Share a Google Doc?
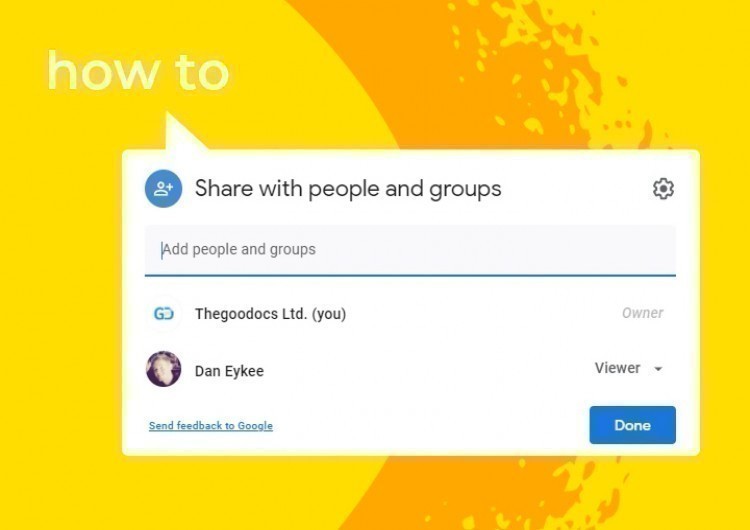
Watch the video from https://thegoodocs.com/ and see how to share a Google Doc: How to Share a Document on Google Docs | Sharing Google Docs - YouTube.
Sharing the Google document is the fundamental feature of Google Docs since the service is meant for real-time collaborative work by multiple people.
The basics are that you give different users different permissions to work with a shared file, such as only view, editing, and commentator modes.
Access the Sharing Menu
First of all, there are 3 steps to access the sharing menu for the document, and they all start on your Google Drive.
Step 1
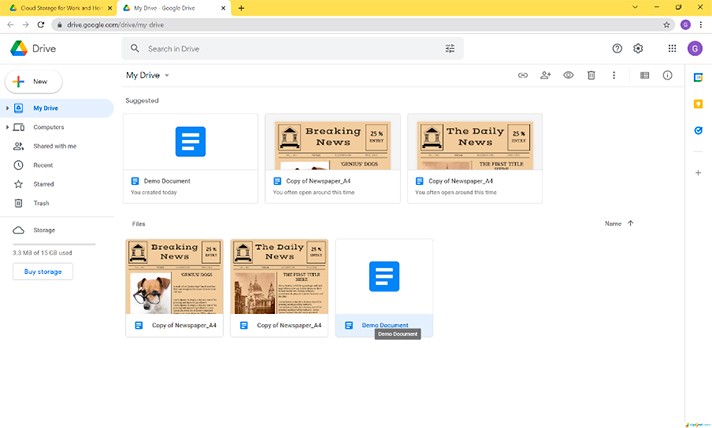
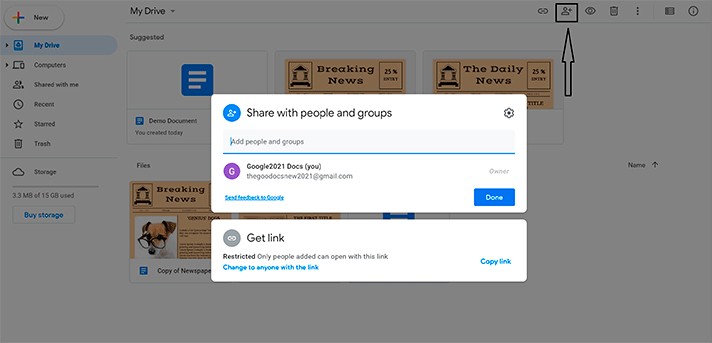
- Locate the file on your Drive but don’t open it yet. Click on it once, and on the top right corner, you’ll see new buttons appear. You need the second of them, a person with a plus icon
Step 2
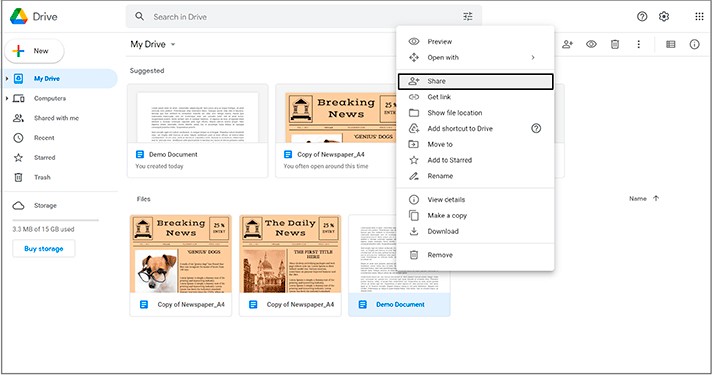
- The following method is to simply click on the document with a right mouse button and select the third Share item on the list. Then you will get the same window
Step 3
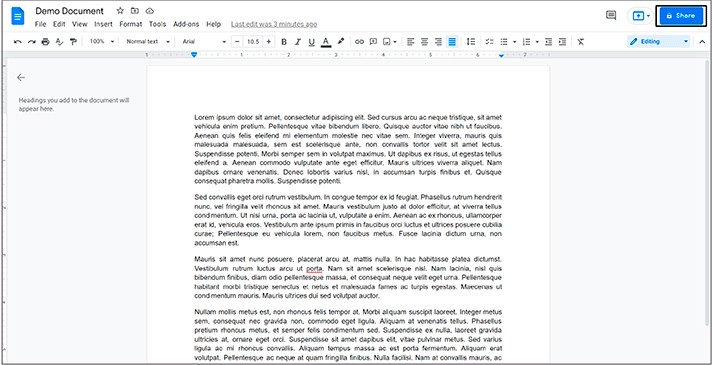
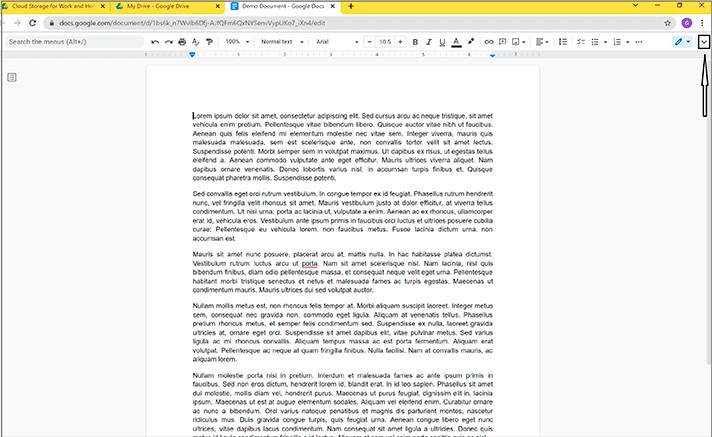
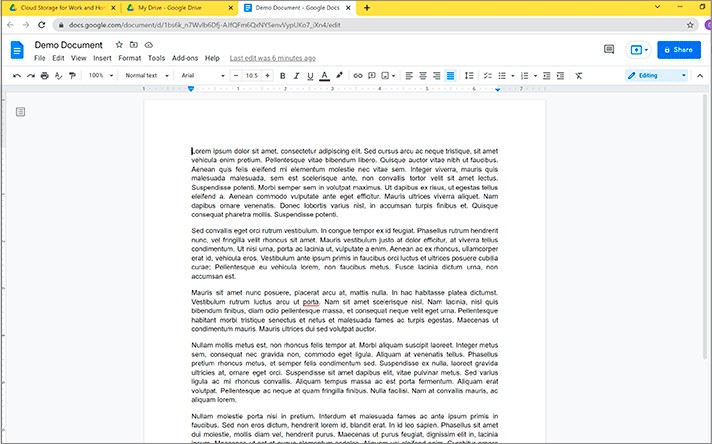
- If you don’t have such a button, you may have closed the top menu. And to open it, you will need to find such a button on the right and click it (you will see on the screenshot). There you go
Sharing with a Limited Group
Now we’ll talk about giving different permissions to different users regarding their interaction with the document. There’s plenty of ways how you can organize teamwork within a particular document.
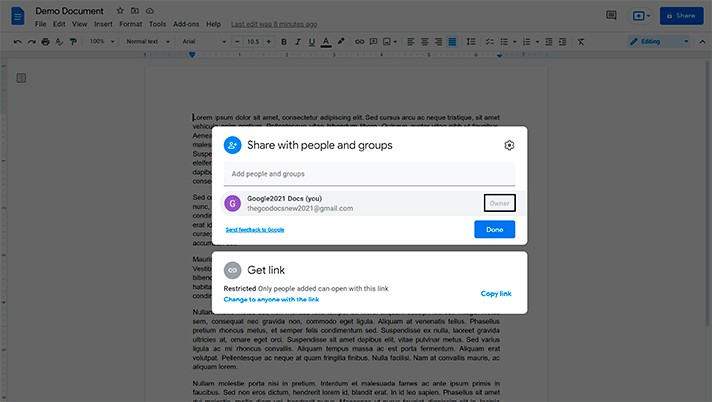
- From here, you have 2 menus for sharing. The top one means sharing a document with a limited group of people by entering their emails
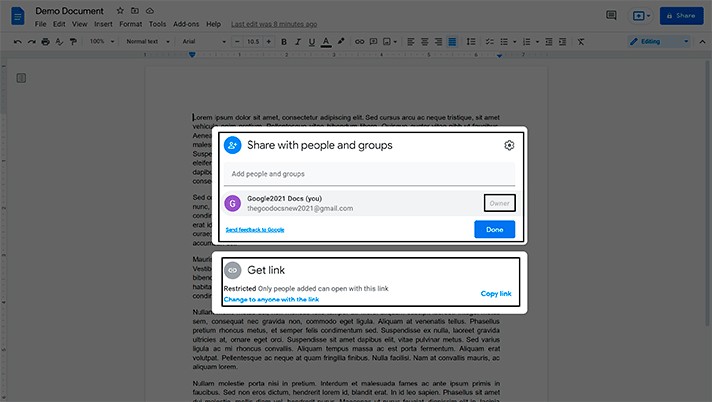
- Now you need an email of the person that you want to share the document with. Let us type any sample email
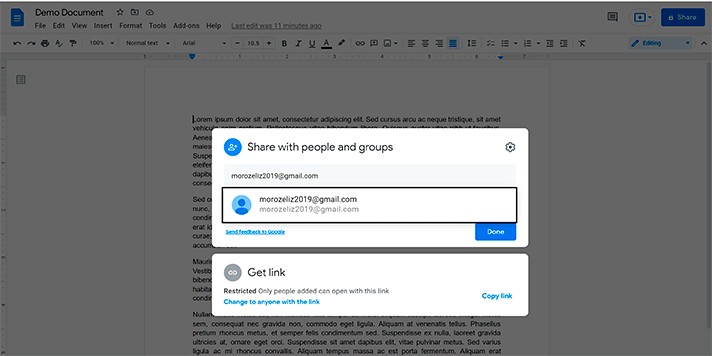
- Google shows that the user has a Google account. So, press it, and the person is added. Then you can keep adding new members via email
Giving Permissions
The most important part now is giving specific permission to a user. To do that, drag the cursor to the button next to the typing field and press it. Now you can assign a particular role to every single user:
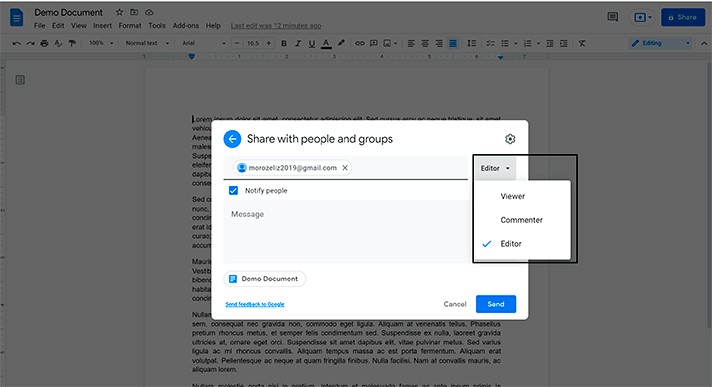
Now you can add users and assign each one different access permissions.
Other Settings
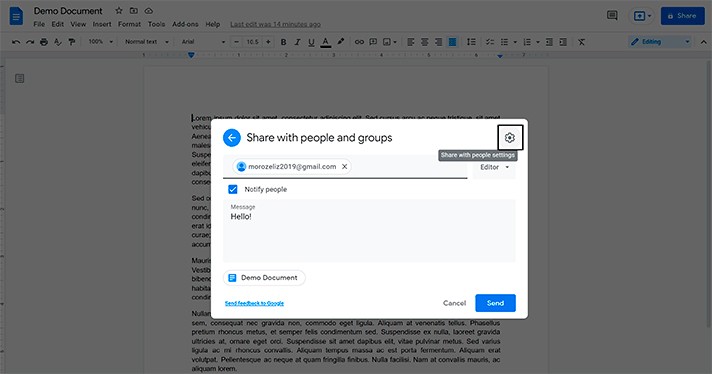
- Also, for every single user, you can write an invitation message and select whether you want to notify him/her and other people, which means the invitation message will go to the person’s email address. So, press Send so that a person will be notified
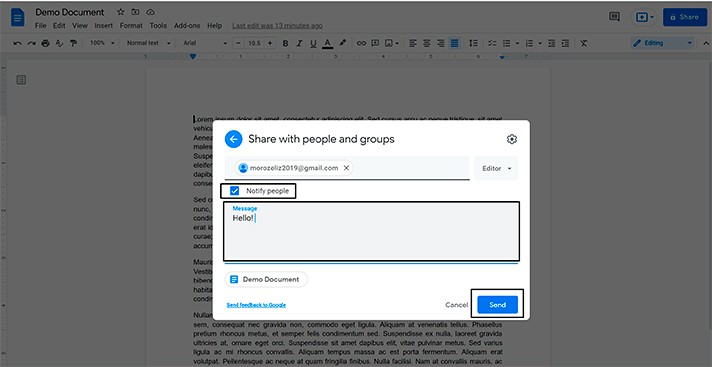
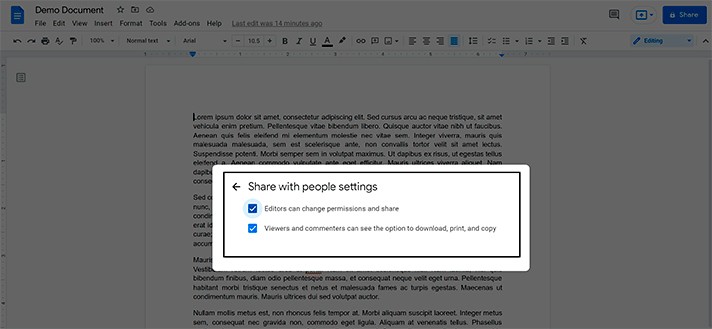
- By the way, we can go to the advanced sharing settings by pressing this cog icon and modify such settings for editors and viewers
Document Public Sharing
Otherwise, the second sharing way does not require people to have an email address and Google account. Only a link to the document.
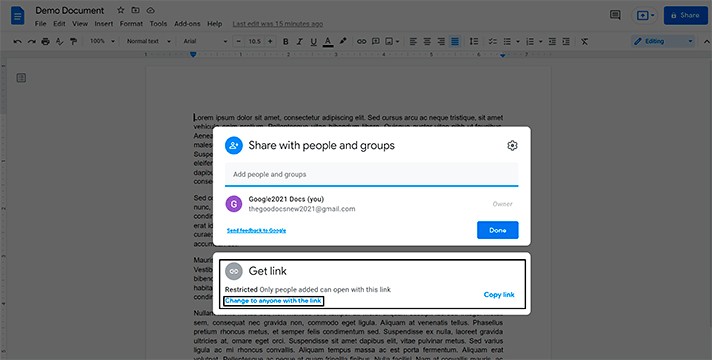
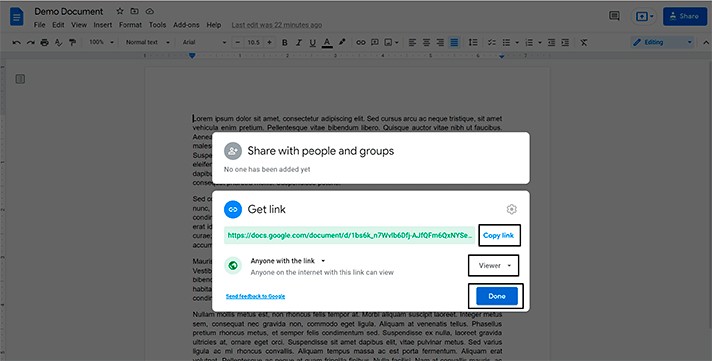
- Copy this link with the special Copy link button and then send it to the people you want to share it with
Public Access Permissions
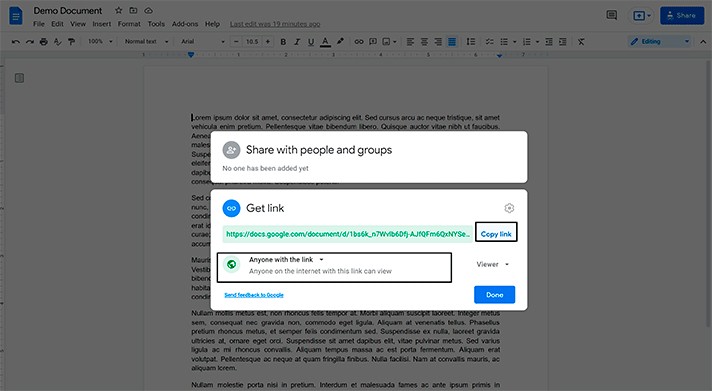
And next here come the access permissions as well, which are the same but are applied to everyone with a link and not just specific users, making it more widely available.
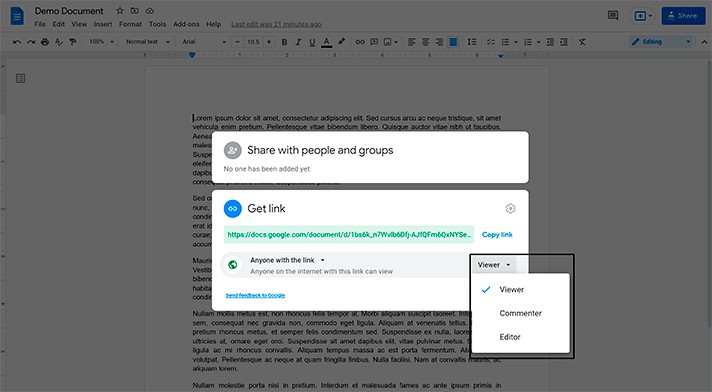
- Select the option you need (Viewer, Commenter, Editor; we will choose Viewer on the screenshot, as a sample), copy the link, and share it with people you work with on this document. And press Done
We hope this tutorial will help you understand how to share a Google Doc. Good luck!

We are a team of creative people who dream of sharing knowledge and making your work and study easier. Our team of professional designers prepares unique free templates. We create handy template descriptions for you to help you choose the most suitable one. On our blog, you'll find step-by-step tutorials on how to use Google Products. And our YouTube channel will show you all the ins and outs of Google products with examples.


