How to Make Columns in Google Docs?

Unlike before, you don’t need to insert a table in your document to divide the text into columns. Now, this is done more easily. We will show you how to do that on a sample document to demonstrate how to work with the text columns in Google Docs.
Watch the video from thegoodocs.com and learn How to make columns in Google Docs:
Making Multiple Columns for the Text
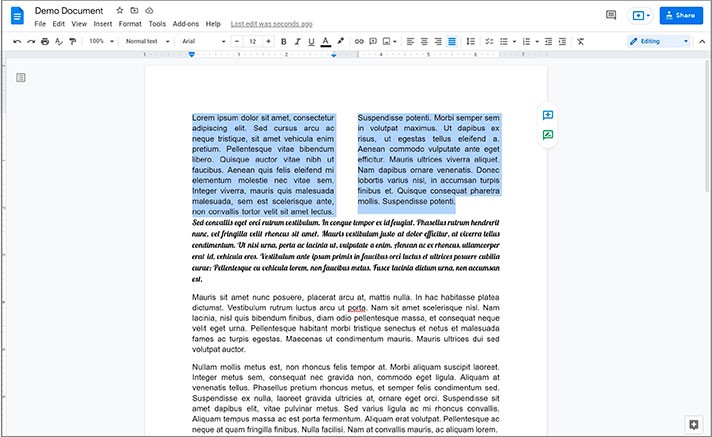
- As simple as that, highlight the portion of the text that you want to divide into the columns. Go to the toolbar on top and select the Format button. In the drop-down menu, drag the mouse pointer down to the Columns item. Go right and select either second or third item, with two, as you can see with this preview, or three columns, respectively, depending on how many you want to create. Let’s make two columns now. Just click the middle item, and here you go
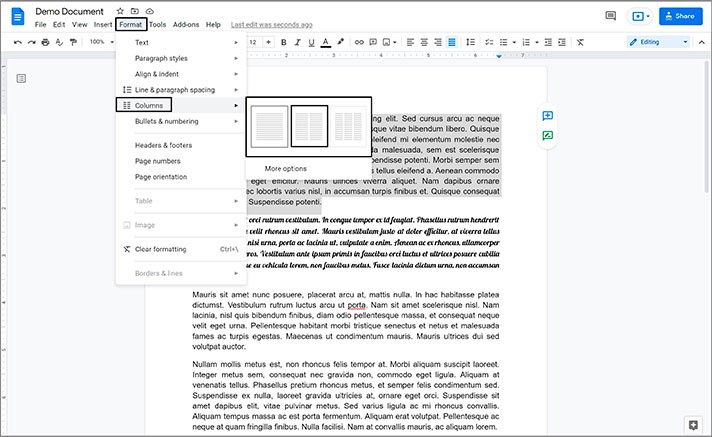
- The text is divided into two columns where the second follows the first one
- But that’s not all. And now, let’s make three columns. We are reverting changes. Go to the Format button on the toolbar and select the Columns option. Here on the right, we choose the third item
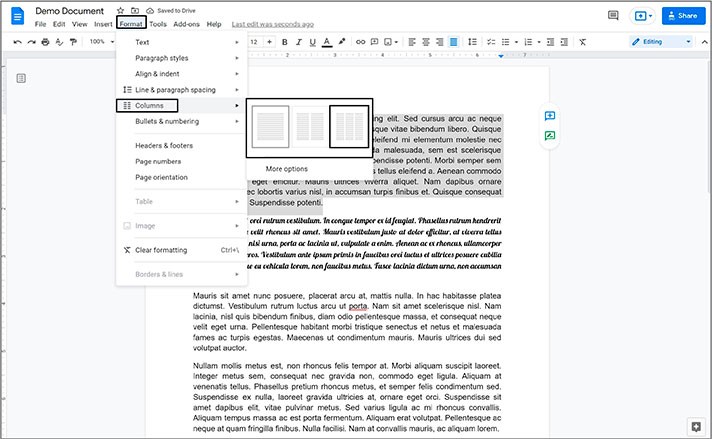
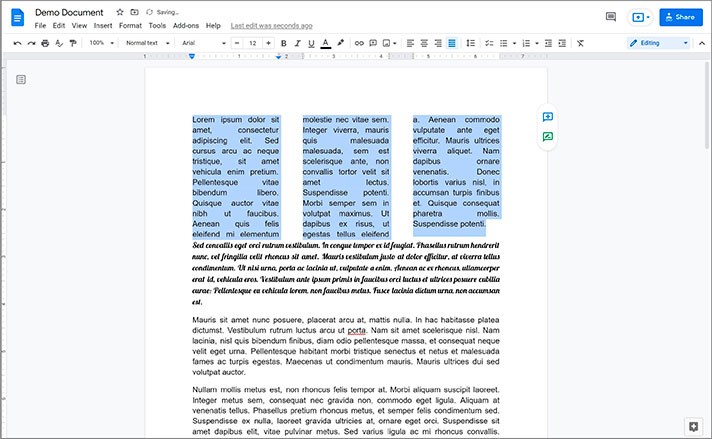
- And our simple text is now divided into three columns. That's the maximum here now
Advanced Features
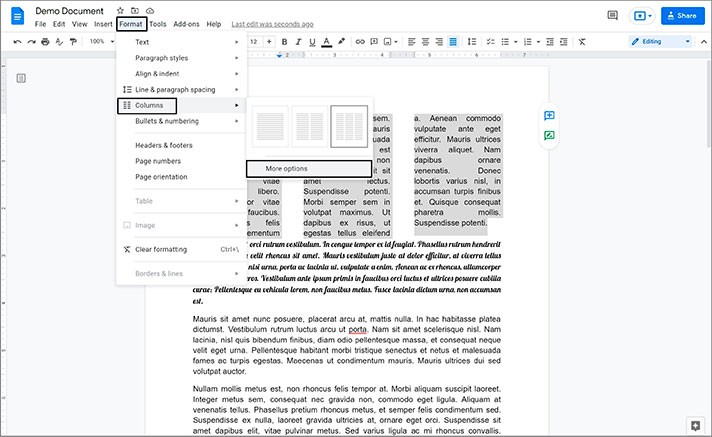
- For the customization and the advanced functionality, we highlight the text and go back to the Format button on the toolbar, down to the Columns option. And on this new window on the right, we are clicking on the bottom More options item
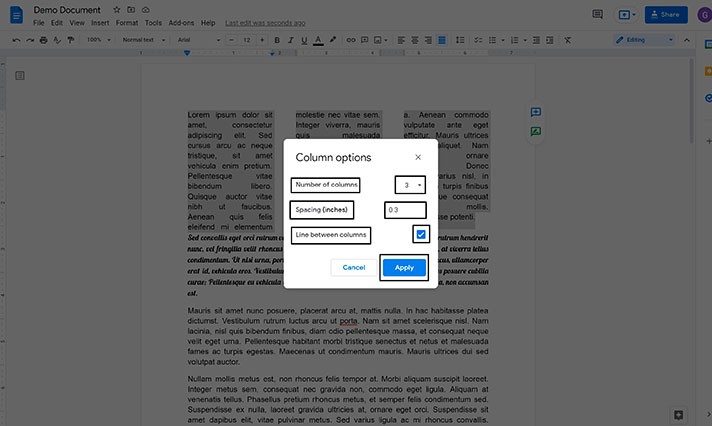
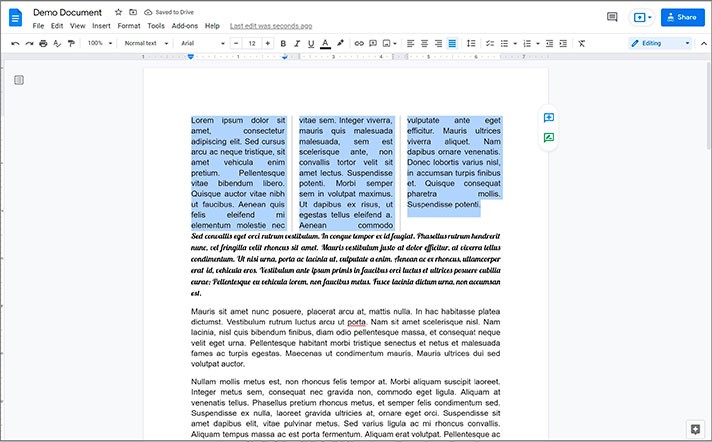
- The new menu appears, and here we can adjust the Number of columns (from one to three), Spacing (inches) between them (for example, we like it really narrow), and whether you want to insert a separating Line between columns (check the box if you do). And here we are with three columns, with custom spacing, and with the lines between columns
Adjusting the Columns
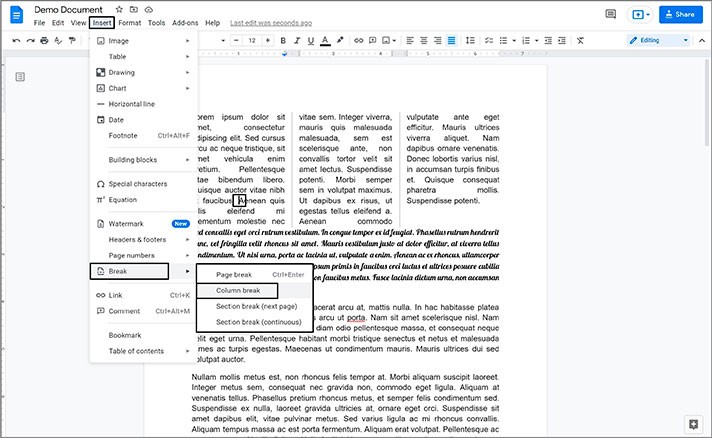
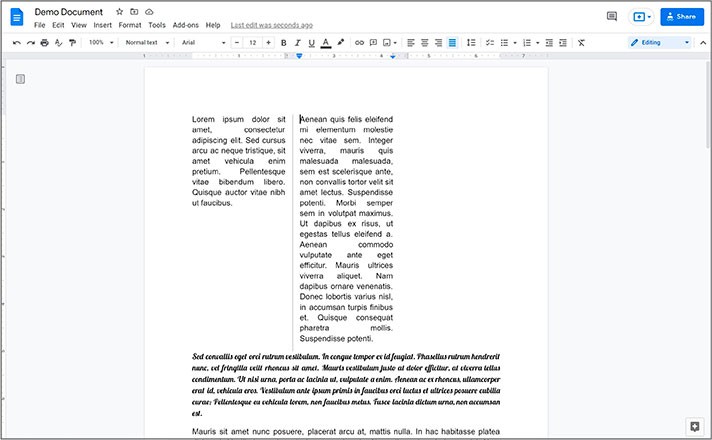
- What else you can do here is to insert a column break. Put a cursor where you want the column to break. For example, we are going to break the column here (you will see in the screenshot below). Go to the Insert button on the top toolbar. And then down to the Break item. In the new window, select the Column break item. Or use Ctrl + Enter shortcut on a PC and Command + Enter on Mac
- And here you are
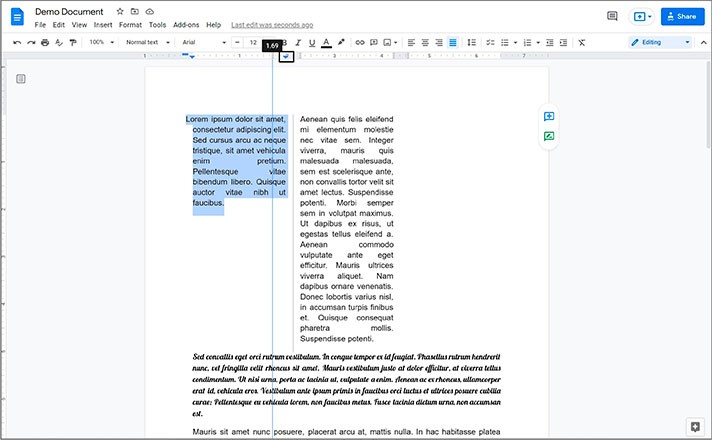
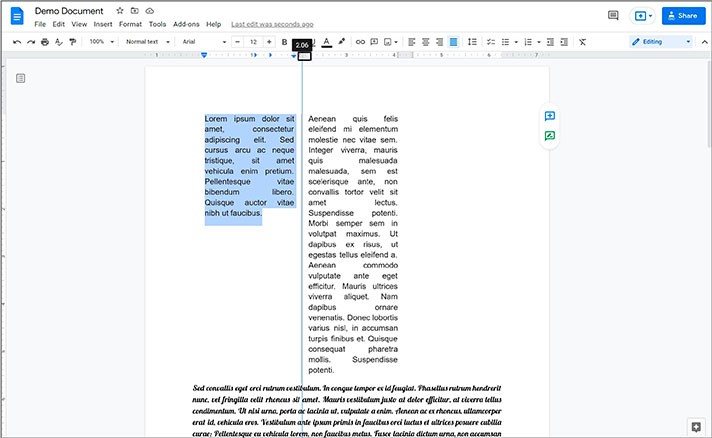
- The last adjustment you can apply to your columns is manually customizing the indent and the spacing with the ruler on top of the document. Highlight the part of the column that you want to adjust. Drag the mouse cursor to the ruler on top and adjust the left indent by pressing, holding, and dragging the little blue triangle button
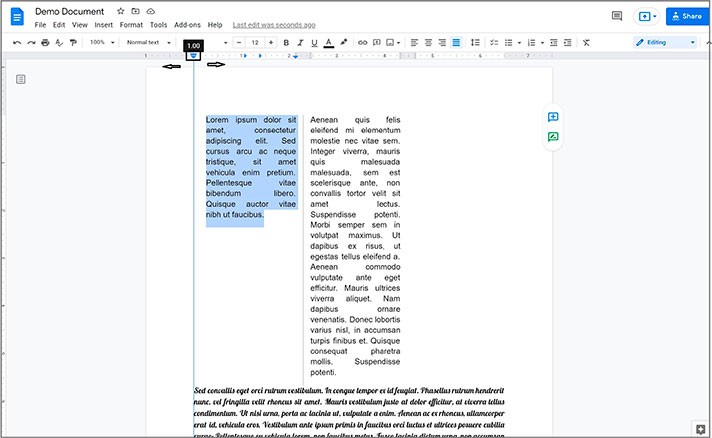
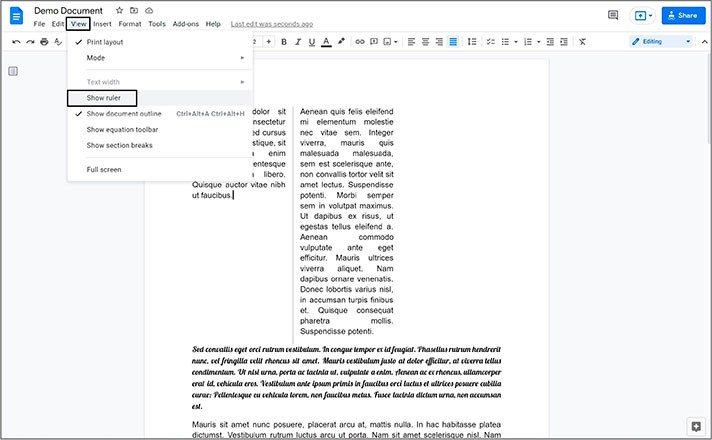
- And then there’s a similar triangle on the right for the right indent. And as you can see, there are also such little lines on the ruler which you can move as well to achieve the perfect position
We hope this tutorial will help you learn how to make columns in Google Docs. Good luck!

We are a team of creative people who dream of sharing knowledge and making your work and study easier. Our team of professional designers prepares unique free templates. We create handy template descriptions for you to help you choose the most suitable one. On our blog, you'll find step-by-step tutorials on how to use Google Products. And our YouTube channel will show you all the ins and outs of Google products with examples.


