How to Make a Title Page in Google Docs?

Creating a cover or title page in Google Docs in a broad sense means inserting an image into the doc and writing something over it. But to make a really good-looking cover page, a few other adjustments need to be made, such as, for example, setting the margin size, creating the borders, and the correct text placing on the doc. That`s what we are about to do.
Watch the video from https://thegoodocs.com/ and find out how to make a title page in Google Docs:
Adjusting Page Margins
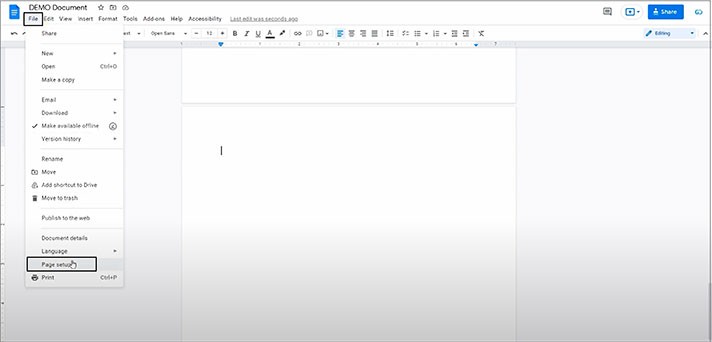
- First, we want to adjust the page margins to get rid of empty space around the cover page we are making. For that, we go “File” on the toolbar on top of the page and then down to “Page setup”
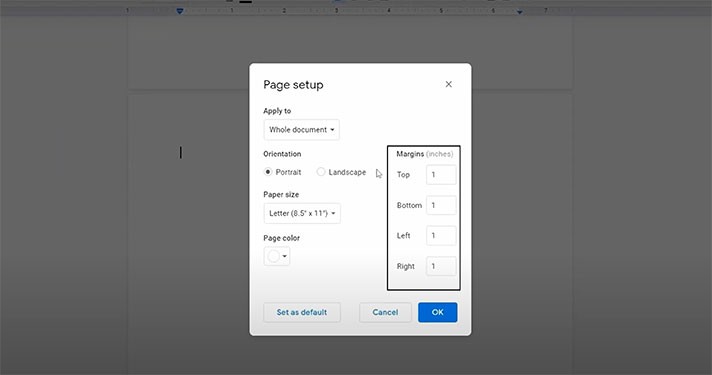
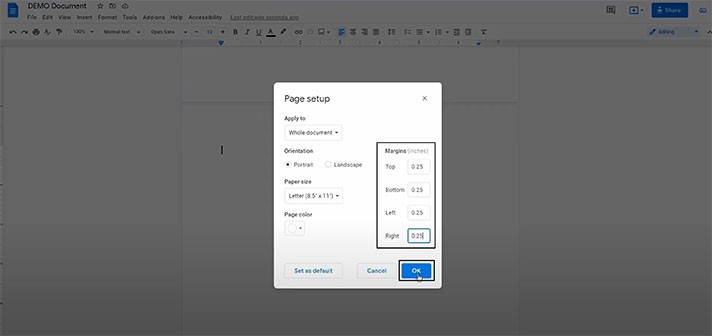
- Here, in the menu, in this column (as you can see in the screenshot below), you can see the default size of the page margins, which is 1 inch. For example, we usually do it 0.25 to leave some space on the page. Then we press OK when we finish the page margins adjustments here
Creating a Border
Then we create a page border. There is no direct way to create a page border in Google Docs, but a few easy-to-do workarounds exist.
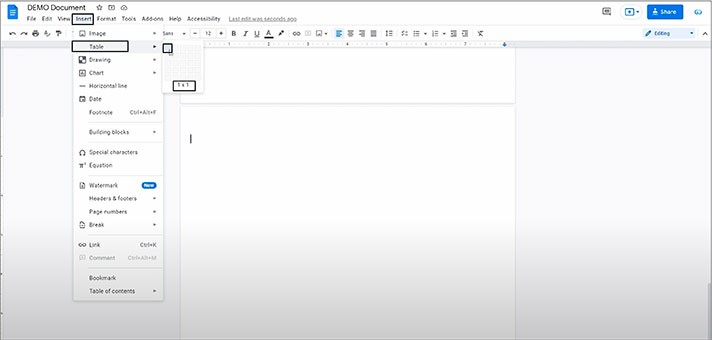
- And now we expand it to the suitable proportions, press-holding on its bottom margin and dragging it down near the page end. Just good!
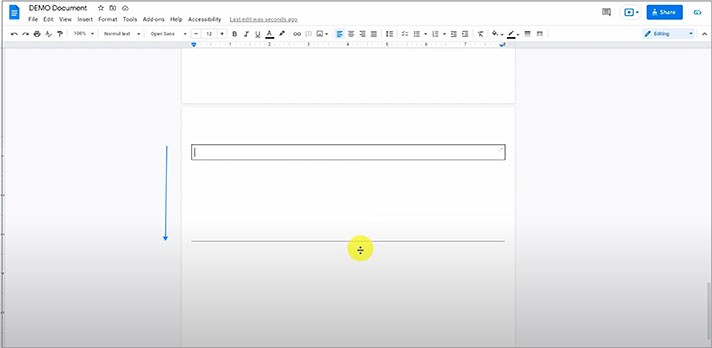
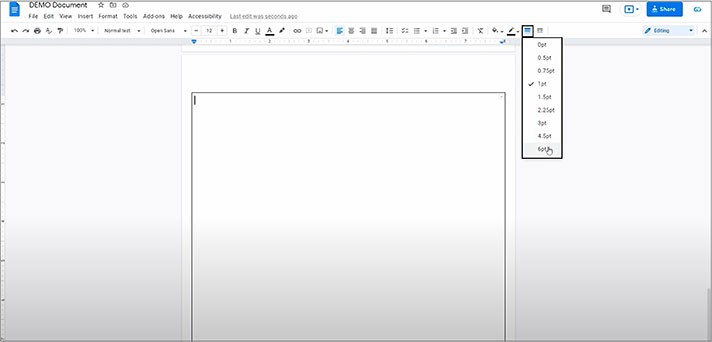
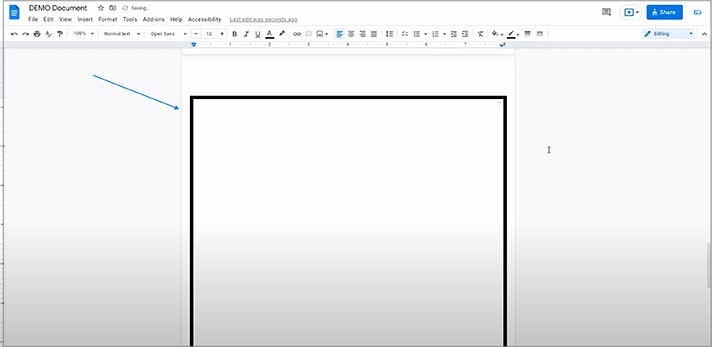
- Then, we`ll make a border a bit thicker to make it look more like a border. So, go to this item on the toolbar on top (you will see it in the screenshot below). This is “Border width”. Press it, and here we select, for example, the last option (the thickest one). Much better!
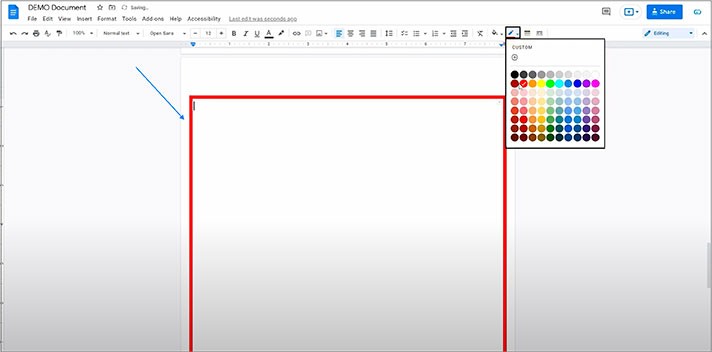
- And you can also change its color. So, go here to this pen icon (you will see it in the screenshot below). This is “Border color”. And select the color you would like to use for your border. For example, we will select a random color
Inserting an Image & Drawing on It
Now we insert an image inside of the border and then write a text on it. That is performed from a drawing workspace.
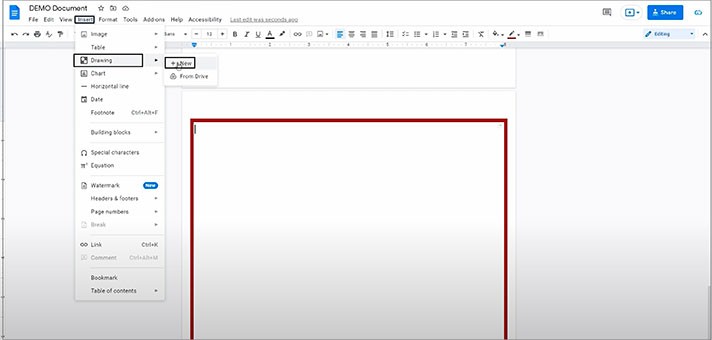
- That opens a drawing canvas over the document, where we do everything
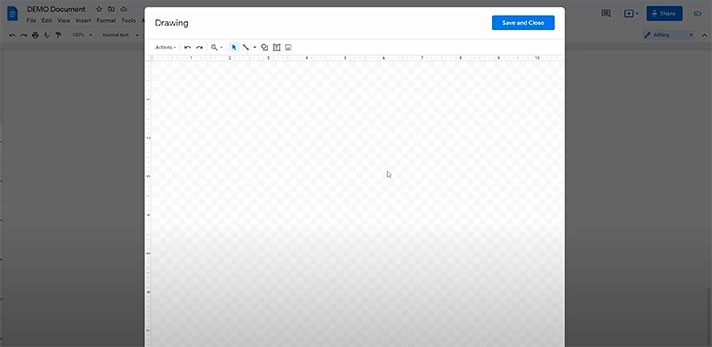
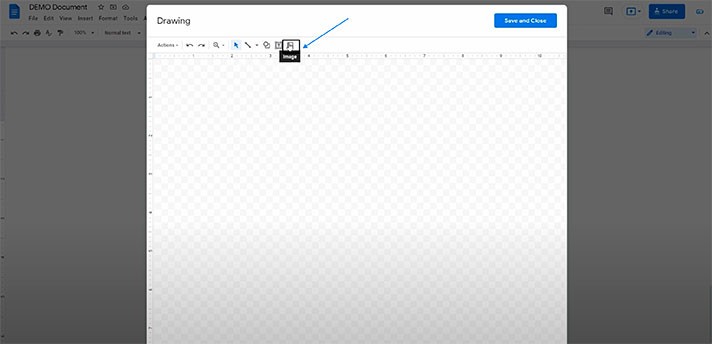
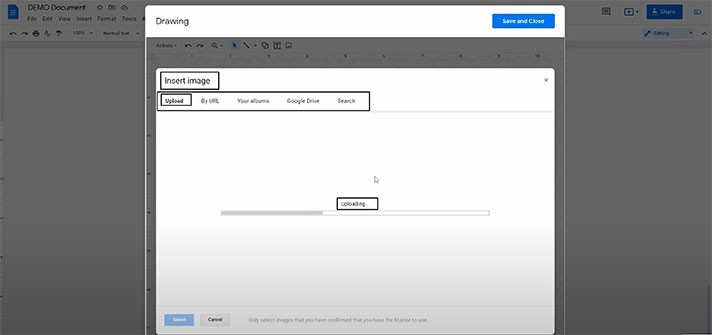
- First, we insert the image by clicking the rightmost icon on the toolbar. Then, you will be offered to get the image from various sources. And we will choose the fastest way now: we just drag the image right here from the computer. Here it is in the drawing workspace
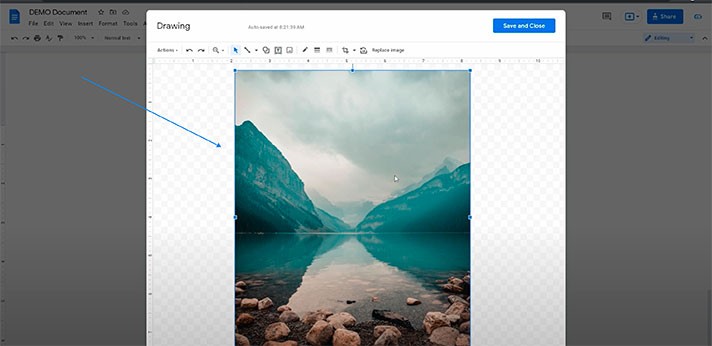
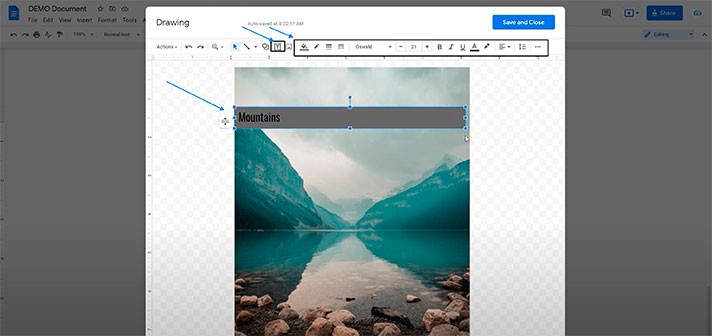
- And you can write over the image using the toolbar on top. For that, you create a text box by clicking on this icon on the toolbar (you will see it in the screenshot below). And now, we can draw a figure over the image. Here it is. You type everything you need in here. Then, you may want to format the text just like you normally do in the documents with these tools. Moreover, you can move your text box to where you want it to be. And so on
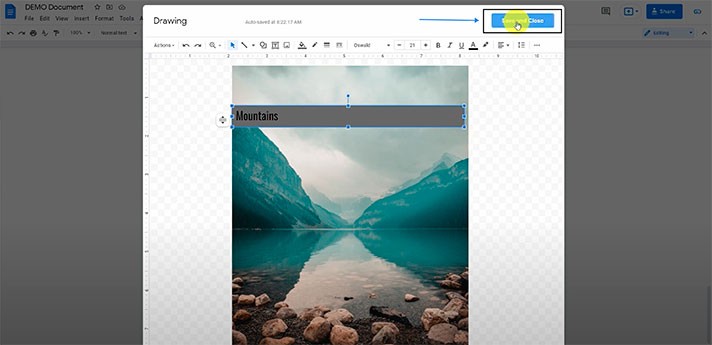
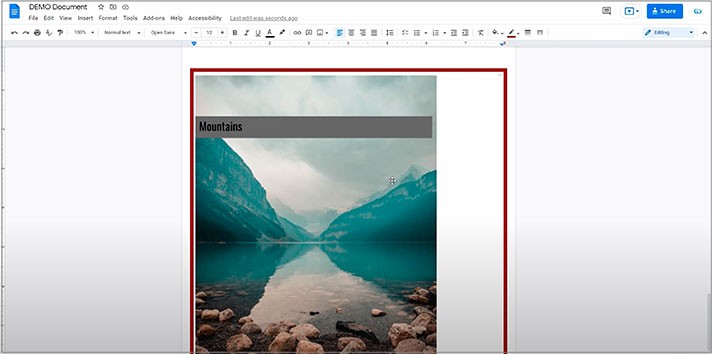
- Once completed, press “Save and Close” in the top right corner. And here is your image inside of the border in the document
Some Final Edits
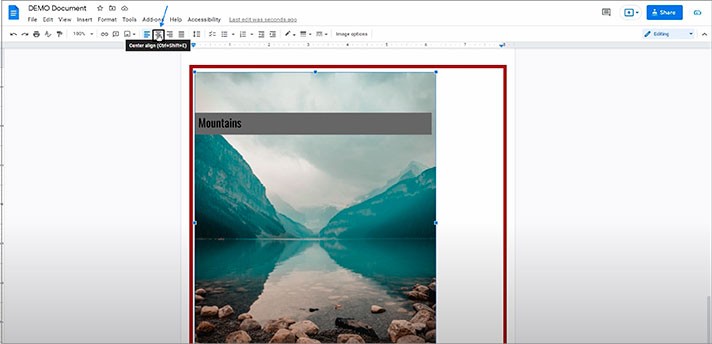
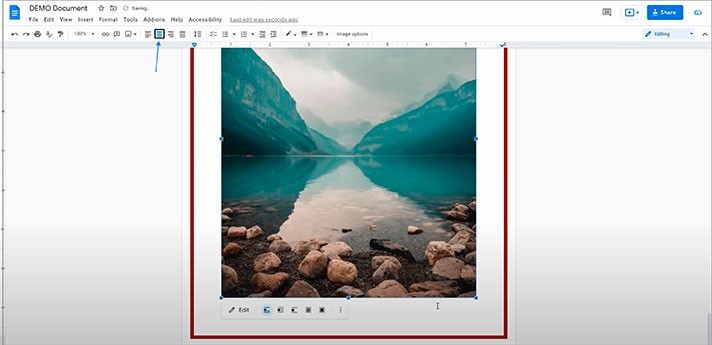
Now let`s center the image on the page.
We hope this tutorial will help you learn how to make a title page in Google Docs. Good luck!

We are a team of creative people who dream of sharing knowledge and making your work and study easier. Our team of professional designers prepares unique free templates. We create handy template descriptions for you to help you choose the most suitable one. On our blog, you'll find step-by-step tutorials on how to use Google Products. And our YouTube channel will show you all the ins and outs of Google products with examples.


