How to Make a Timeline on Google Docs?

Google Docs has become a popular choice for creating timelines due to its accessibility and collaborative features. Here are a few reasons why you should consider using this online editor for your projects:
- Free and Easy to Use: Docs is a free web-based application that requires no installation or additional software. It offers a user-friendly interface, making it easy for beginners to create timelines.
- Collaboration: It allows multiple users to work on the same timeline simultaneously. This feature is particularly helpful when working on group projects or when you need to gather input and feedback from team members.
- Accessibility: Your timeline can be accessed from anywhere with an internet connection. This makes it convenient for remote collaboration or when you need to work on your timeline from different devices.
Thus, let’s get started!
Creating a Timeline from Scratch
Before you can start creating your timeline, you need to have a ready-made document. If you don't have one already, you can easily create a new one by visiting Google Drive and choosing a new Google Docs template.
1. Setting up a Page Orientation.
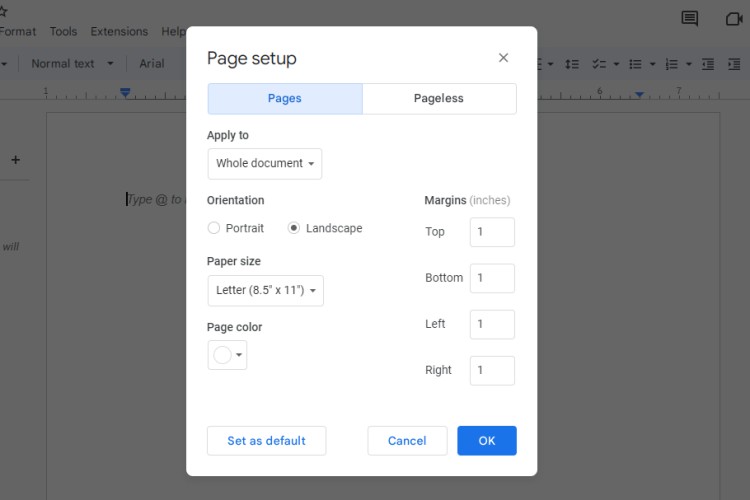
To create a nice and meaningful timeline you might need a vast space which is why it is essential to switch the page orientation from vertical to horizontal.
For this, 👉 click on File – Page Setup. Now select Landscape orientation from the dialogue box. Click OK.
2. Adding a Line.
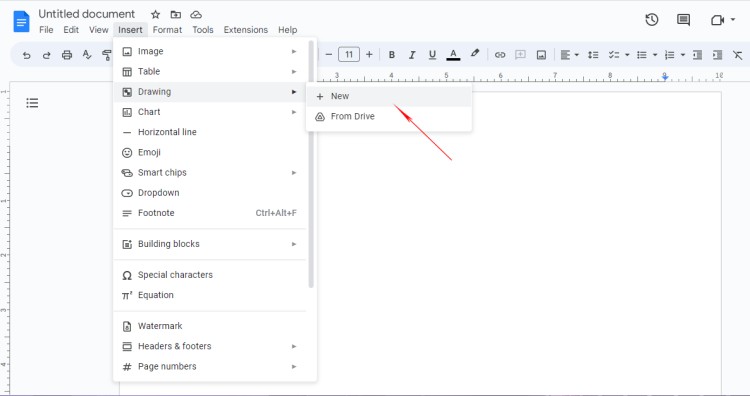
To start drawing a timeline, 👉 click on the Insert tab from the menu at the top.
Select Drawing from the dropdown menu and choose New to open the drawing editor.
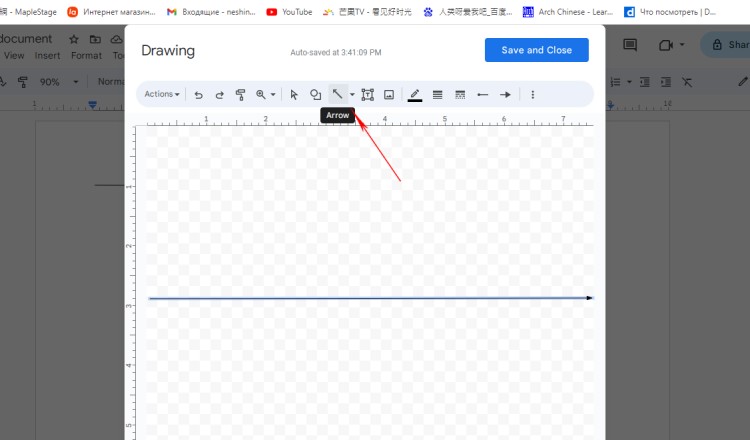
In the drawing editor, 👉 click on the line tool (represented by a diagonal line icon). Now drag your cursor to draw a line on the canvas.
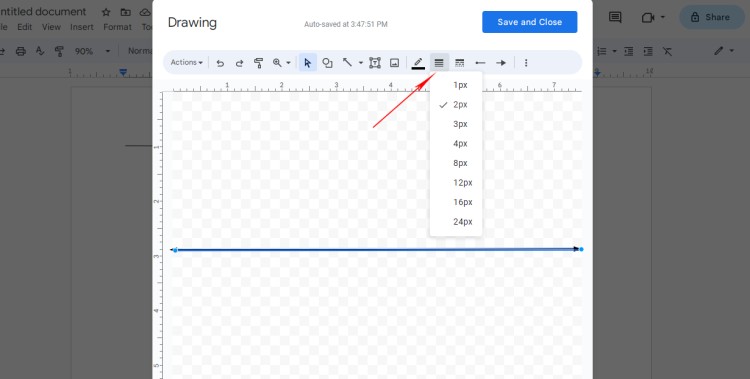
Additionally, let’s increase the line weight to make it look clearer. Select the drawn line by pressing the Select button and now choose the proper line weight. For now, we’ll go with 2 px.
3. Adding Points or Events
Now the magic begins!
The task is to build shapes to initiate the scope of a timeline. For this, one might think of the structure suitable for the project. 👀
Let’s create a timeline for opening an Instagram store till getting the first sales. Our date range is 13 days divided into seven-point markers.
Choose the Oval shape and start drawing.
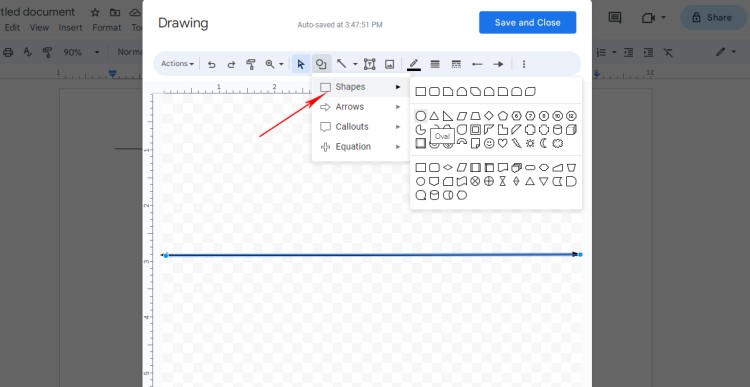
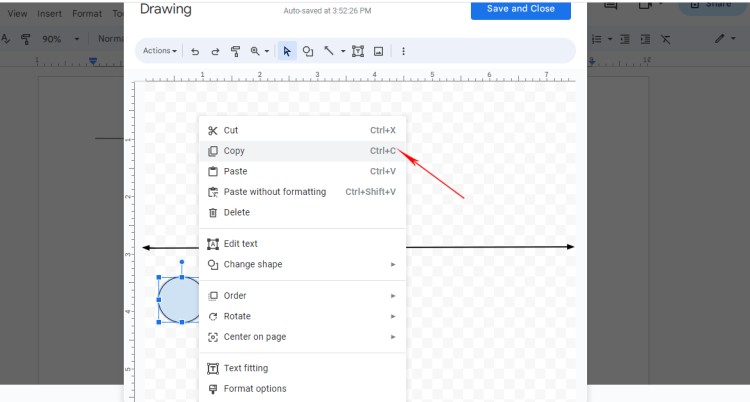
Now when we have our first shape for a time marker, let’s copy it and paste it as many times as we need the date markers.
Note: we can change the color later after we see what the structure looks like.
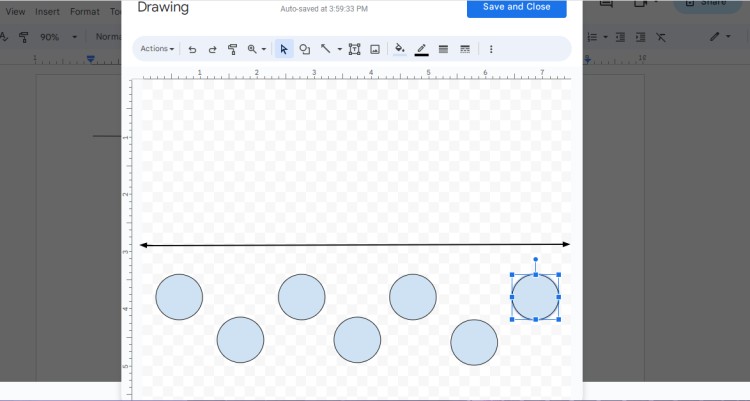
Now we got our oval shapes for indicating dates.
4. Adding Dates.
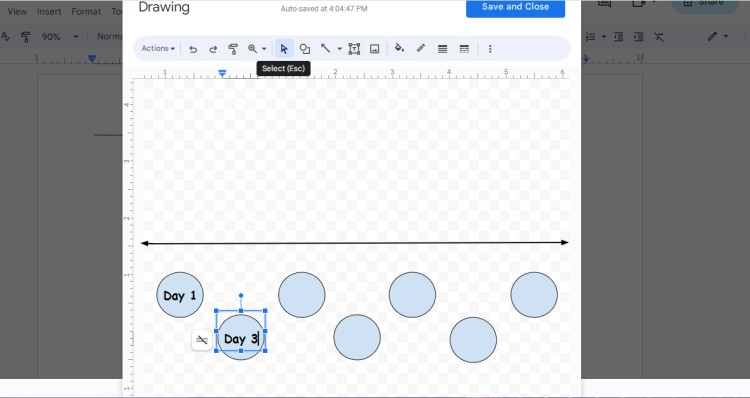
Use the toolbar at the top of the drawing editor named Text Box. The text box will appear and you can drag it on the shape.
Enter the text you want to display on the shape.
Use the toolbar at the top of the drawing editor to change the font, font size, and text alignment.
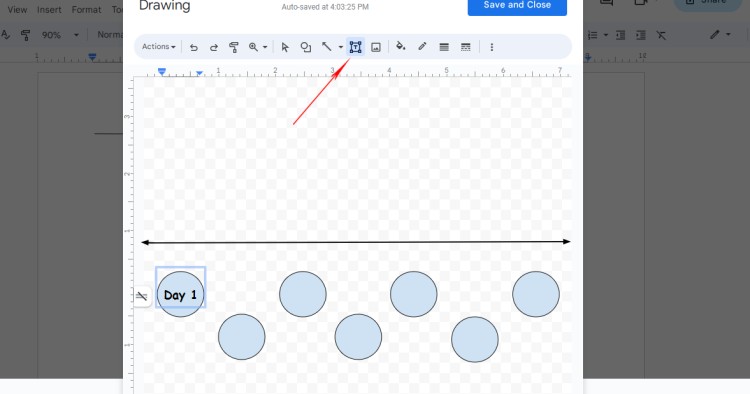
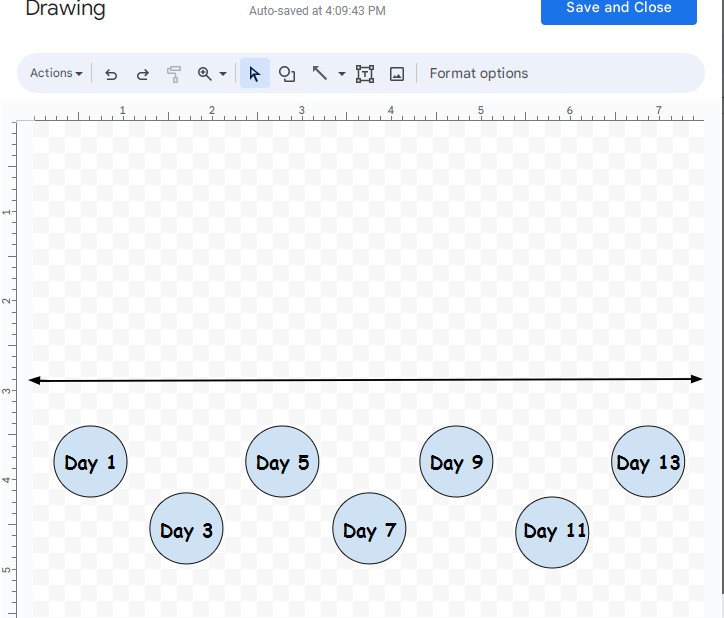
It is easy to copy the text and change the date. Use the Select tool to activate the selection of the text. Copy and paste the date to the nest shape.
Here is the result.
5. Building Shapes for Tasks.
In the drawing editor, 👉 click on the shape tool once again (represented by a square icon) to select it and choose the shape for tasks. Let’s simply choose a Rectangle.
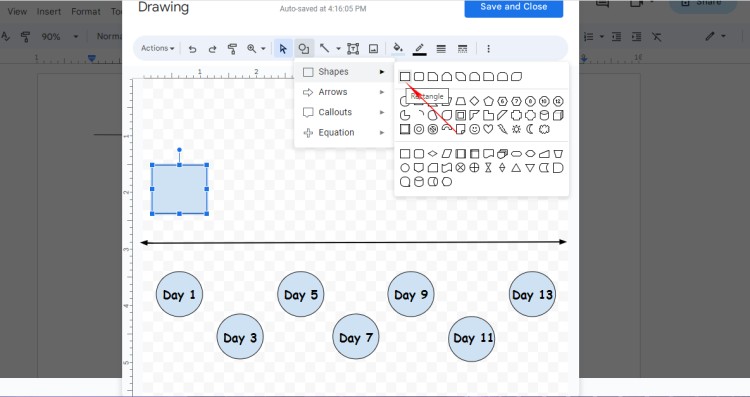
Copy the rectangle and place it to align with oval shapes.
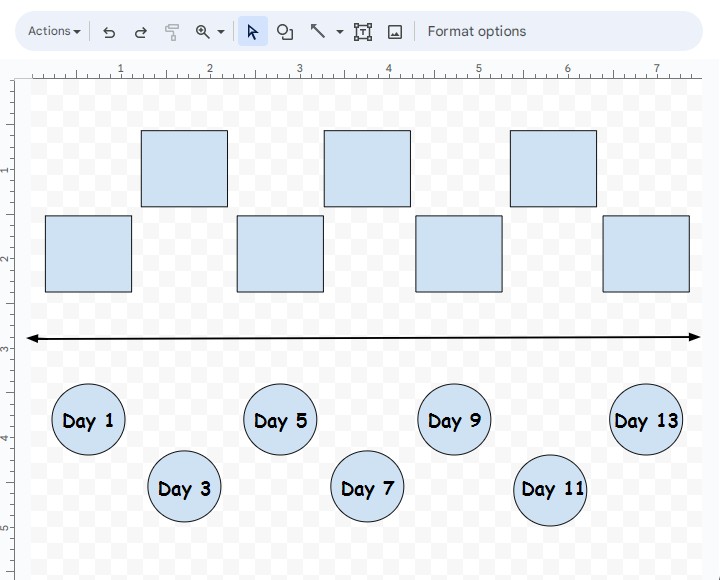
Now add the text by the same method – either copy the text box from the date’s timeline or click on the Text Box to add a new text.
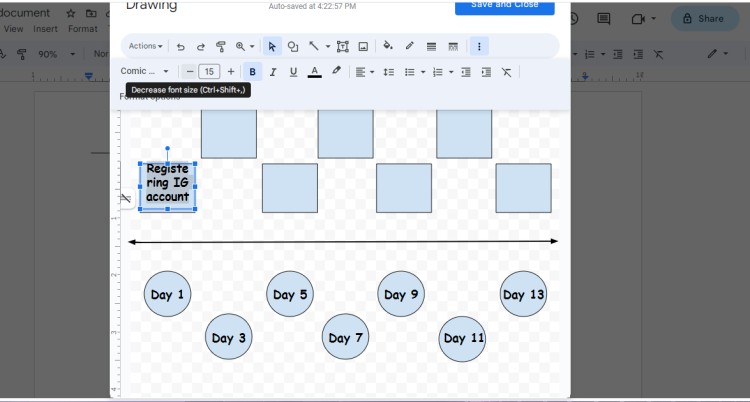
Now all information is filled in.
Do you think we are going in the right direction? 👀
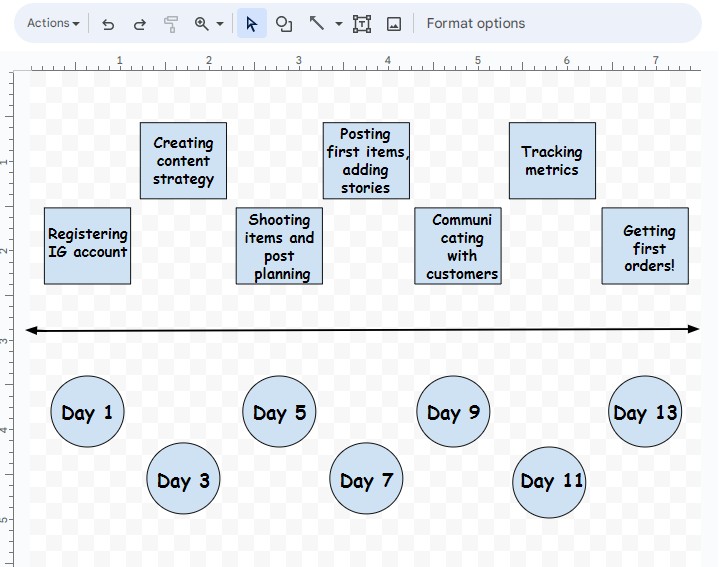
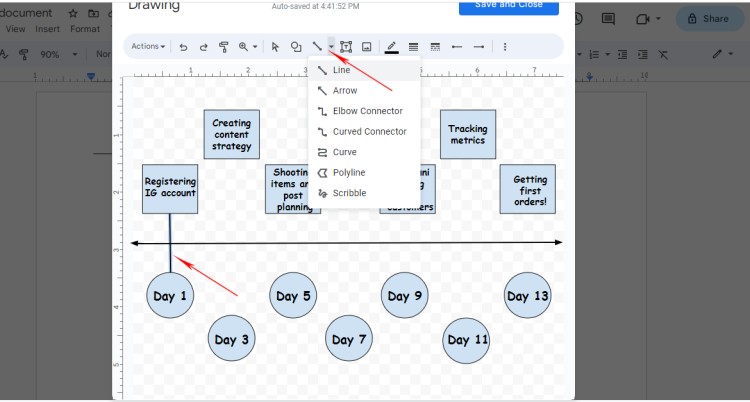
6. Adding Connecting Lines.
To connect the date and the task, use the same Line tool to draw lines. You are free to use either a simple line or an arrow.
Customizing Your Timeline: Add a Touch of Vibrancy
1. Customizing Colors.
As leaving the blue color within the shapes may look simple, let’s add some vibrancy and change colors to match the Instagram theme.
Choose the shape and click on Fill Color. Now 👉 click on “+” to add a Custom color (HEX color codes).
Blue #002296ff
Purple #82008fff
Dark pink #c0007aff
Purple red #ea0c5fff
Orange #ff5341ff
Yellow #ff8820ff
Light yellow #f6ba00ff
Before:
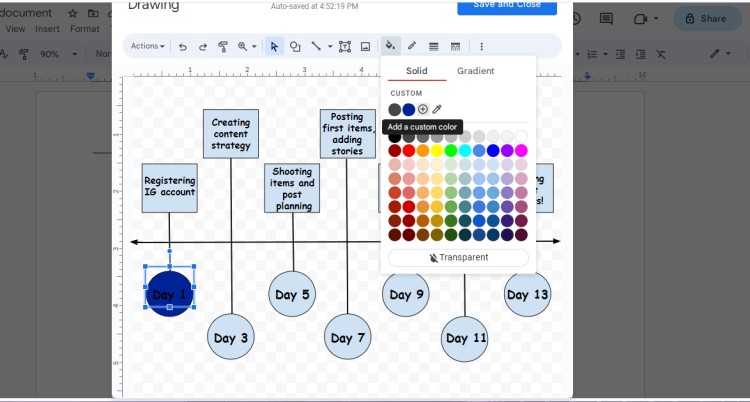
After:
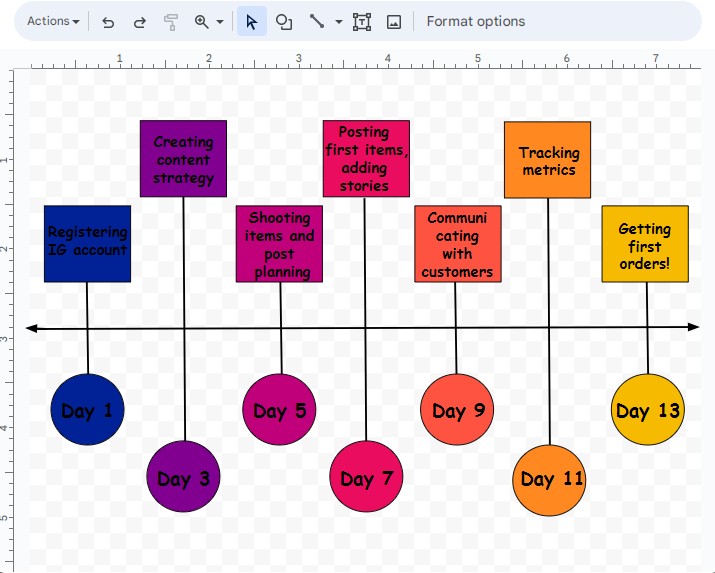
Now let’s try out changing the font color to White #ffffff.
To do that press Shift and choose all text elements, 👉 click on three dots to see the hidden menu and choose Text color.
Before:
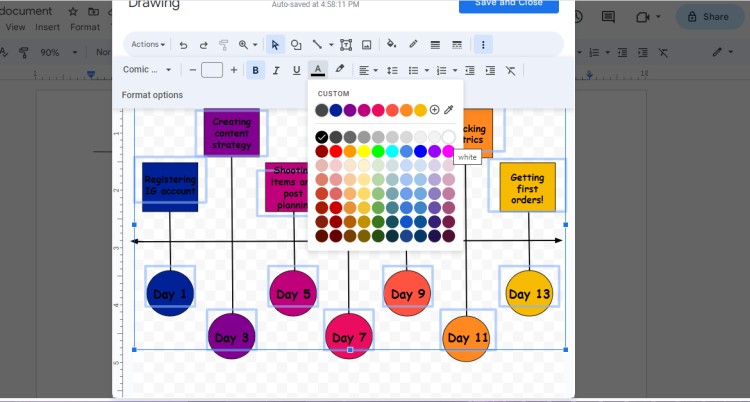
After:
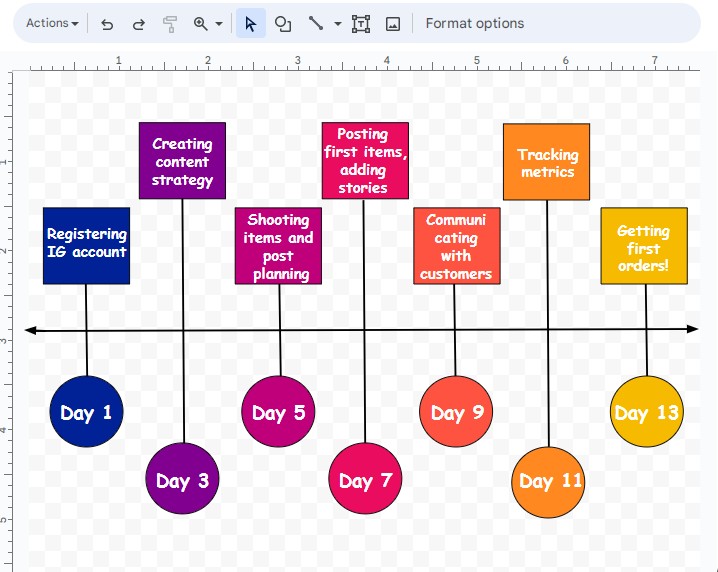
2. Final Adjustments
What if we experiment with the lines and try out using a dot type? 👀
Select the main line and then 👉 click Line Dash. Choose any line type you think is suitable.
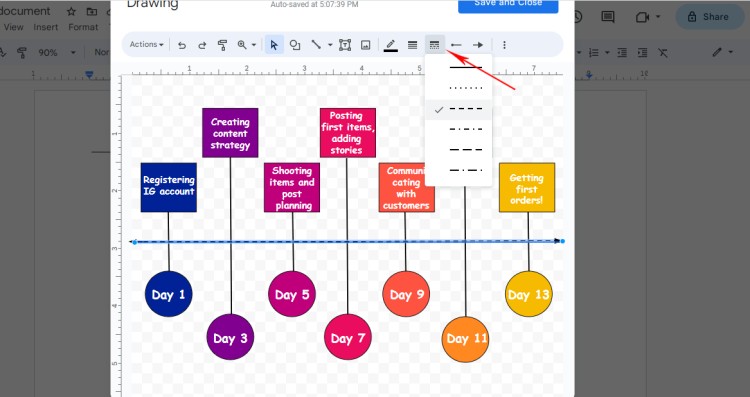
Now choose Save and Close to see the timeline on the slide. See the result!
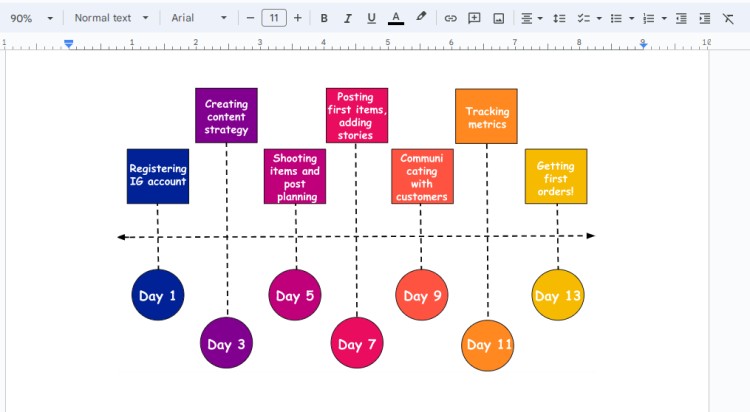
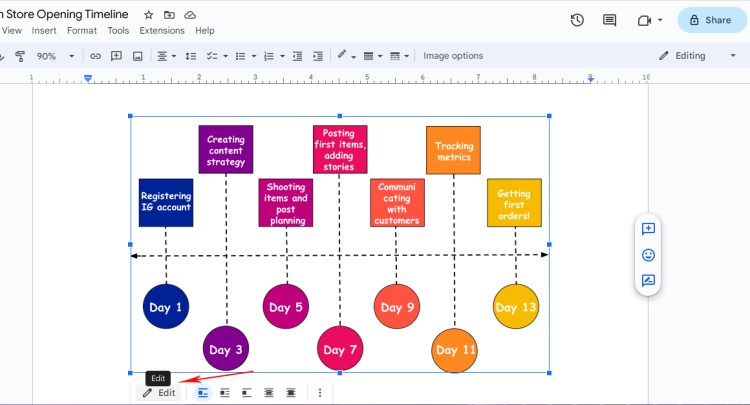
But you are always can get back to the Drawing dialogue box and make edits. For this, 👉 click on the timeline and you’ll see a panel emerging below the image. Click Edit.
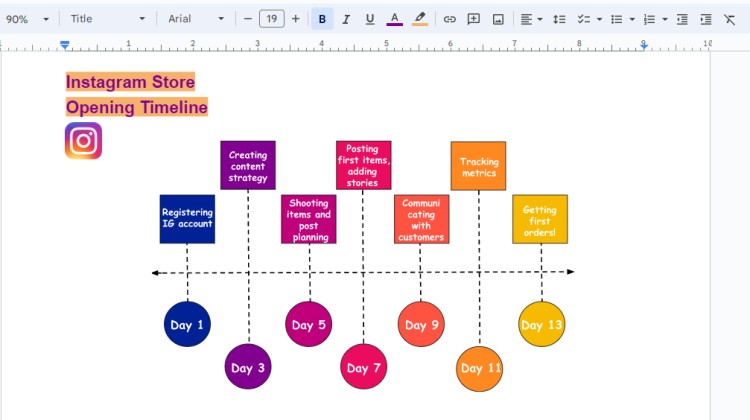
Let’s add a title and Instagram logo. To add an image click Insert - Image – From PC or Search the Web.
See the final result!
Frequently Asked Questions (FAQ)
Q1: Can I add images to my timeline in Google Docs?
Unfortunately, Google Docs does not have a built-in feature to directly add images to your timeline from the Drawing window. However, you can take a screenshot of the image and add it as a shape on your timeline.
Q2: Can I import data from a spreadsheet into my timeline?
Currently, Google Docs does not have a direct feature to import data from a spreadsheet into a timeline. However, you can manually enter the data or copy and paste it from a spreadsheet into the timeline.
Q3: Can I export my timeline as an image or PDF?
Yes, you can easily export your timeline as an image or PDF. Simply click on the "File" tab, select "Download", and choose the desired format.
Q4: Can multiple users edit the timeline simultaneously?
Yes, Google Docs allows multiple users to edit the same timeline simultaneously, making it ideal for collaboration.
Q5: Can I print my timeline directly from Google Docs?
Yes, you can print your timeline directly from Google Docs. Simply click on the "File" tab, select "Print", and choose the desired print settings.
Have you liked our tutorial?
We hope it was helpful and engaging. You are free to create any structure for the timeline and experiment with its placement. Don’t forget to add colors to make it visually appealing and eye-pleasant.
Hope your project is successful and you are keeping up with deadlines!

We are a team of creative people who dream of sharing knowledge and making your work and study easier. Our team of professional designers prepares unique free templates. We create handy template descriptions for you to help you choose the most suitable one. On our blog, you'll find step-by-step tutorials on how to use Google Products. And our YouTube channel will show you all the ins and outs of Google products with examples.


