How to Make a Table on Google Docs?
Today we touch on creating and editing the table in Google Docs. Tables help organize data, put text and numbers in order, and make them match each other. Basically, this is a grid with rows and columns containing cells in them. Here we create one filling it with data, editing its properties, and customizing it. And we also review new features Google added to it by the end of 2021.
Watch the video from https://thegoodocs.com/ and find out how to make a table on Google Docs:
Creating a Table
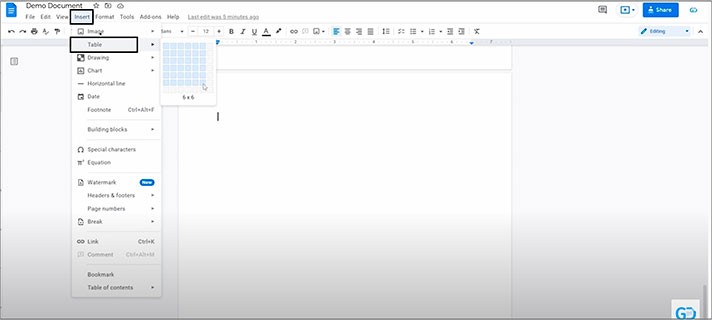
- On the document, it starts with us going to the “Insert” item on the toolbar on top and pressing it. In the menu, we drag the cursor to the second line, “Table”, and here on the popping up window with the grid, we set the number of columns, rows, and the number of cells in it at once. For example, we will do a 6 by 6 figure that we will use for tracking the employees` working hours. For that, we drag the pointer over these cells until we see that it covers a 6 by 6 square, which will also be displayed at the bottom of the window. And then we finally press on the last selected cell
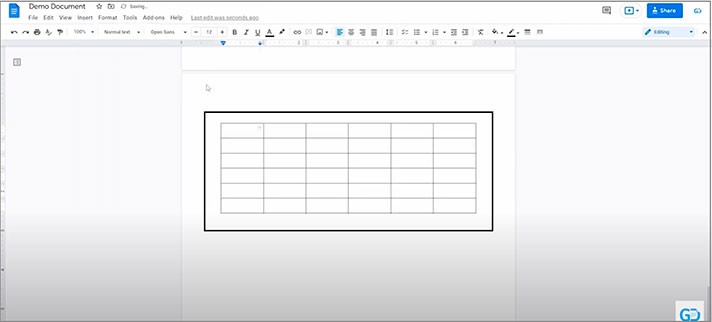
- There we go, just what we chose, 6 on 6 rows to columns with a total of thirty-six cells
Filling the Table with Data
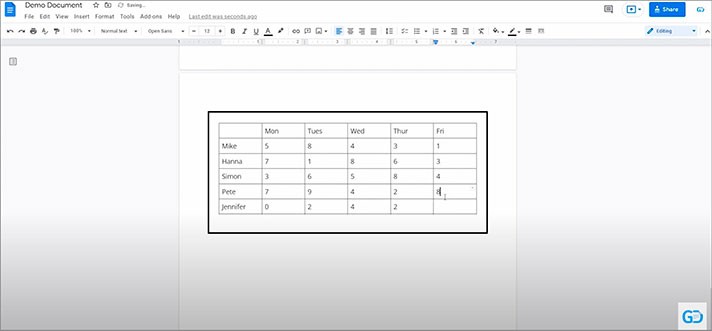
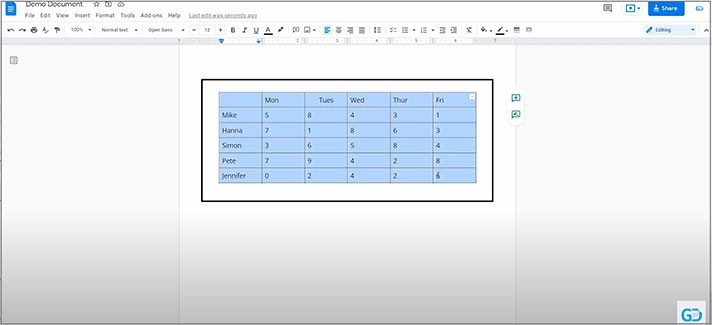
- To start filling it, we just click on the specific cell and start entering. And it is absolutely not different from how you regularly work with data in the doc which includes formatting text with numbers, inserting images, and basically everything. In the first row, we are entering the working days of the week. Then in the first column, we enter the employees` names. And then their presumptive number of working hours per day. That’s how we create a simple table to track working hours for demonstration
Formatting Data in the Table
All common tools for working with text are fully applicable to the data in the table.
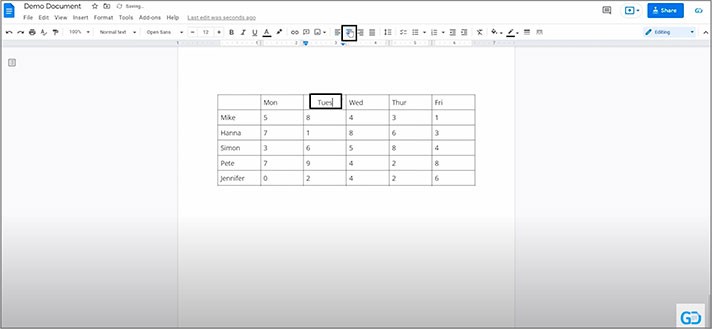
- For that, we click-hold on the cell that we want to start from and drag the mouse cursor to the last cell of the range that we want to modify
- Now let’s center the highlighted data by pressing the center align button. There we go. And let’s make the data bold and italic. And we will change the font. Well, you got it
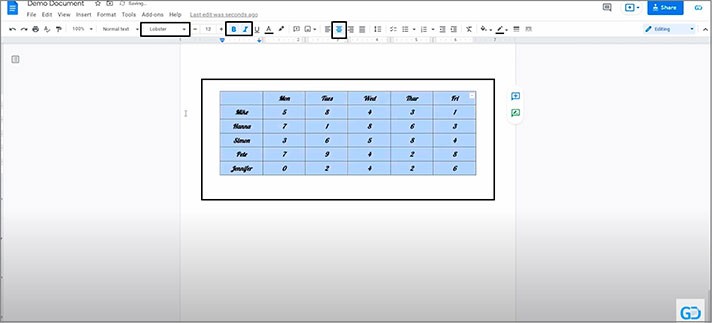
Table-specific Features
Now concerning the table-specific features.
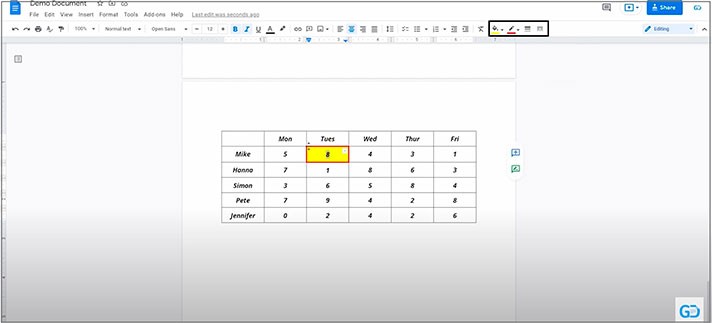
For instance, we will customize one cell as we like.
Working with Columns and Rows
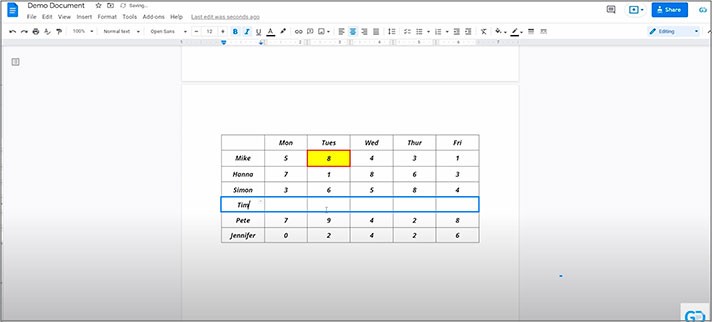
Now we format the table and explore its possibilities. At some point, you will realize you need more rows or columns.
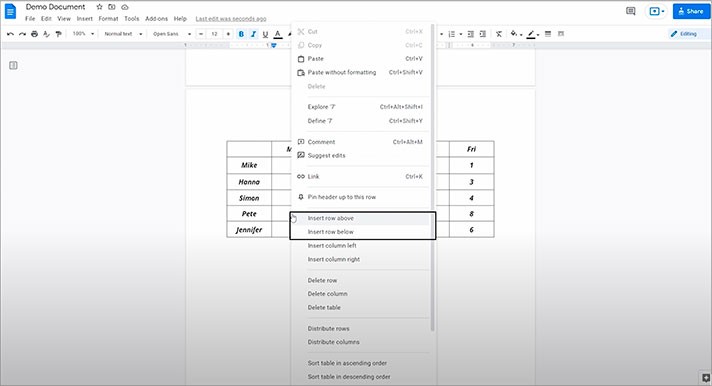
- And we got a new row, where we will enter the new employee’s name
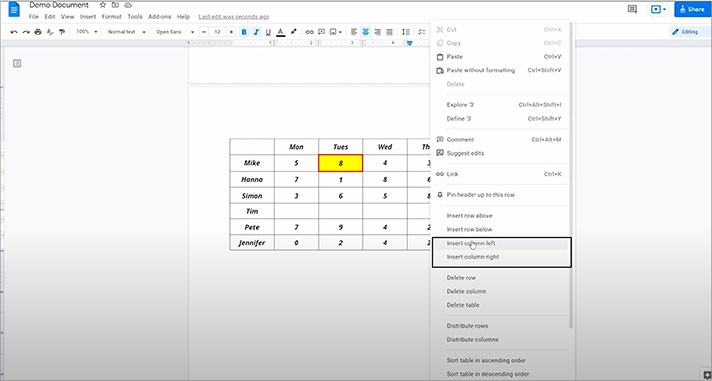
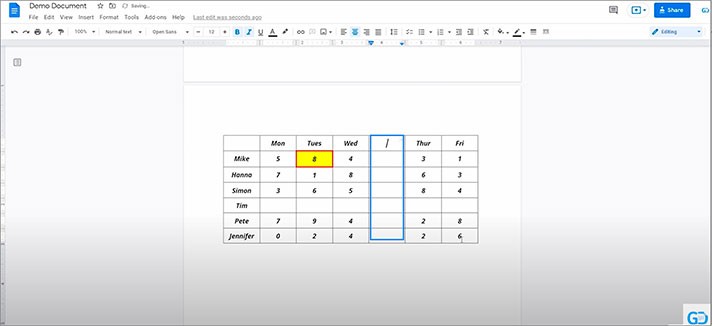
- The same applies to the columns. Select the cell in the column next to which you want to insert one more column left or right to it. Right mouse click. And in the context menu, we select “Insert column left” or “Insert column right”
- There we go
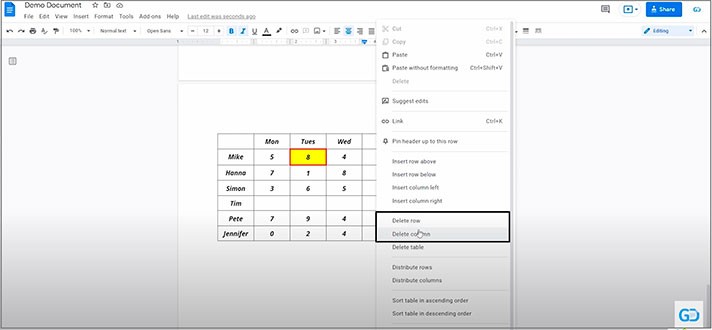
- And it works backward, meaning deleting them where you select the cell in the column or row, right mouse click, and then in the menu, locate and click either “Delete row” or “Delete column”
Adjusting Table & Dimensions
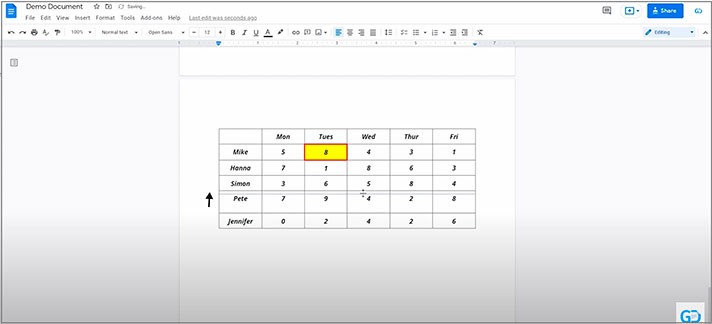
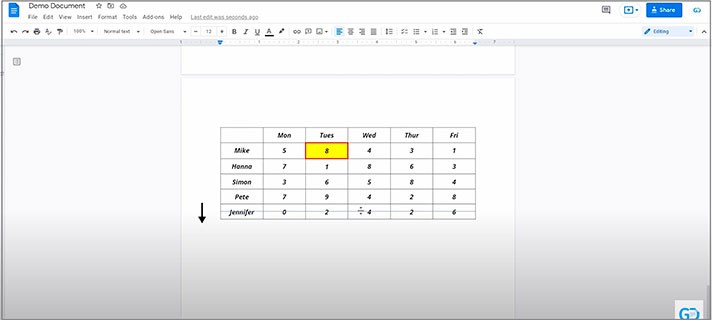
You can change the dimensions of each row and column.
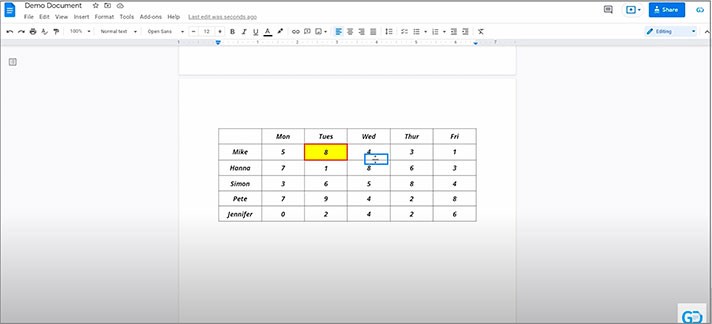
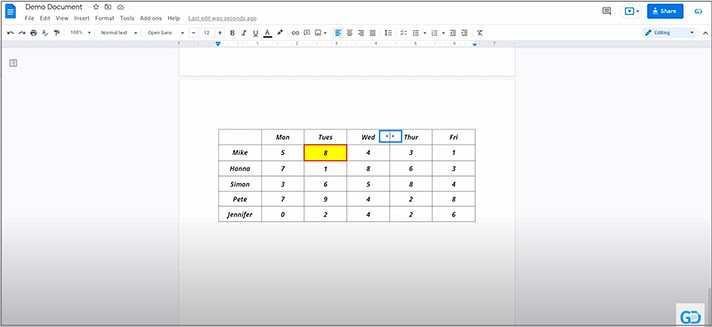
- You can move the borders of the rows up or down, left or right for the columns
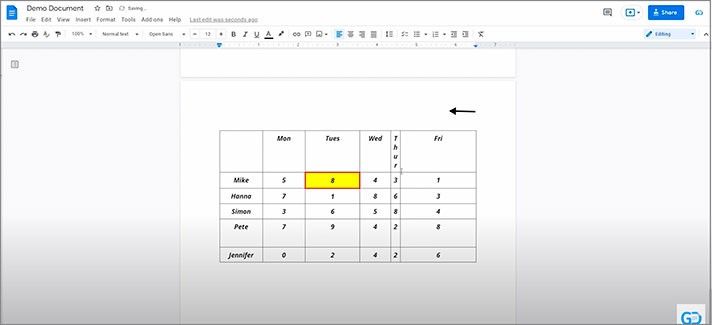
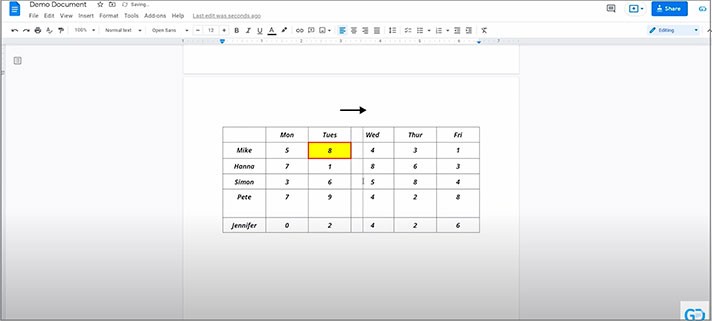
- And one more thing concerning the table size adjustment is that you can click on any cell of the table, call up a context menu, and click either “Distribute rows” or “Distribute columns” which will make all the cells in the row or the column align evenly in accordance with the overall height and width of the table. And that’s incredibly handy since it aligns them perfectly
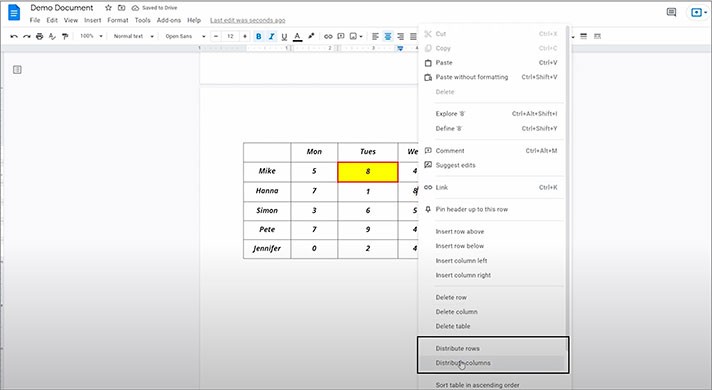
Table Controls Menu
And it doesn’t end here. There’s a really nice table controls menu containing all aforementioned settings in a single place but with even more controls and fine-tuning. Let’s get to it.
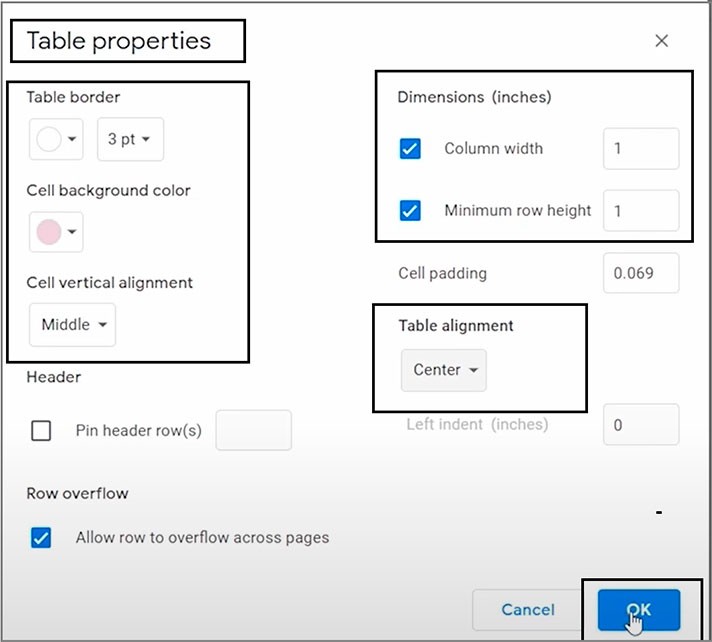
- For example, we will highlight the entire table, right mouse click on any cell, and in the menu, we locate “Table properties” at the bottom and press it
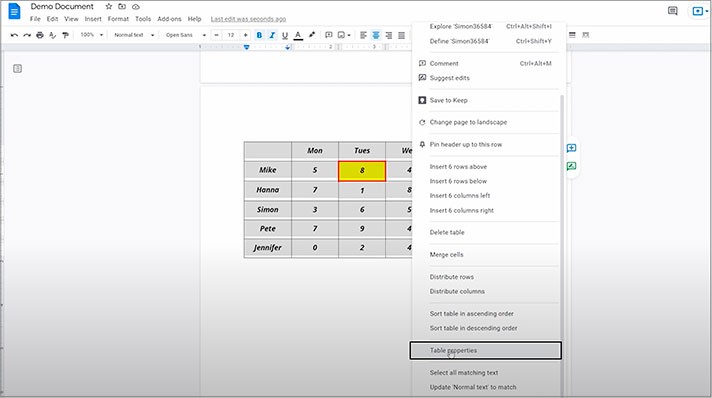
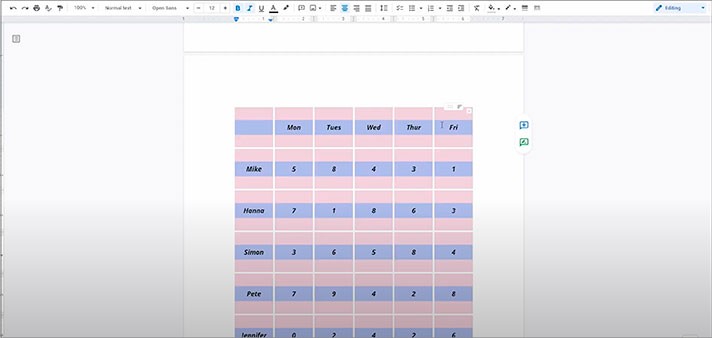
- Let’s apply some edits in the menu. Let’s make the table borders disappear by pressing on the color here and selecting a white color, for instance. Then we will increase the width by pressing this button and selecting 3 in the drop-down list. After that, we will change the background color of the cells by pressing this button, and on the palette, just choose the one you like from the standard ones or create a custom one. We will select this creamy one here. Then we can align the data in cells vertically. And we change the dimensions of the cells by entering numbers, unlike we did it earlier with just a mouse. We’ll click the checkboxes and do 1 and 1. And the table alignment. So, now we press OK
- There we go
Shifting Rows & Columns (New)
- Up next, this is a relatively new feature, allowing us to easily shift the entire rows and columns at once. For the columns, drag the mouse cursor to any cell on top to its upper part until such a bar appears. And then press-hold on its left side
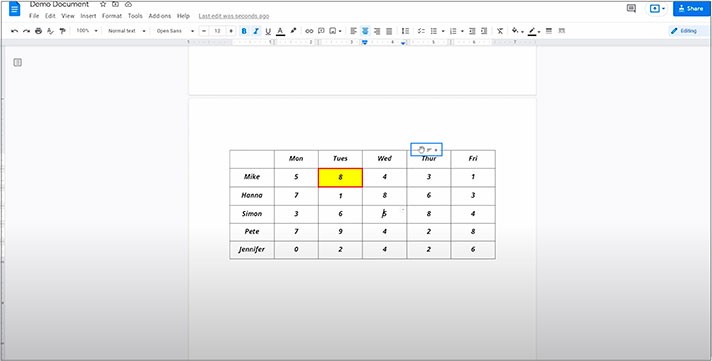
- Now you’re able to move the whole column with all its contents left and right and place it at the start of the table or next to any other column in the table
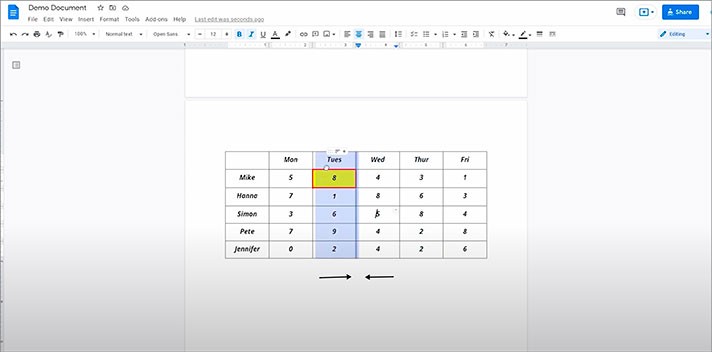
- The same applies to rows but their controls are on the left to each row. So, just drag the mouse pointer to the first cell of the row that you want to move. It will make this bar appear on the left. And if you click-hold on its leftmost icon with these dots, you will be able to shift the entire row up and down
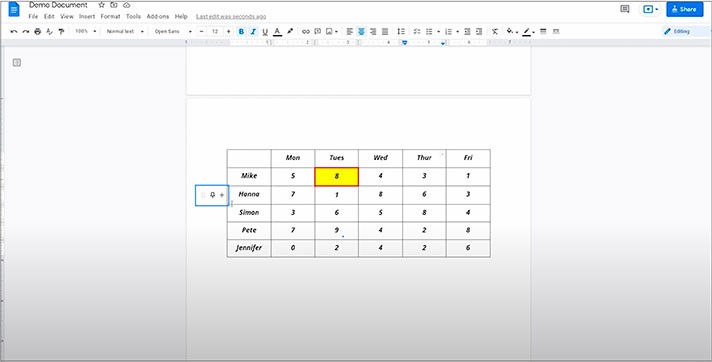
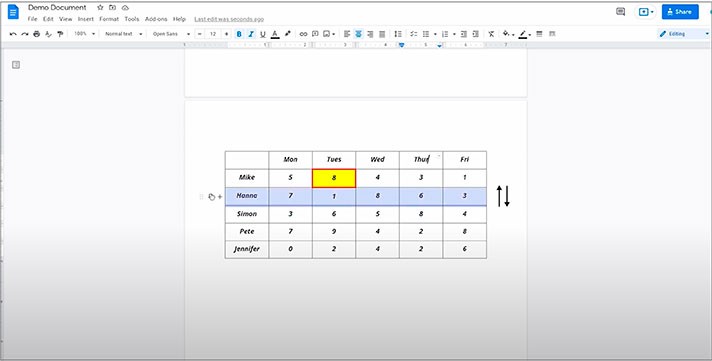
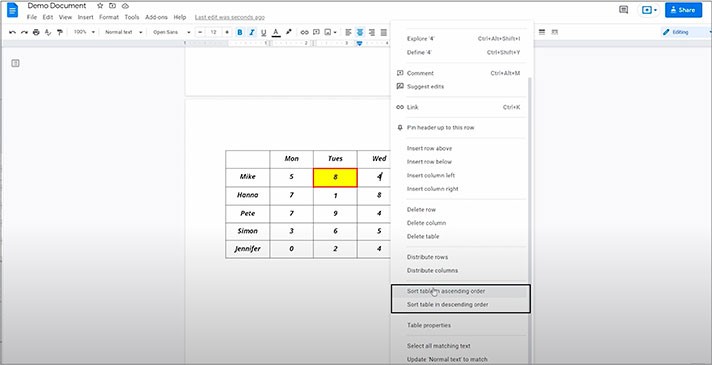
- Google added an incredibly useful feature allowing us to sort the table by its contents in ascending and descending order. We know many anticipated it, and it’s finally here executed with a right mouse click on the cell to call up the menu, and then down to “Sort table in ascending order” and “Sort table in descending order”
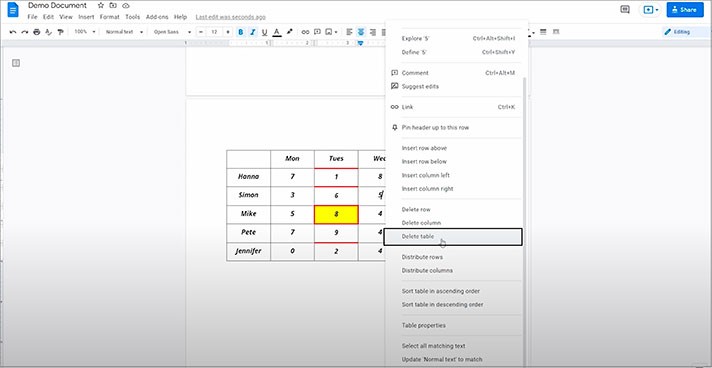
- And let’s finish it by just deleting the table. So, right mouse click on any cell and select the “Delete table” line in the menu. There we go
We hope this tutorial on how to make a table on Google Docs will be helpful for you. Good luck!

We are a team of creative people who dream of sharing knowledge and making your work and study easier. Our team of professional designers prepares unique free templates. We create handy template descriptions for you to help you choose the most suitable one. On our blog, you'll find step-by-step tutorials on how to use Google Products. And our YouTube channel will show you all the ins and outs of Google products with examples.


