How to Make a Cover Page on Google Docs

Today we will guide you through making a cover from zero on Google Docs, as well as personalizing the template with a ready structure.
You will learn the following tools and features:
- Setting up a Google document;
- Applying background – solid color, pattern, image, or illustration;
- Selecting fonts – professional for academic and business documents, and creative – for books, marketing materials, and any other literature.
- Personalizing a cover page from the template.
But let’s start with the basics and uncover what is actually a cover page and its types.
What is a Cover Page and Its Main Applications?
“Never judge a book by its cover”.
That’s what we often hear in different life situations like job interviews, meeting a guest, or discussing a person; but according to our social nature, we still tend to like the aesthetic look of things in front of us. The same goes for a cover page. Will you buy a plain journal or one that appeals to your interests and is nicely arranged?
A cover page is a type of document or one-page letter which comes first before the main part. Often this term is associated with written research papers, but has multiple applications:
- Academic paper
- Book
- Journal
- Portfolio
- Personal project
- Business or marketing proposal
- CV or resume.
While the cover page for the research paper may simply include the title, name, class, subject, and year, the cover page for the creative project consists of the work summary or brief overview letting the reader know the inner story.
But how to create a professional and attractive cover page to get a positive judgment? There is no 100% recipe for that, but we can outline four main tips to follow:
Consider the Main Task
Before you start making a cover page, consider the main task of your job – a strict business document, a creative portfolio, or a marketing proposal. Customize the cover page according to the industry you are in.
Stay Consistent
Create a cover page which is the mirror of your main document. Organize the content in a clean readable structure. Don’t overuse colors, shapes, or unnecessary elements that don’t align with the subject.
Keep it Simple
Avoid the complicated layout and write simple short sentences. Keeping your cover page simple will help you better showcase the work and encourage the viewer to keep reading.
Give it a Personality
If you are working on a creative project or portfolio, consider using your personal identity and make a bold statement with a catchy quote that reflects your personality and thoughts.
Creating a Cover Page from Zero on Google Docs
With the publishing market size projected to rise by $ 19.37 billion by 2028, more and more self-publishers and researchers actively use digital tools to write academic papers and literature periodicals. One tool that is actively used is Google Docs, a cloud-based application treasured for its autosave and shareable features. While typing a text and aligning a text on a white working canvas is as simple as eating, but not everyone knows how to create a cover page.
Now our team will guide you through crafting different types of covers and researching toolbar features to make it stand out among other works.
1. Cover Page for Academic Research Paper
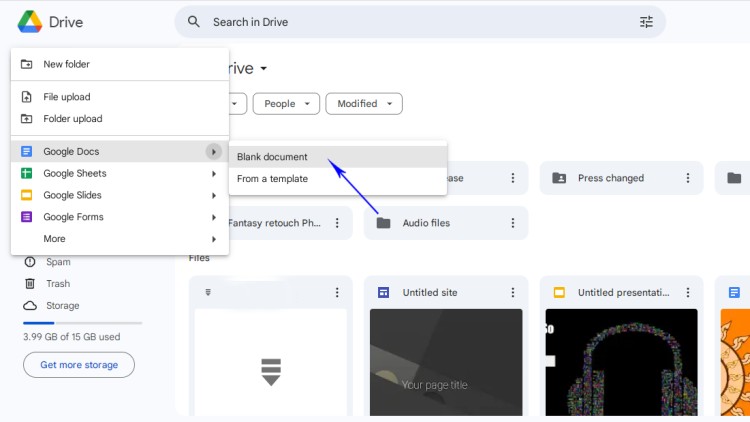
First, we will show you how to make a cover page for your academic work or research project on Google Docs. Open your Google Drive workspace, choose New (+) – Google Docs – Blank Document.
Step 1. Page Setup
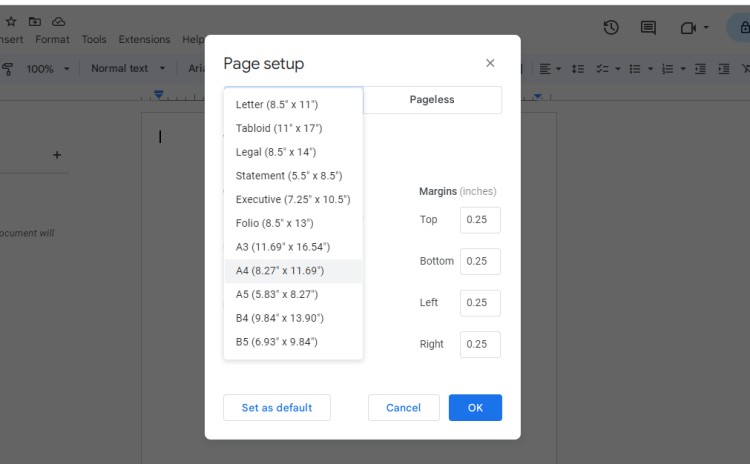
Open your document and give it a title, for instance, Cover Page A4. As we are drafting a cover page for an academic paper, usually, the size is A4. But you can choose any according to your school or university requirements.
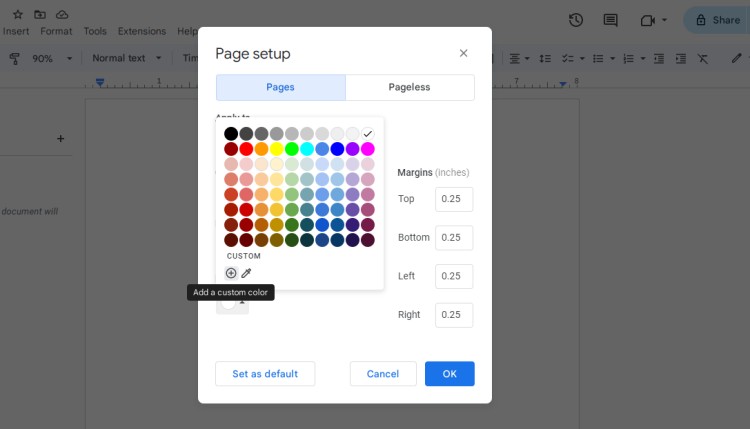
We need to set up the document size. Go to File – Page Setup. In the pop-up window, you need to select the A4 paper size with 0.25 margins. Apply.
Step 2. Adding Text
Let’s type in the title and the following information. For instance:
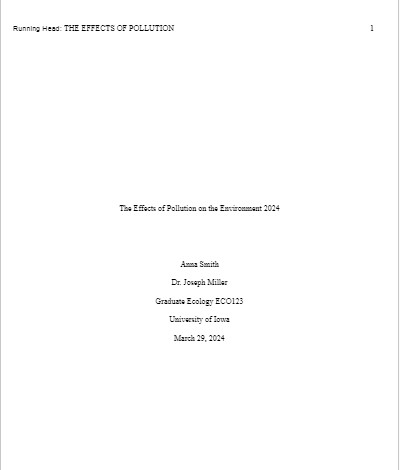
Title: The Effects of Pollution on the Environment 2024
Anna Smith
Dr. Joseph Miller
Graduate Ecology ECO123
University of Iowa
March 29, 2024
To type in this information, center your cursor on the page and choose Times New Roman font, size 12.

Step 3. Adding the Running Head
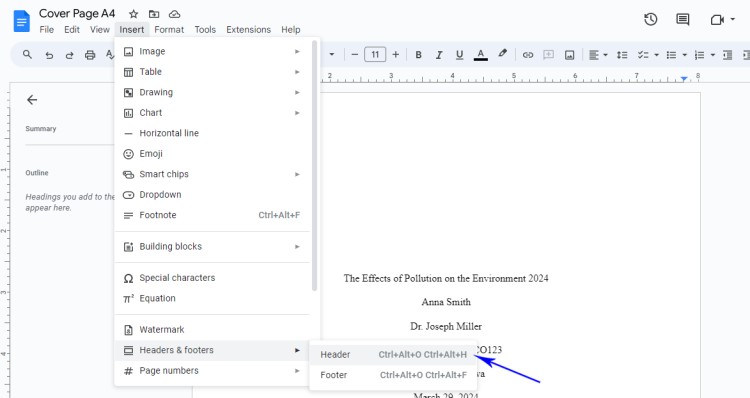
According to APA or MLA academic paper requirements, you may need to add a running head with a short title.
Go to Insert – Headers and Footers – Header.
Now type in with CapsLk the short title (or choose Uppercase capitalization in the menu Format – Text – Capitalization). You can choose to start page numeration with the Header.
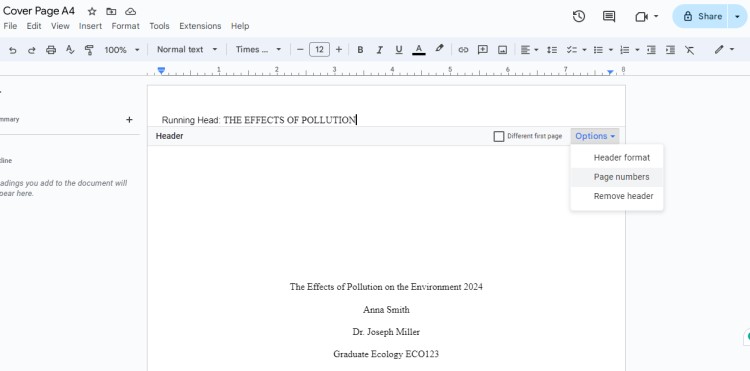
Now let’s see the final result.
2. Cover Page for a Project
Now we are coming up with more engaging content creation like a cover page for a project with illustrations or images. Whether you need a cover page for your marketing strategy, business project, or literature piece, you can always use Google Docs to have the cover page available at any place and at any time.
Step 1. Document Setup
This is the step as above – choose the paper size, either A4 or A5. We will leave the same size.
Step 2. Add the Background
Before you start drafting a cover page, decide whether you want to add an image, a frame, or make a simple page with a title on the colorful background.
Let’s discover how to apply different background styles:
- Solid Color: To apply only one color as the background go to File – Page Setup. From there choose a color. Apply.
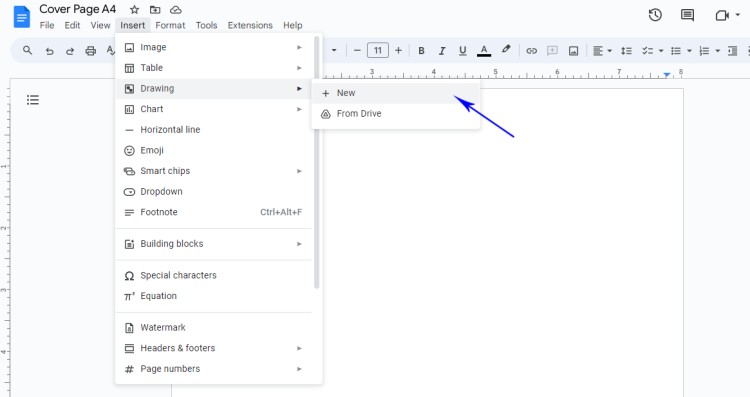
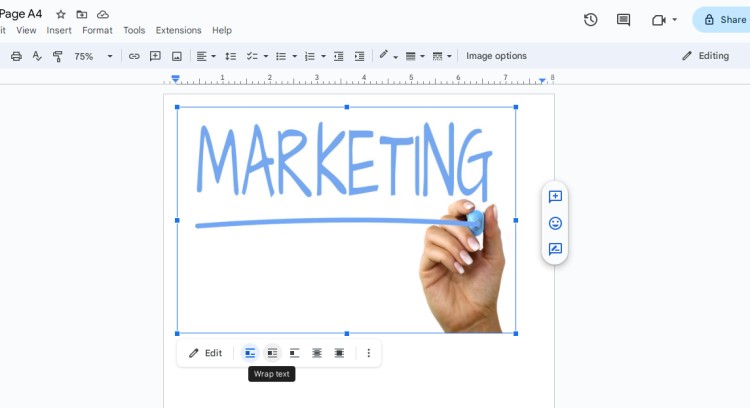
- Image as a Background: To apply an image to the whole canvas or place it at the center (corner, above, or bottom), first click Insert – Drawing – New.
On the Drawing workspace, click Image and choose the source of the image: Upload from PC, Photos, Google Drive, or Google Images. We will browse the web and type in the query to the Google search tab.
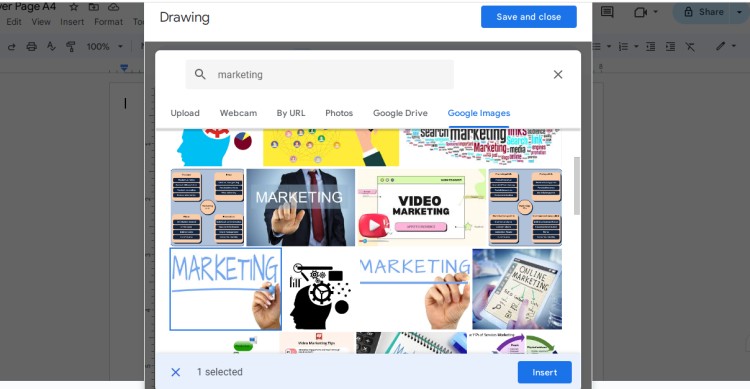
Now click Insert, Save, and Place. Move the image on the page by aligning it with the text placement.
Step 3. Adding Title and Summary
To type in the project title, first choose the font – from generally used Times New Roman and Arial to more creative and old-style.
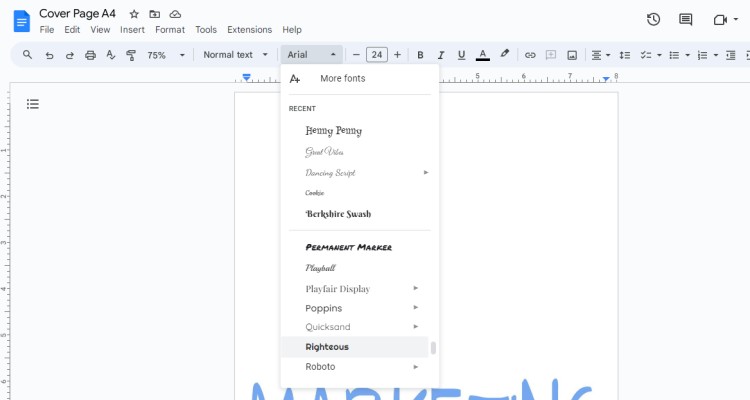
You can add extra elements like shapes and frames in the same way we have added an image. Let’s see the final result.

3. Cover Page for Publications (Books, Journals)
When writing a publication or releasing a book, a well-designed and structured cover page can help you attract more viewers and customers.
To guide you through making a book cover in Google Docs, let us tell you the about main elements and how they contribute to the book’s appeal:
Front Cover: it should be designed to showcase the main genre and story plot. It also serves as a marketing tool to sell your book to more publications and readers. The front cover includes:
- Cover image or illustration (cover art);
- Title;
- Subtitle;
- Author’s name;
- Testimonial (if applicable).
Spine: the spine is the center station of your book, where all pages come into one bundle. It includes the book’s title and the author’s name.
Back Cover: the book cover serves as a page that convinces the reader to buy “it” and sets the tone for the reader’s journey. It consists of:
- ISBN – unique 13-digit code;
- Publisher’s logo;
- Short description – a summary that tells readers what it is about;
- Author biography and headshot.
Step 1. Adding an Image as a Background
First, set up the paper size – we have applied A5 paper size (5.8 x 8.3) inches.
To add an image, go to Insert – Image – Search the Web. Let us browse different ideas like flower gardens or green forest as the main theme. Place it.
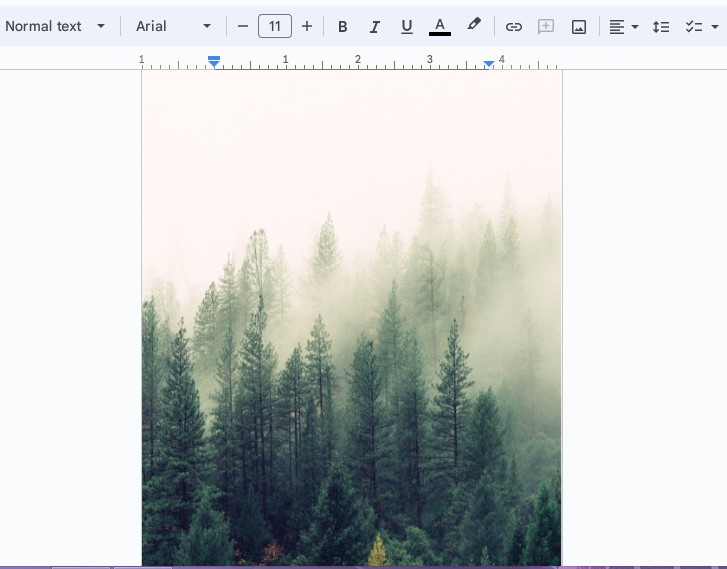
To add the text to the image, go to Insert – Drawing – New. To type in the title and author’s name click on the Text box and place the square in the middle of the working space.
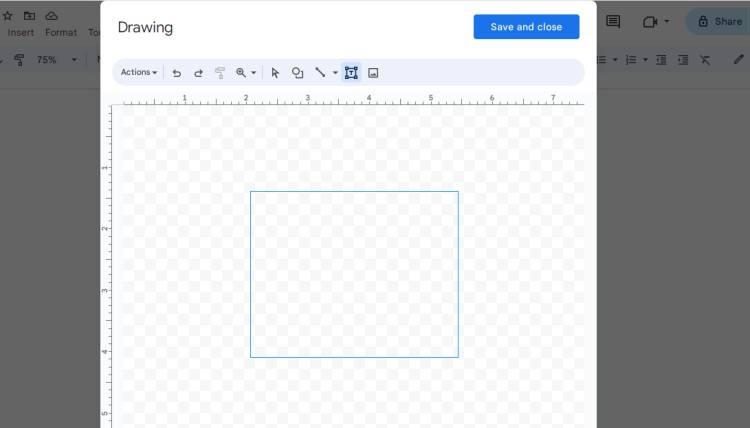
Type in the title and experiment with fonts suitable for the book cover. Also, think of the text color to make it noticeable on the page.
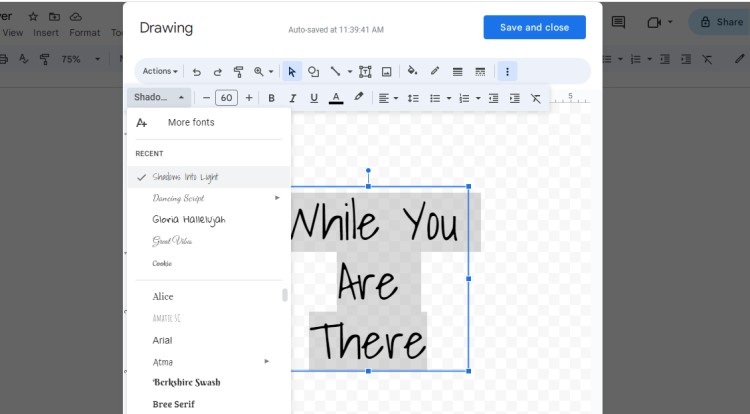
Let’s see the final result. This is the custom decision for an imaginary book.

Creating a Cover Page from a Template
While many of you prefer making a unique cover page from start to finish, some occasions like lack of time after a long working day, require a fast decision. Here we recommend using cover page templates that can be easily personalized according to the project.
TheGoodocs website is a platform for creative and fast decisions, where you can find hundreds of amazing and professional designs like flyers, resumes, agendas, business documents, and covers. One category worth mentioning is book cover templates crafted for authors, novelists, comics creators, and creative individuals.
Let’s take a look at the newest cover page for a children’s fairytale book - Children Book Cover. You may download it by clicking the button Edit in Google Docs and make a copy to your Google Drive. The process of personalization is simple, yet, it’s worth demonstrating possible steps and features.
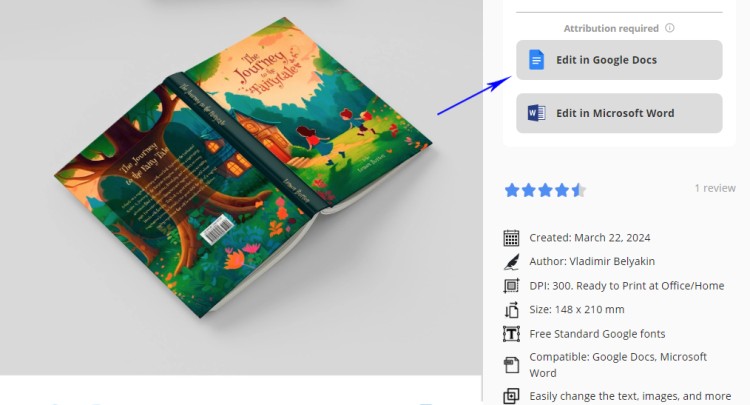
Step 1. Open the Template and Set Up Cover Size
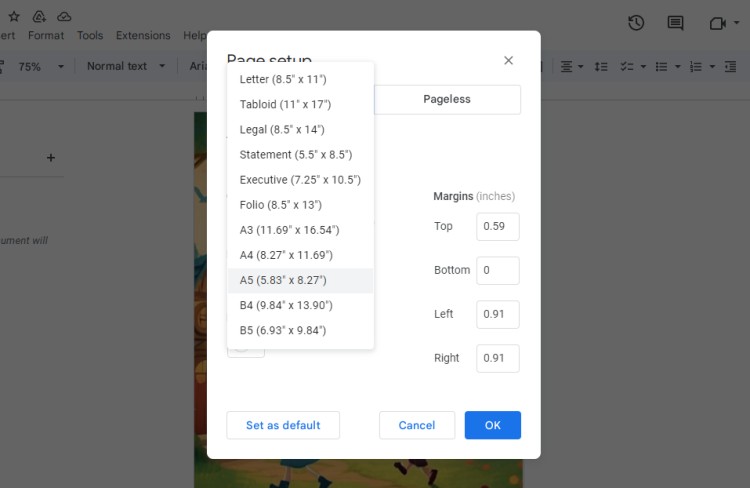
After you have downloaded the template, it opens automatically, or go to your Google Drive and open the template. The cover page for a book we are working with is set to A5 US paper size. If you need to change proportions, go to File – Page Setup. In the pop-up window choose the paper size and apply.
Step 2. Changing the Title
Let’s imagine we are also writing a storybook, thus, this cover page illustration of strolling happy kids is ideal for us. But what we need is to change the book title and maybe make some amendments like font color.
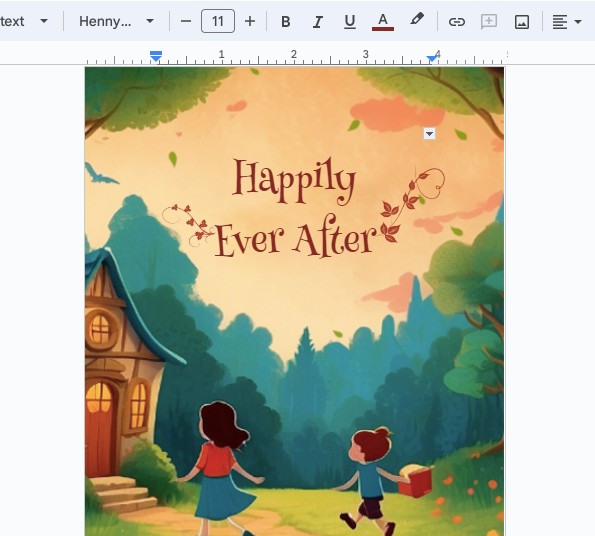
For example, the title of our book will be Happily Ever After. To type in the title, we have removed the existing title and placed the cursor in the center.
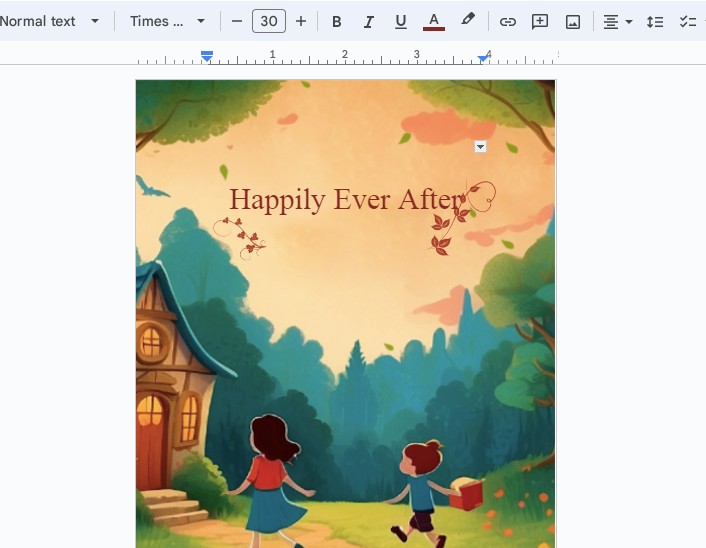
After we have typed in the title, it looks plain, moreover, we need to align it with the existing leaf elements. Let’s experiment with applying different fonts to choose the most suitable and fairy-like. Highlight the title and go to the toolbar Fonts.
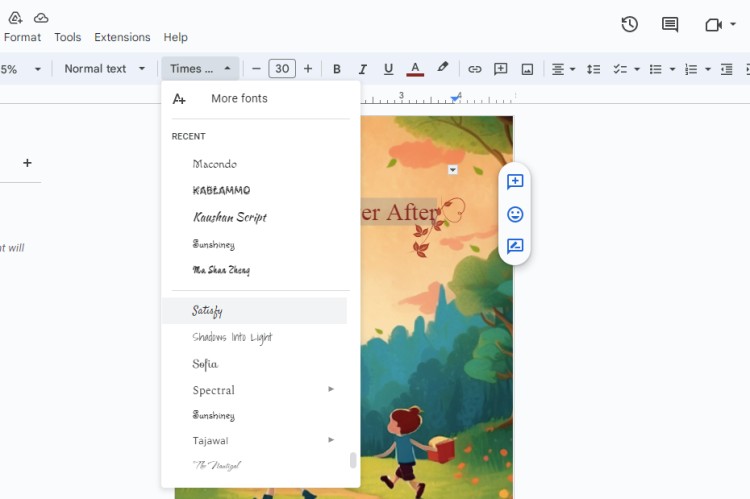
We have tried different fonts, but Henny Penny is the best for this illustration and storytelling theme.
Step 3. Customizing the Book Summary
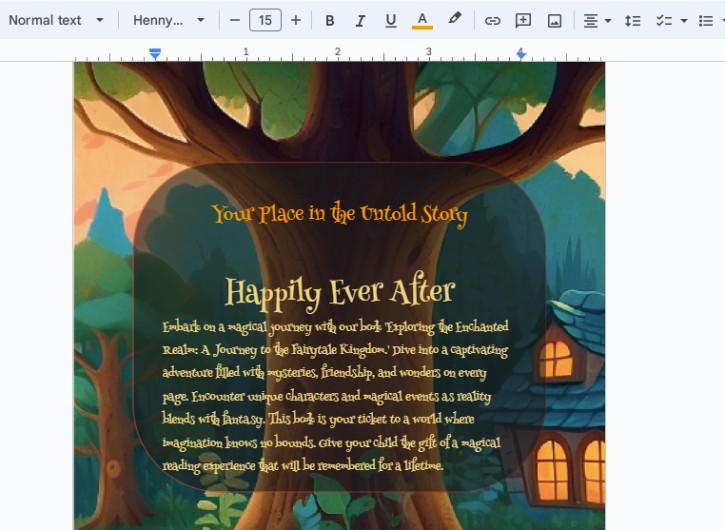
Now let’s replace the author’s name and the book summary on the back of the cover.
You can either type in the description of your book or copy and paste from your document to this page. The same combination works in Google applications: Ctrl+C (copy) and Ctrl+V (paste).
Step 4. Replace the Barcode
We are almost done. The last you need to do is insert the image of your book’s barcode.
As we already have the default barcode, simply highlight it and click Replace Image. You will see different options like Upload from PC, Drive, or Search the Web. Probably you will have your barcode stored on PC, thus choose to folder and place your image.
You can move the barcode to the corner or any place you think is suitable.
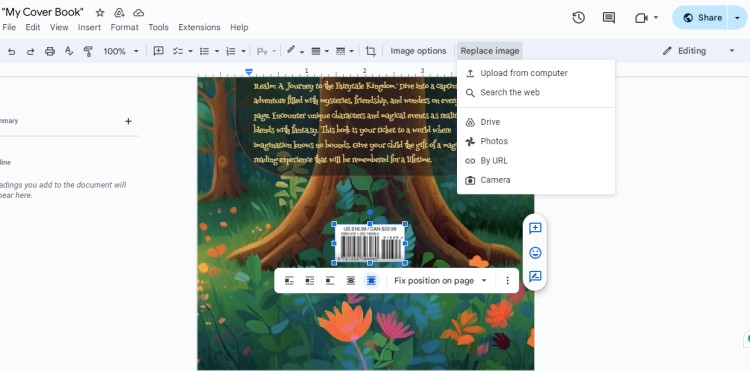

Let’s see the result!

Wrapping Up
Our team hopes you have found this tutorial useful and learned something new in mastering online applications.
Working with Google Docs cover page is easy and you can always experiment playing with shapes, text positioning, adding images, and choosing attractive fonts.
We will continue to bring you the best designs for enhancing your working and daily life with flyers, newspapers, books, itineraries, and so on. Don’t forget to share our blog and tutorials with friends and colleagues!

We are a team of creative people who dream of sharing knowledge and making your work and study easier. Our team of professional designers prepares unique free templates. We create handy template descriptions for you to help you choose the most suitable one. On our blog, you'll find step-by-step tutorials on how to use Google Products. And our YouTube channel will show you all the ins and outs of Google products with examples.


