How to Insert, Crop, or Mask Images in Google Slides?

Google Slides is a well-known presentation platform that enables users to create visually appealing slideshows. As already mentioned, one important aspect of such presentations is the use of images and illustrations. These can be valuable in conveying ideas, highlighting key points, and showing graphics.
If you are ready to maximize your skill set, take a cup of coffee and keep reading!
Inserting an Image
There are many ways to work with images, but the first and foremost is to simply insert an image, and later format it.
Firstly, users can insert images and illustrations from various sources. One option is to use the images and illustrations already present on one's computer, Google Drive, while the second option allows adding an image from web resources. Let’s see how we can do that!
1. Open your existing presentation or start with a new one. To open the presentation you might need to enter your Google Drive first.
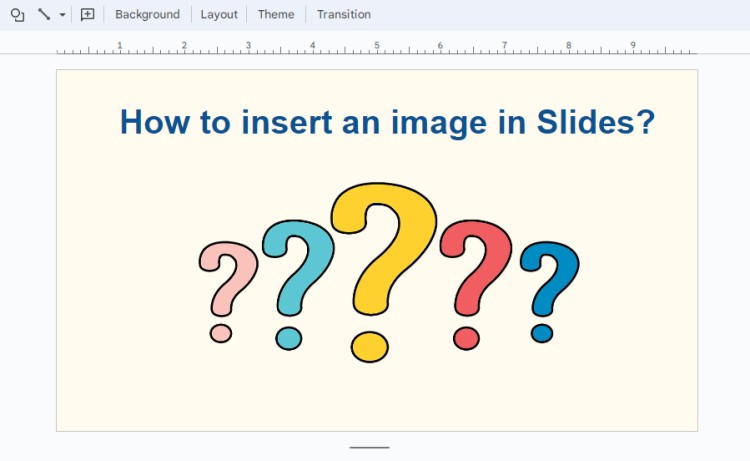
2. Click on the slide where you want to add an image. Now navigate to the upper menu and choose Insert> Image.
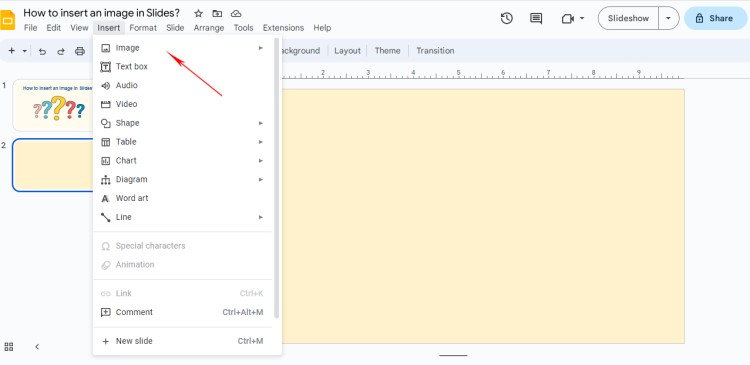
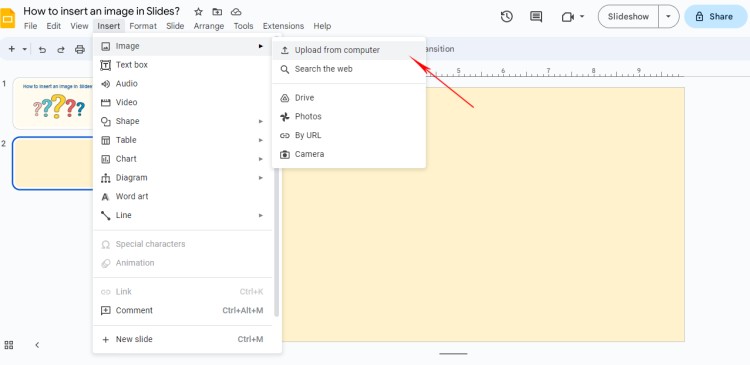
3. You will be prompted to choose an image to upload from your computer or Google Drive. Let’s say you have a saved image. In this case, choose the image from the folder or the desktop.
Here is the result!

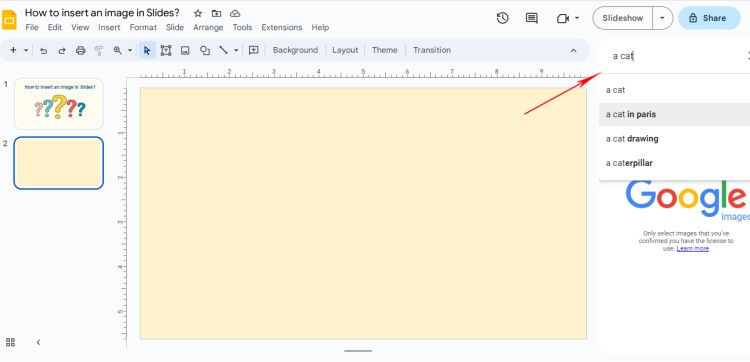
4. In case you only need to insert a themed image from the internet, simply choose Insert > Image > Search the web.
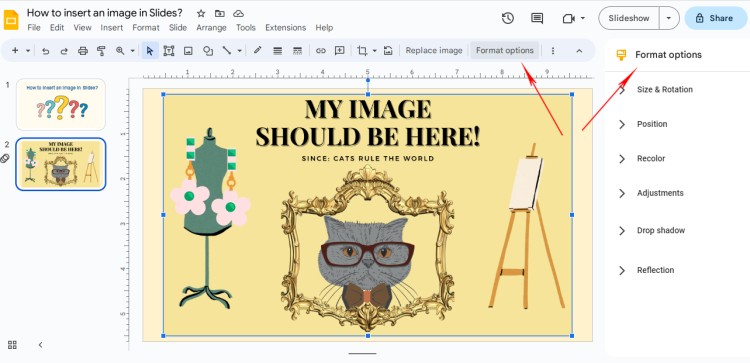
5. Once the image is inserted, you can resize and move it around to the desired location on the slide. The simple toolbar allows different options for working with images, try it out!
Cropping Images
Sometimes, you may want to use only a specific portion of an image for your presentation or simply don’t need image borders. Here's how to crop images:
1. Select the image you want to crop. To make a selection, simply click on the image.
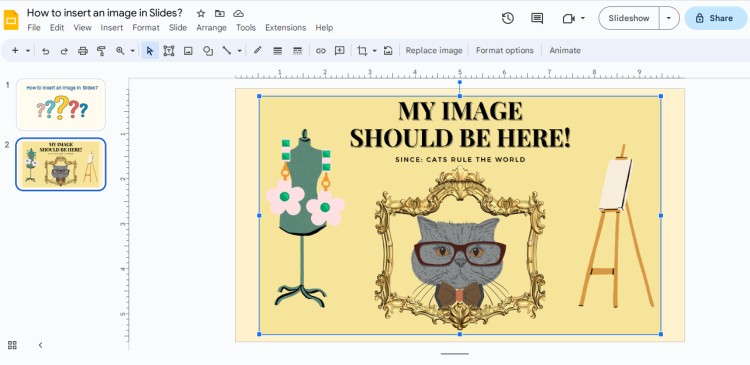
2. At the toolbar you will see an icon called Crop. That’s it. This will display a translucent gray overlay over the image, with handles on the corners and edges.
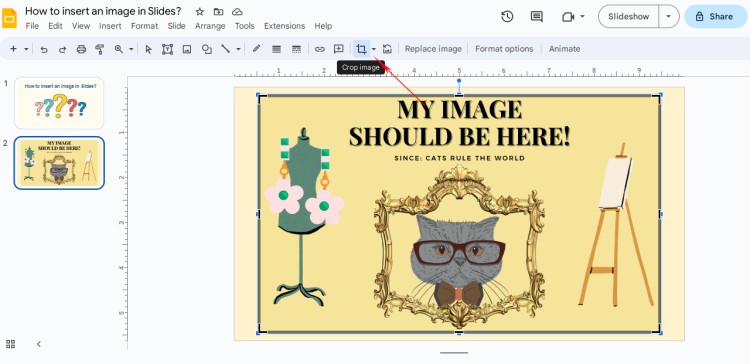
3. Drag the corners of the crop shape to the desired location on the image. You can also drag the edges of the image to resize it.
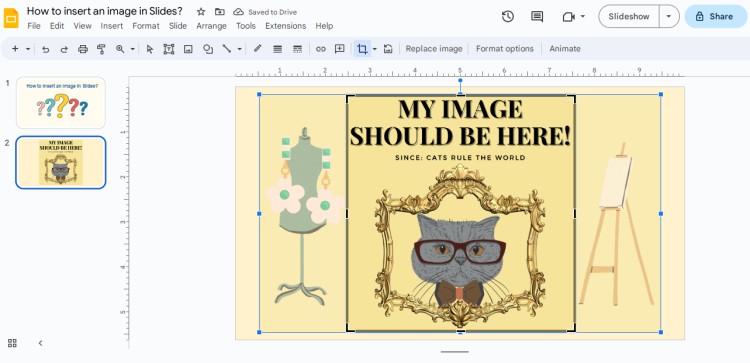
4. Once you have adjusted the crop shape, hit Enter to complete the cropping process. Well done!

Friendly tip: Another important feature to consider when cropping images in Google Slides is the aspect ratio. The aspect ratio is the relationship between the width and height of an image. When you crop an image, it’s important to maintain the original aspect ratio to prevent distortion. To maintain the aspect ratio, hold down the Shift key while moving the handles of the overlay. This will constrain the crop to the original aspect ratio of the image.
How to Mask Images?
One of the common tasks for users is to mask images in Google Slides to create more visually appealing slides. Masking is the process of hiding a portion of an image, typically to emphasize or focus on a specific part of the image. So let’s see how we can do that!
1. To mask an image, you need to add a shape on top of the image. To do this, click on the Crop tool on the toolbar, then select Shape. Choose the shape you want to use to mask the image. The rectangle shape is the most commonly used shape for masking an image. But we will choose an oval. Draw the shape over the part of the image that you want to be visible.
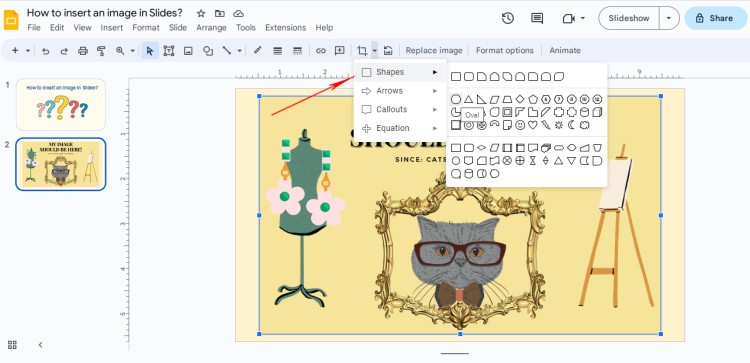
2. Now your image will be masked automatically. Well done!
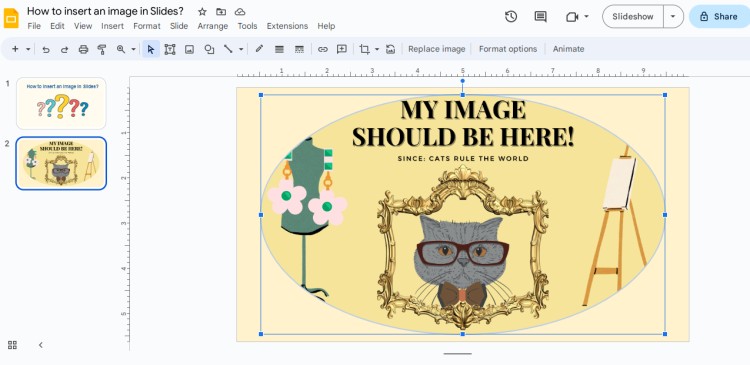
3. If you want to adjust the shape, you can do so by clicking on it to select it. You will see blue squares on the outline of the shape. Click and drag it to change the size and shape of the shape.

Additionally, you can also change the color and style of the shape to match the theme of your presentation. To do this, click on the shape to select it, then click on Format on the menu bar. You can change the color, outline, and fill of the shape from the options provided.
FAQ
We know that after running through our tutorial you still might have questions. Thus, we gathered some popular questions and prepared answers.
Q: Can I add animations to images in Google Slides?
A: Yes, you can! Click on the Animate button on the toolbar and select the animation style you want to use.
Q: Can I add alt text to images in Google Slides for accessibility purposes?
A: Yes, you can add alt text to images in Google Slides. Select the image and then click on Alt text to add a description of the image for people who use screen readers.
Q: How do you adjust the transparency of an image?
A: Sometimes, decreasing the transparency of an image can make it more suitable for a background or blend it seamlessly with the slide's content. To adjust the transparency of an image, select the picture and click on the Format options on the right side pane. From there, you can adjust the transparency by sliding the Transparency option to the desired level.
Q: How do you edit an image in Google Slides?
A: Google Slides provides basic editing tools that allow you to edit images. To use these tools, select the image and then click on Format Options. Here, you can adjust the brightness, contrast, saturation, and add drop shadows, and reflections. You can also use the Replace Image button to replace the current image with a new one.
In conclusion, understanding how to insert, crop, and mask images in Google Slides can take your presentation to the next level. We hope that by following the steps outlined in this tutorial guide, you can create stunning and effective presentations that engage and impress your audience.
If you have more issues with working with Slides, welcome to search through our tutorials that are designed just for you, guys!
Have a nice effective day!

We are a team of creative people who dream of sharing knowledge and making your work and study easier. Our team of professional designers prepares unique free templates. We create handy template descriptions for you to help you choose the most suitable one. On our blog, you'll find step-by-step tutorials on how to use Google Products. And our YouTube channel will show you all the ins and outs of Google products with examples.


