How to Insert a Video into Google Slides?

This time we insert a video into Google Slides.
Watch the video from https://thegoodocs.com/ and learn how to insert a video into Google Docs:
We’re really used to presenting data by means of video in the twenty-first century. And, of course, Google Slides allow you to insert a video into your presentation. Here we do that and overview the features of this function.
Different Inserting Methods
- To insert a video into Google Slides, on a particular slide, we naturally go to the Insert item on the toolbar on top and press it, then go down to the fourth item. This is “Video”
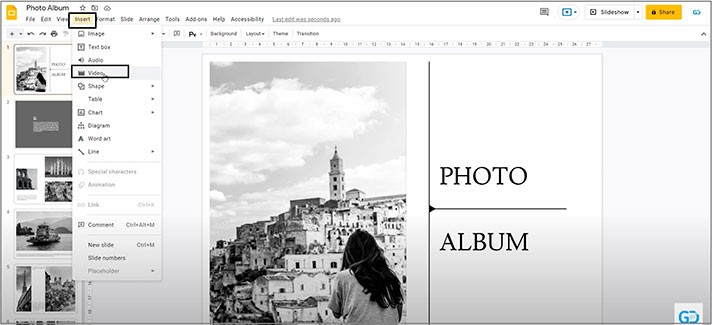
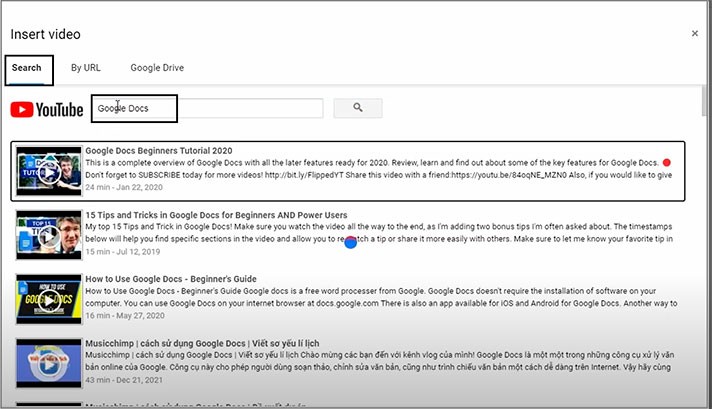
- And here our options are to search for a video on YouTube straight from this search field like you normally do on YouTube
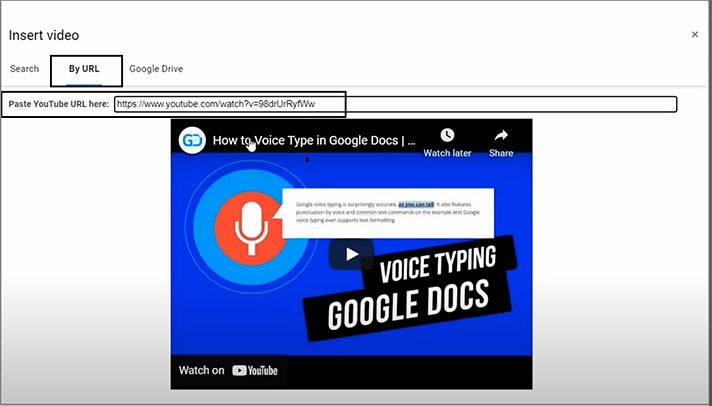
- Then you can paste a direct link to the video right here
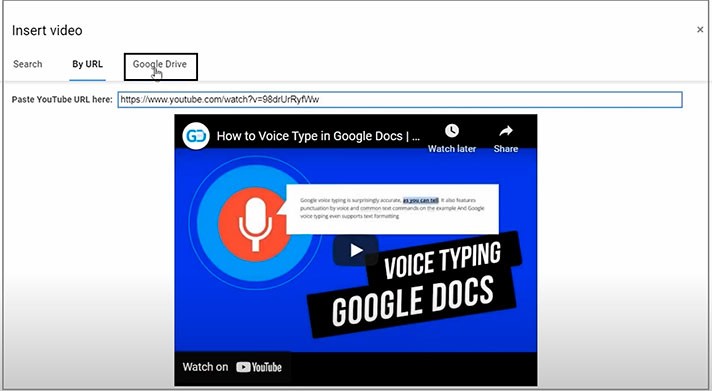
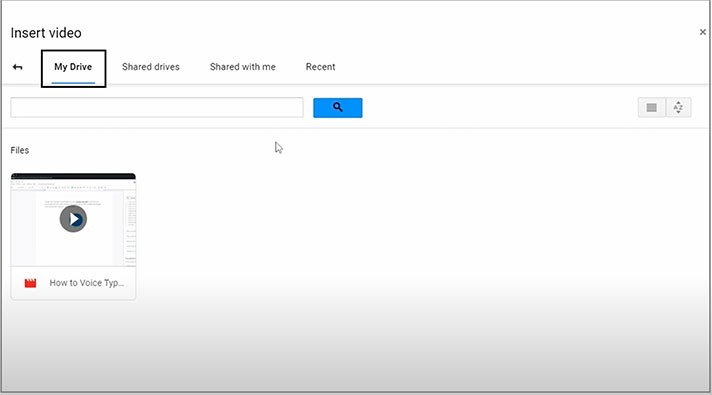
- Or you search for it by its name. Here is ours, a single video we have on our Drive in the main folder. Though, you can also get it from “Shared drives”, “Shared with me,” and “Recent” files that you have used earlier
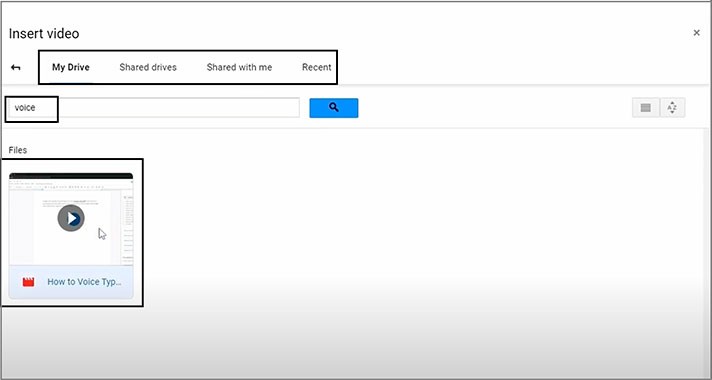
Inserting Video in Google Slides
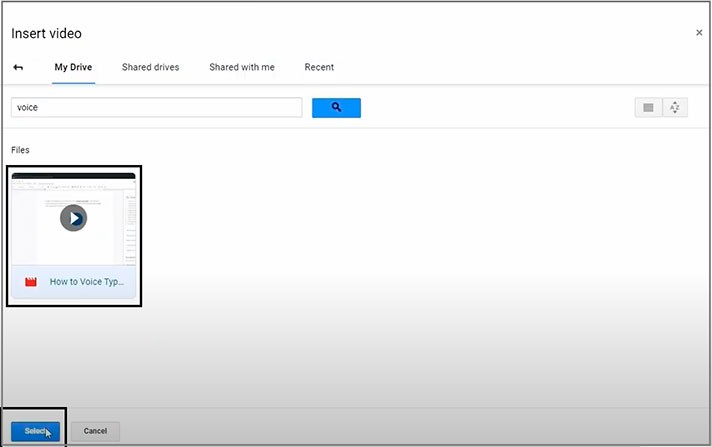
- We click on the video and then press “Select” at the bottom of the window
- Here it is inserted above everything on the slide. Concerning its placement on the doc, it is no different from how you do it with images. You can click-hold it and move it over the working area. You can expand it by pulling either edge of the figure and decrease it with the same technique
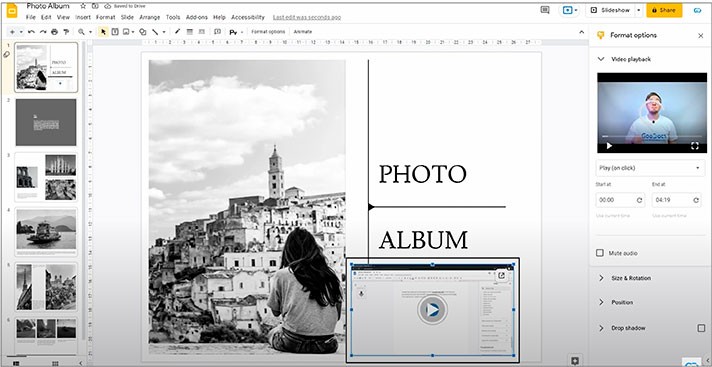
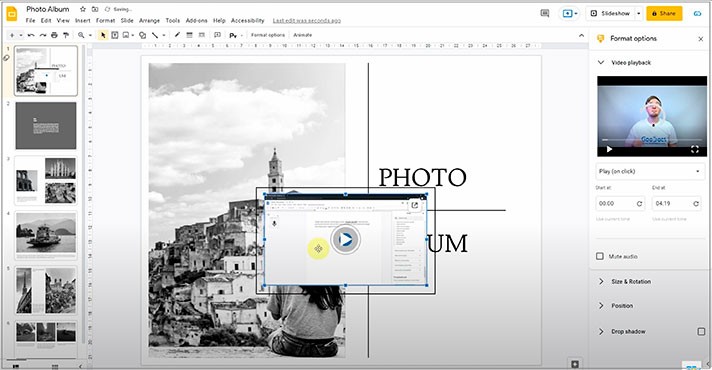
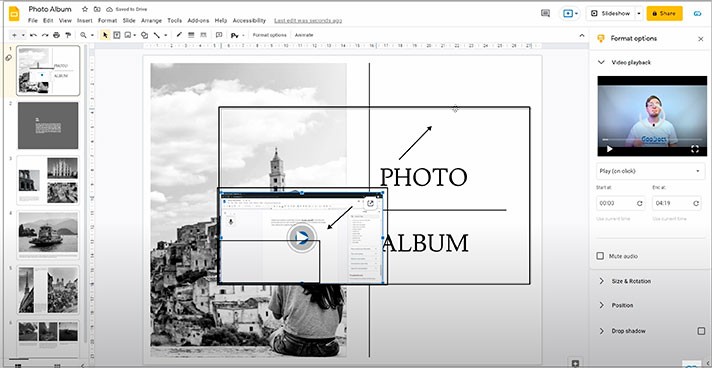
- Also, as you can see, when the element is highlighted, there’s this button in the corner with a link in it that leads directly to the file on the Drive if you press it
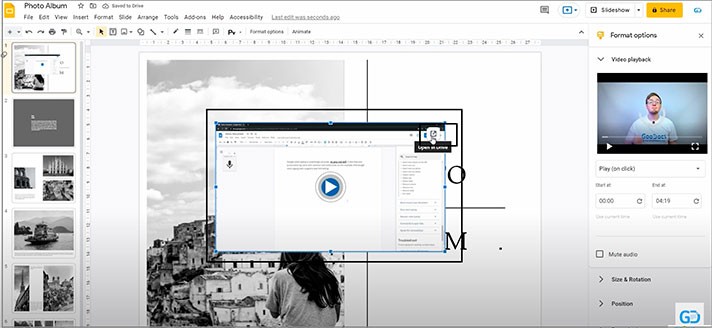
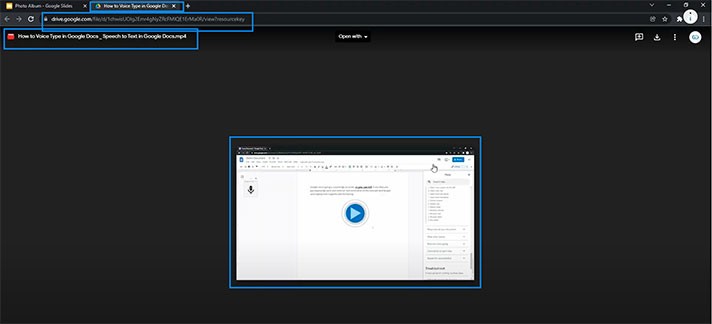
Back to the presentation. And here is how you insert a video into Google Slides.
Formatting the Video
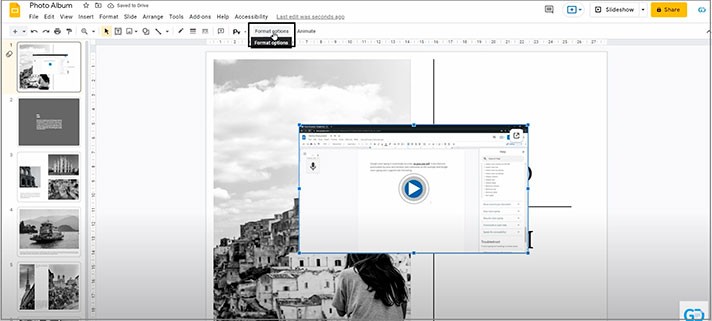
- Similar to images, you have some format options. They either appear just when you have dropped the video onto the doc, or you can select the element
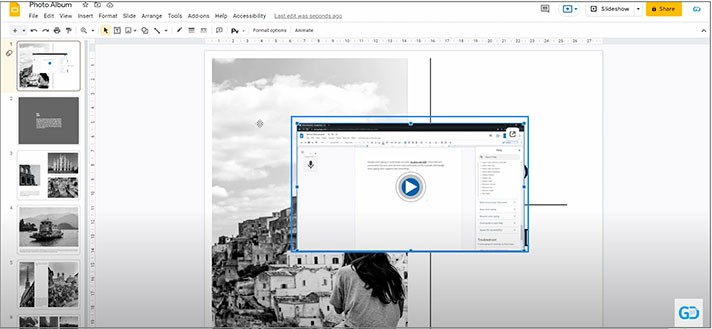
- And here, on the toolbar on top, you can create the border for the element
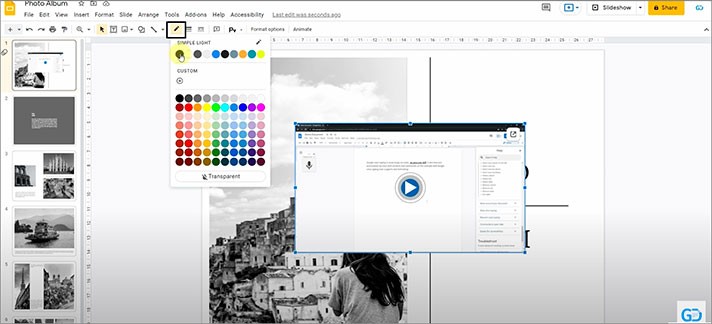
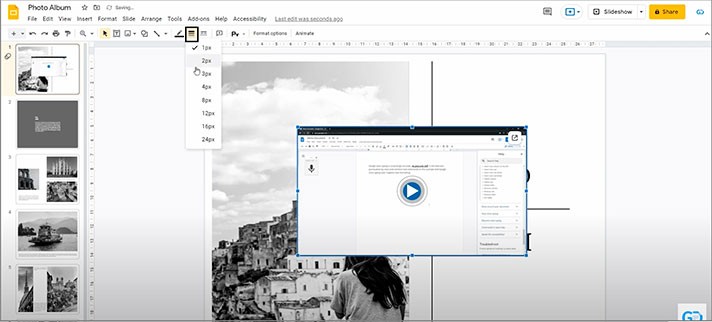
- Increase its weight
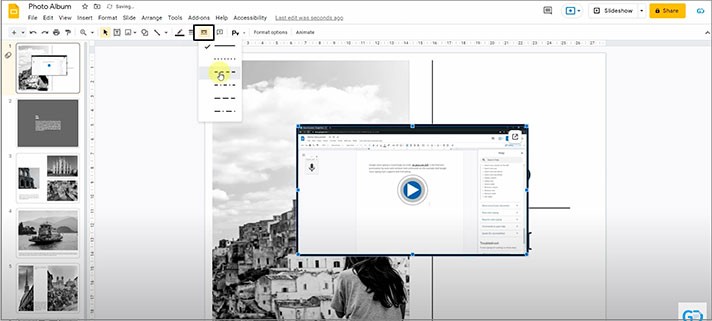
- And change the border dash
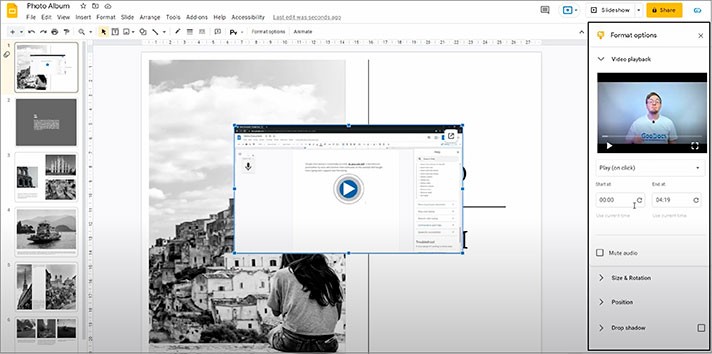
- But then there are advanced format options here. We press this item (you will see on the screenshot below), and that opens the format menu on the right
Video Play Settings
- What’s awesome here is that you can preview your video first up. And this option here is exactly to let you set which part of the video you want to show on the presentation when you select the video and dismiss other parts of it
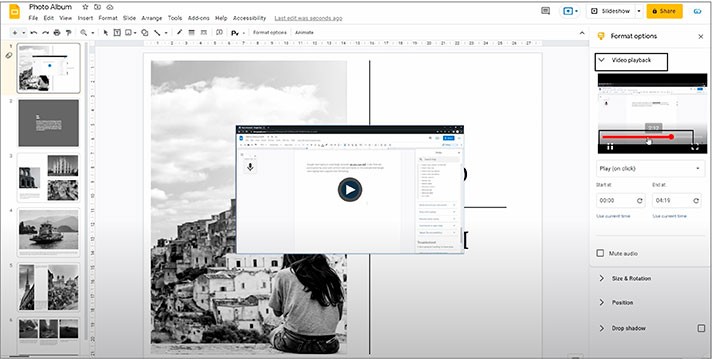
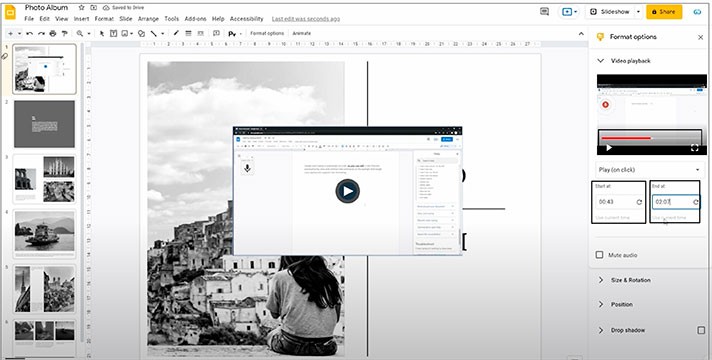
- This instrument allows you to set the start and end points here, making only a part of the video on the demonstration. Let us show you. We will just set the end point at 3 seconds, and then we will click on the play button in the middle of the element
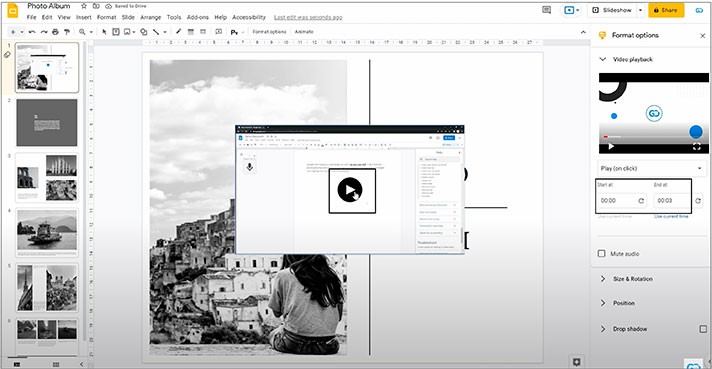
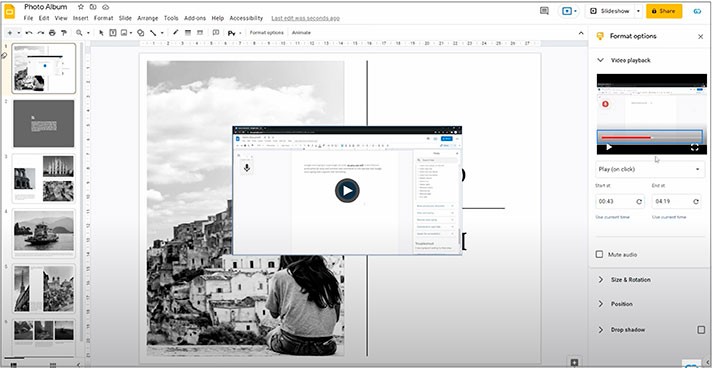
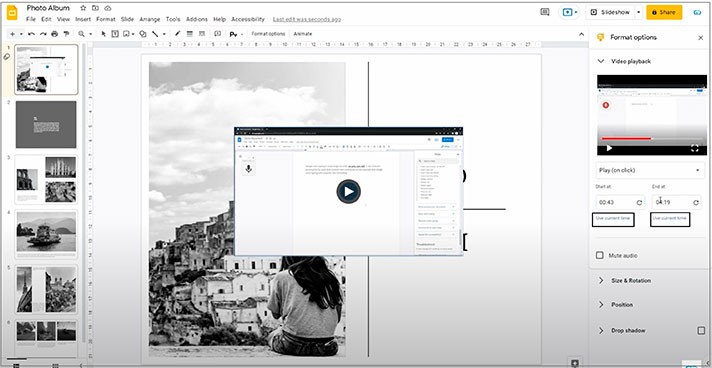
- And below the field, press “Use current time” for the start point. It will put the position here, and the same concerning the end point, where we press anywhere on a timeline again. But then “Use current time” below the “End at” field, which is a really nice feature. And now you know how to use it
Other Features
- Concerning other elements on the format menu, there’s “Size & Rotation”, which, as usual, allows you to manually adjust the dimensions of the element centimeter by centimeter and change its scale
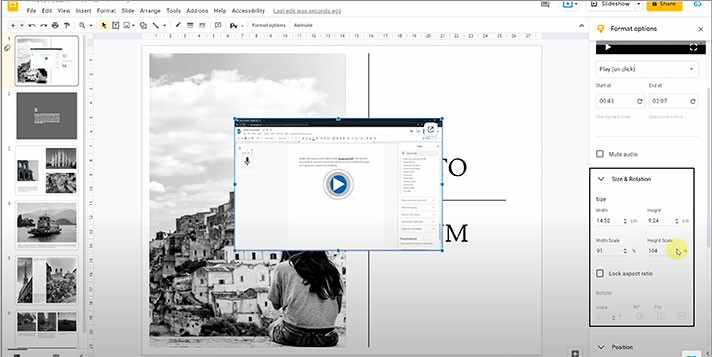
- On the next menu item, you can adjust the figure position more finely on an XY axis
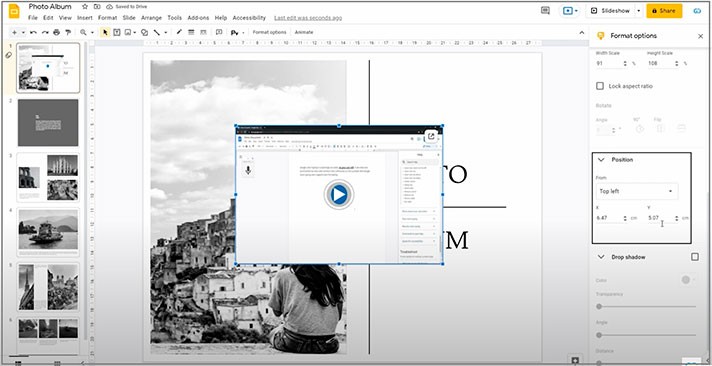
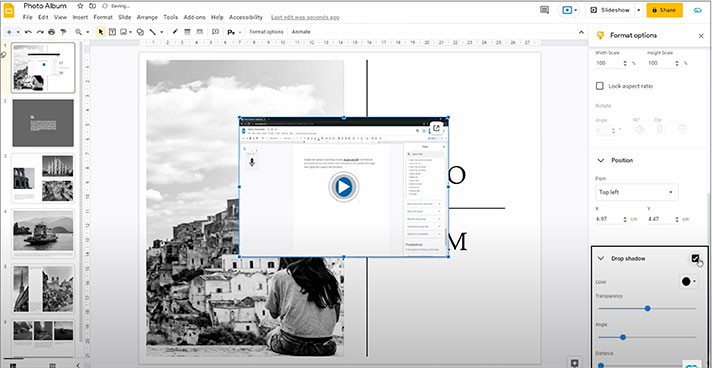
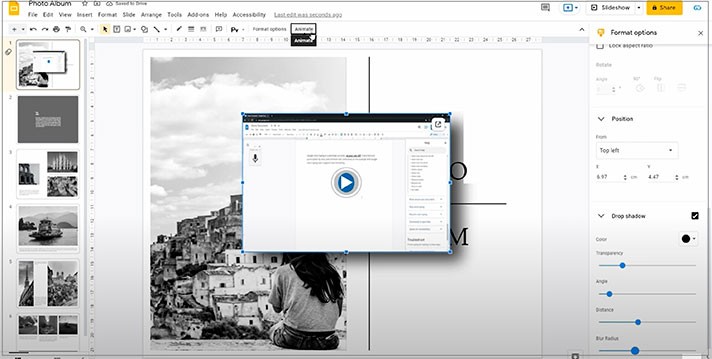
- And the last item is the “Drop shadow” option, which is adjustable with these sliders. Basically, making the object cast a shadow to make it look deeper and stand out from other elements, which is commonly used with text, word art, and images
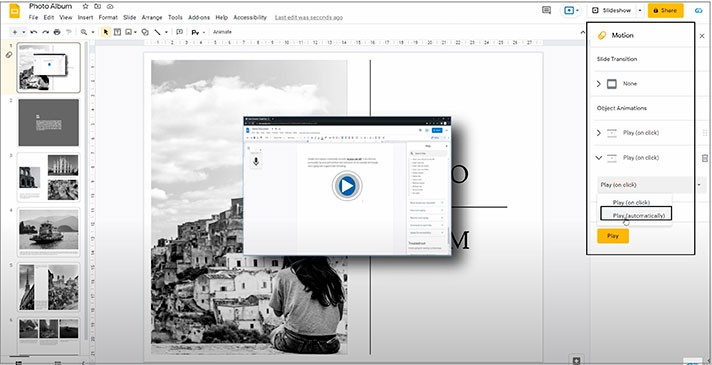
- And to delete the video, select it, and then press the Backspace or Delete button
We hope this tutorial will help you learn how to insert a video into Google Docs. Good luck!

We are a team of creative people who dream of sharing knowledge and making your work and study easier. Our team of professional designers prepares unique free templates. We create handy template descriptions for you to help you choose the most suitable one. On our blog, you'll find step-by-step tutorials on how to use Google Products. And our YouTube channel will show you all the ins and outs of Google products with examples.


