How to Edit Templates in Google Docs

How to Edit the Text in Google Docs Templates
When we talk about text editing, we can apply the following standard edits:
- Change the text style (for the whole text or a chosen fragment, for instance). You can easily select the necessary text where you need to apply another style.
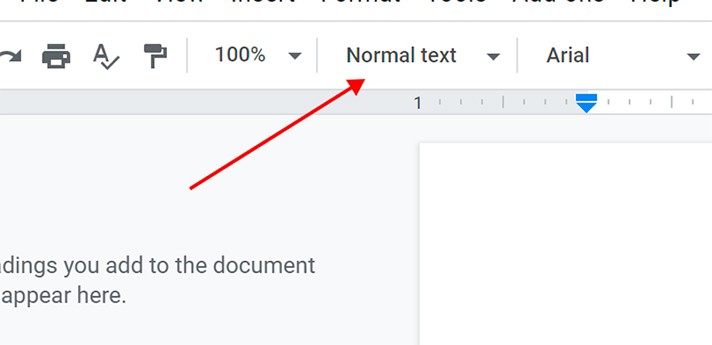
- Choose the font(s) that you like
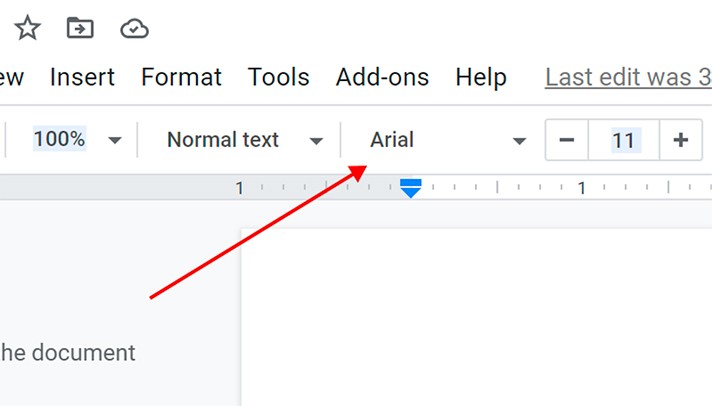
- Set up the required font size
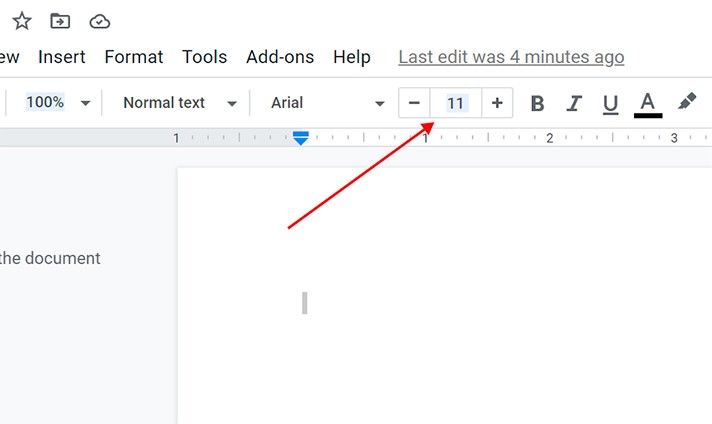
- Choose the optional features (bold, italic, underlined text)
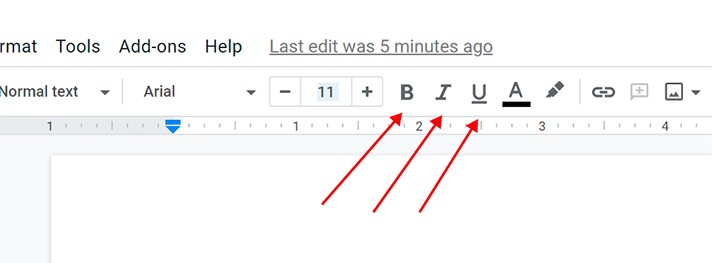
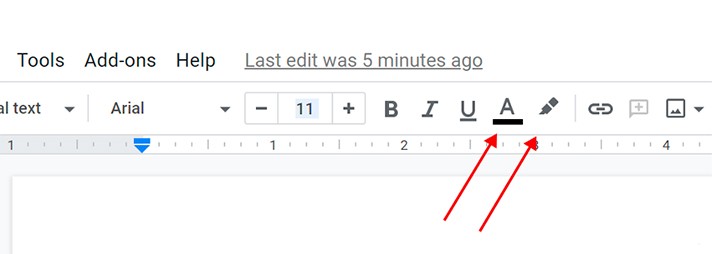
- Select text color and highlight color
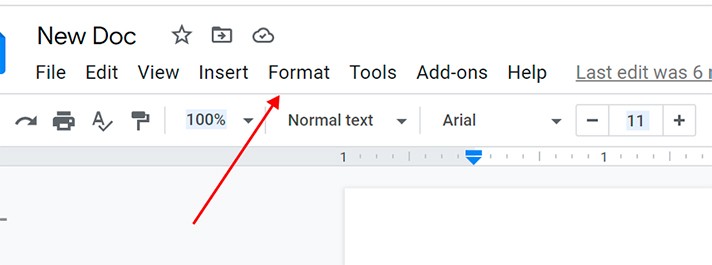
- Search for more tools for text editing by clicking Format - Text
How to Work with the Images in Google Docs
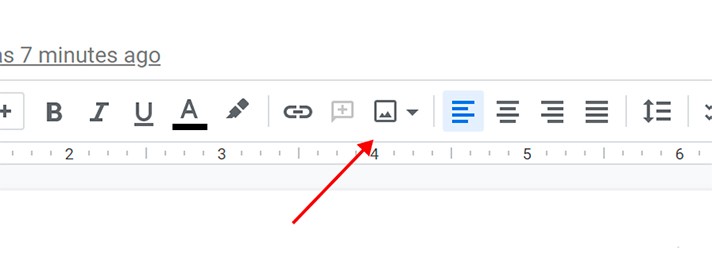
- When you need to change an image in a Google Docs template, press Insert image (the icon at once) or Insert - Image and simply choose the most comfortable way and space to find and upload it.

- In case you should replace an image, you need to choose the necessary image that you want to replace with another one and click Replace image.
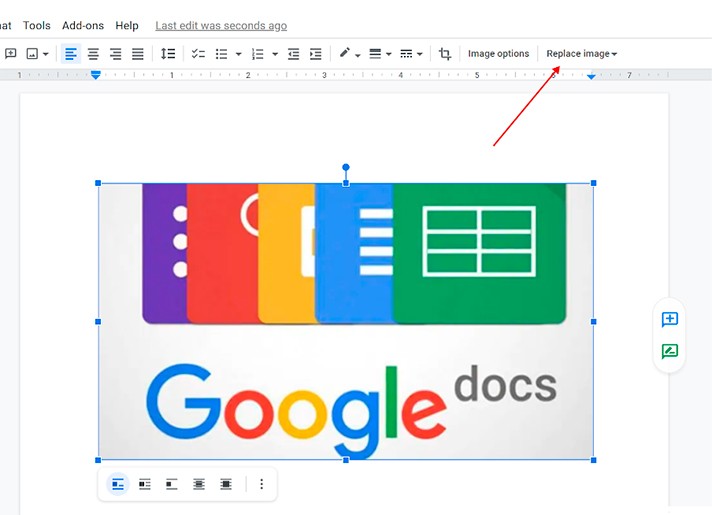
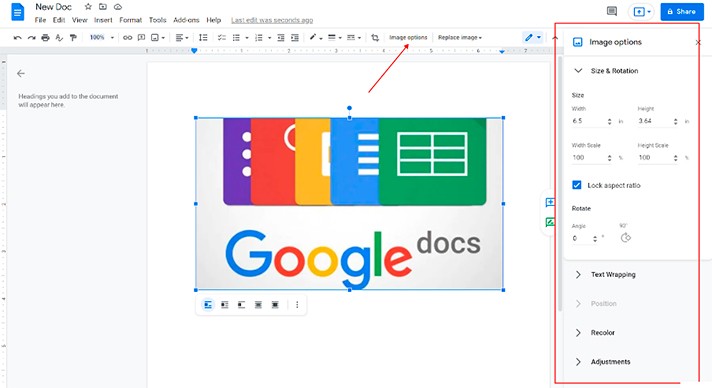
- If you would like to customize the image, just choose the required image and press Image options (size and rotation, text wrapping, style, wrap, margins from text, position, recolor, adjustments, etc.)
How to Insert and Edit a Table in Google Docs
You can use the table when it`s necessary to present data, images, etc., in a more user-friendly display.
- To add a table, you should put a cursor where you need to insert a table. Then click Insert - Table (and choose the required size).

- To edit a table, you ought to use several methods. You may need to change the number of columns and rows, resize them, add a cell border, etc.
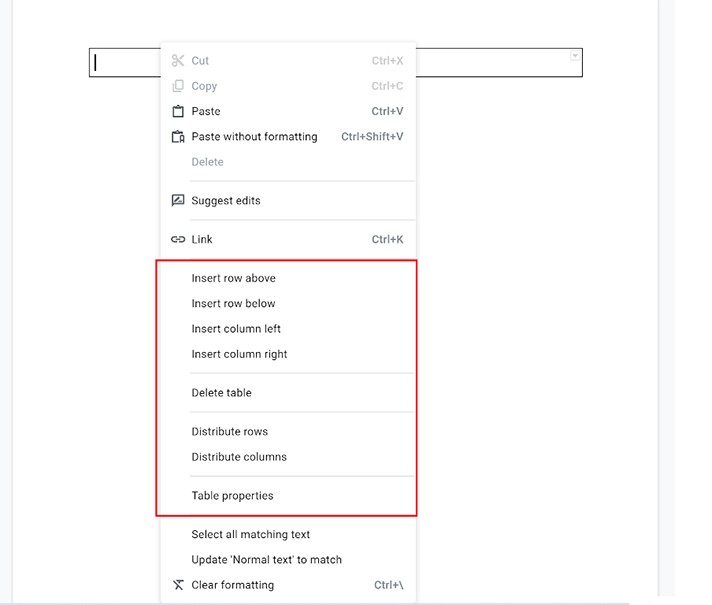
- To add or remove columns/rows, go to a necessary cell in the table (where you need the changes with a column/row). After that, please, right-click and you will see various Insert and Delete options for the rows and columns. If you want to remove the whole table, just click Delete table for this purpose.
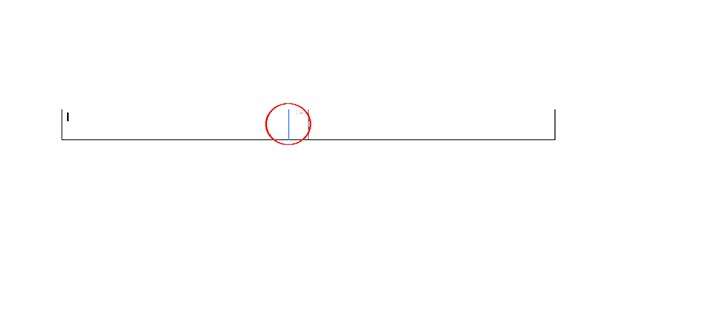
- To resize and adjust the columns/rows in the table, place the cursor on the border of the cell in the row/column that you need to adjust. Then click when you see the double-sized arrow display. The border for the row or column will be highlighted in blue. So, you should drag the line to resize and, after that, release. Let us look.
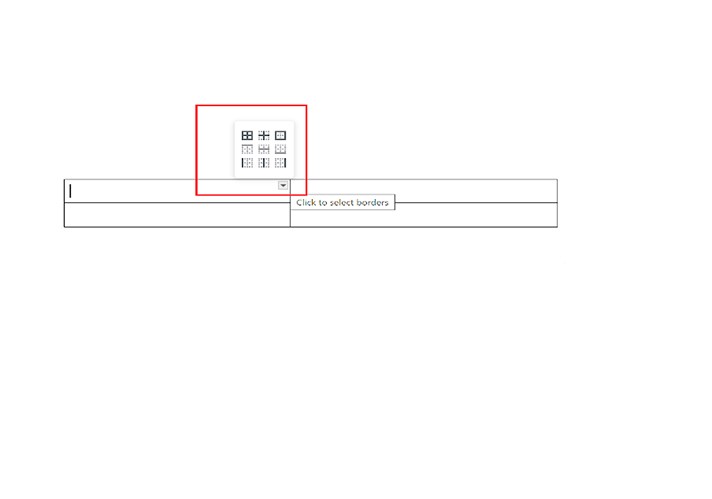
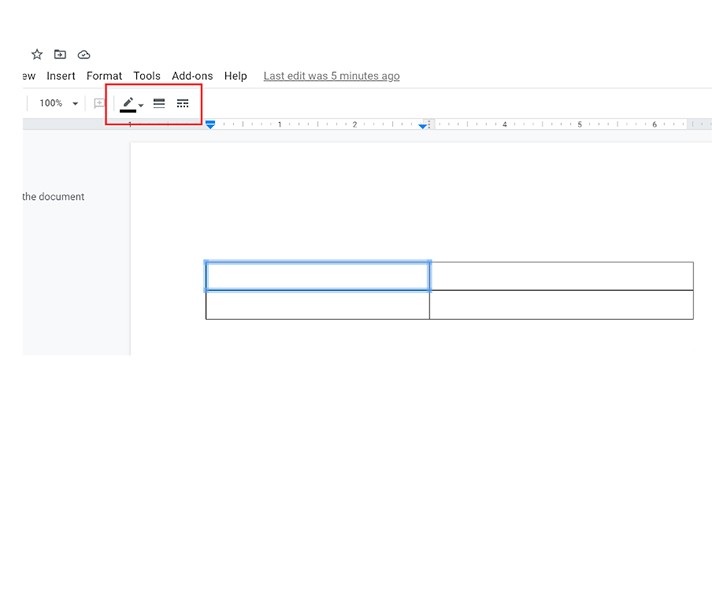
- To add a cell border, you should select the required cell and click the small arrow that appears. Then, the small pop-up window emerges so that you can choose the necessary placement for the cell border. After that, you will see the toolbar where you may customize the border. It's possible to select the border color, border width, border dash.You can select several cells at once to perform the changes for all of them. Or choose one cell after another one when you need a different customization for each. The function of cell border addition helps create the visual highlights of the cell and, respectively, the data placed in it.
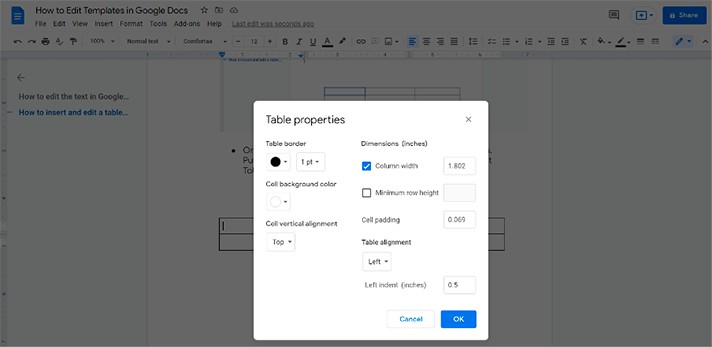
- One more way to adjust your table is to use Table Properties. Put your cursor in any cell of your table, right-click and select Table Properties. Let us show you how to find this option. And then, you may adjust all the necessary settings.
How to Convert the Template to Another Format
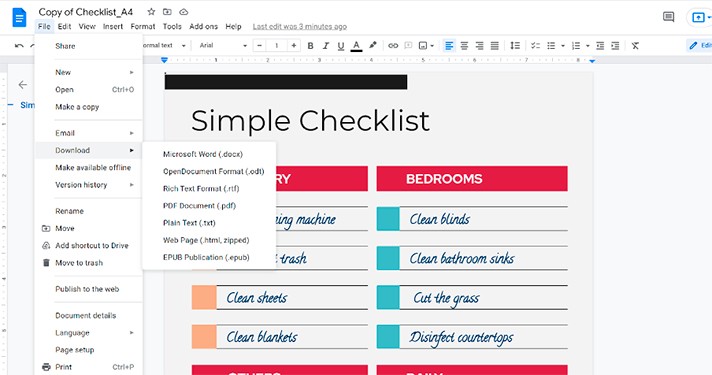
To convert the Google Docs template to other formats, you should click File and choose Download. There is a wide variety of available formats to select. And you will have your template in another format, really easy. Let us show you.
How to Add/Change Headers and Footers
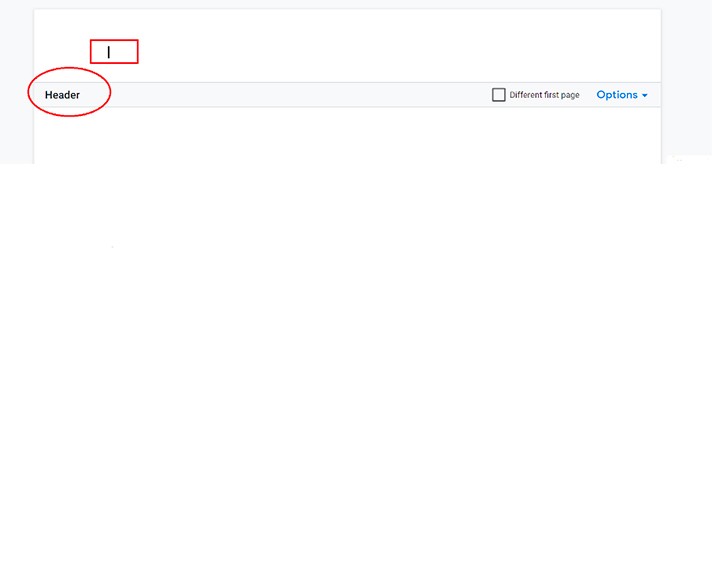
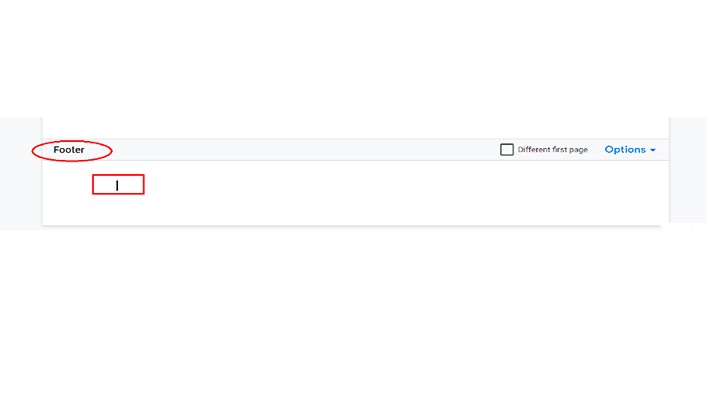
Initially, how do we describe the header and footer? So, the section of the document that emerges in the top margin is called the header. Accordingly, the section that appears in the bottom margin is named the footer.
So, where can we find them: header and footer?
To insert the header or footer, you should click Insert - Headers & Footers (and choose then). We can see the shortcuts for this option, too. You will see them in the screenshot below.
And now you can type the text in the header/footer, format it, and provide any modifications you like.
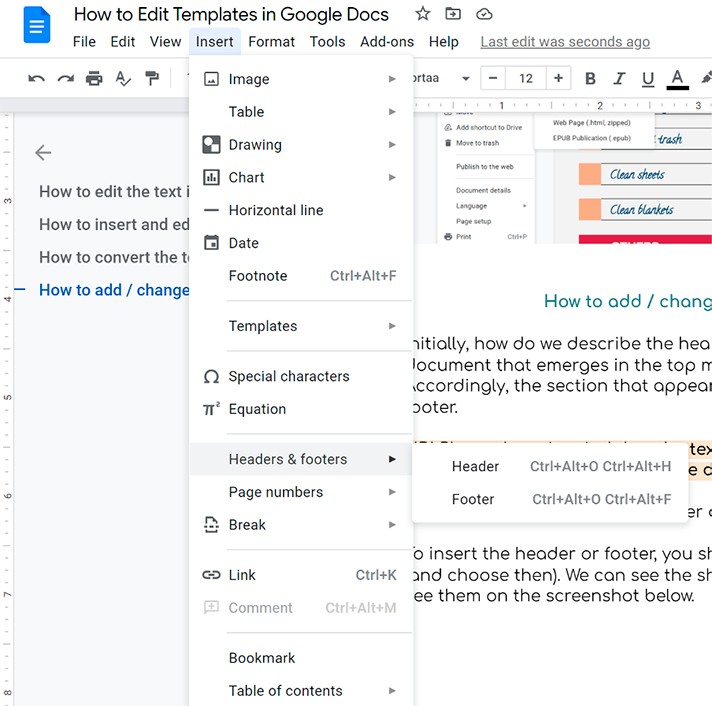
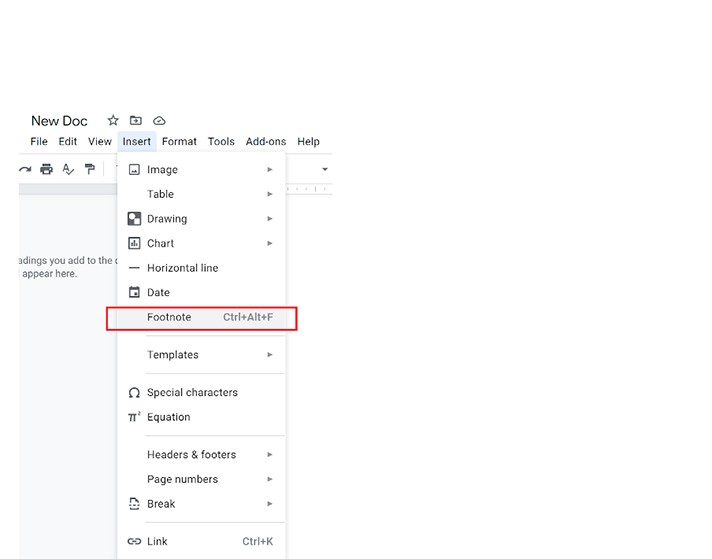
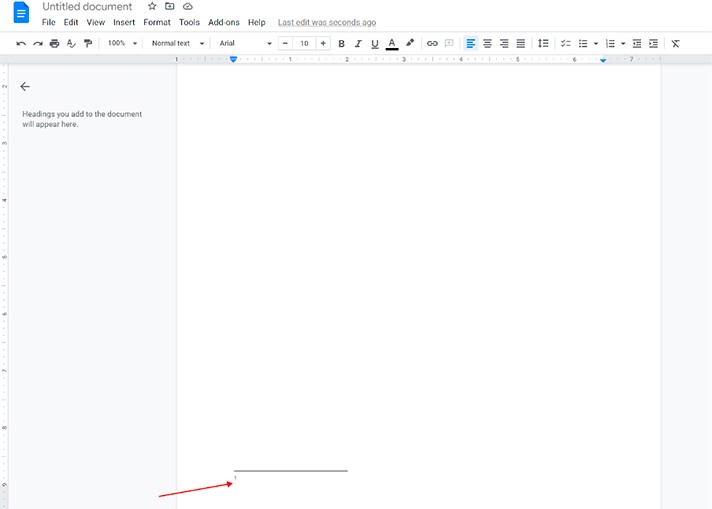
If you need to add footnotes, click Insert - Footnote. Or use the shortcuts (you can see on the screenshot below).
How to Add a Page Number
Sometimes you may need to add page numbers to your document. Let us look at how to do this.
Let us look at how to do this.
Go to Insert - Page numbers. Then choose the necessary format for inserting the page numbers.
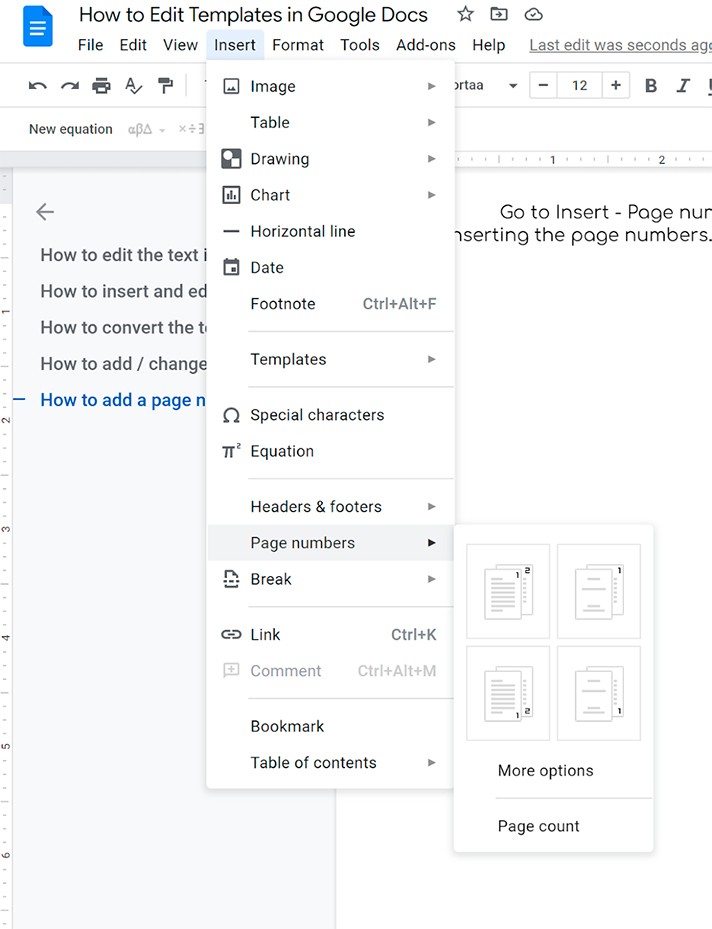
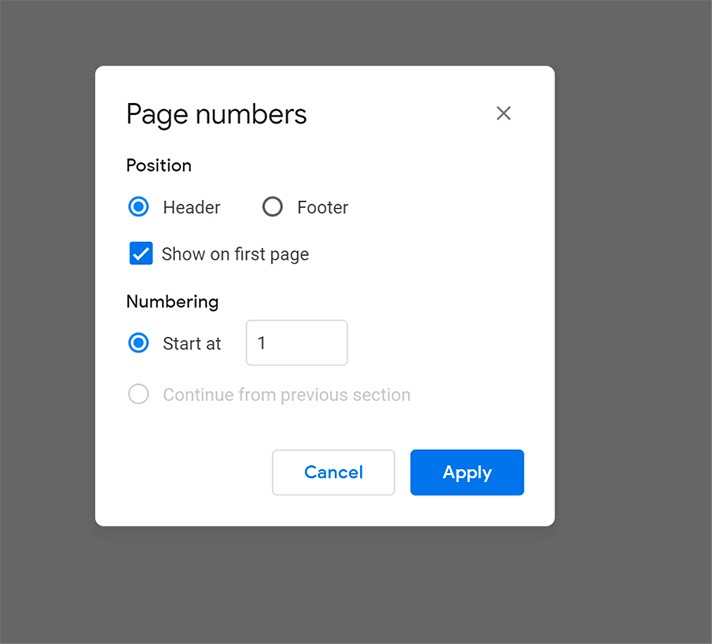
You can customize the settings of page numbers by clicking More options (Insert - Page numbers - More options).
There is a helpful option to count the pages and write the page count result - Insert - Page numbers - Page count. Of course, we usually know the page count. We may scroll and see the necessary page. However, this option may come in handy.
How to Align the Text
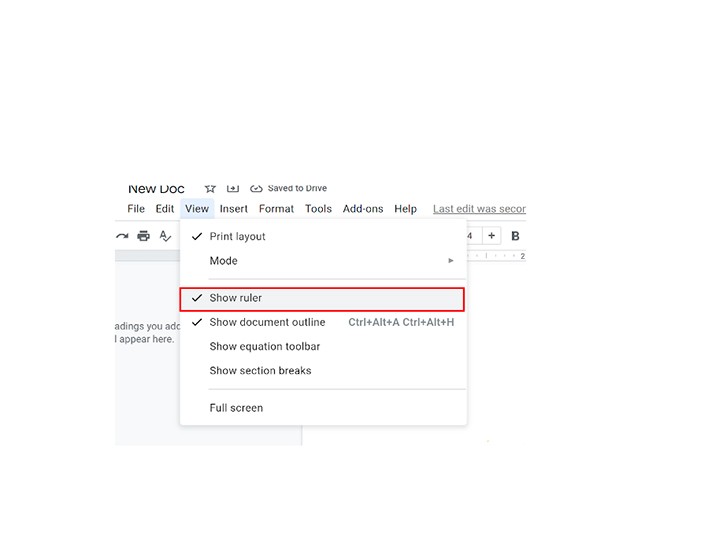
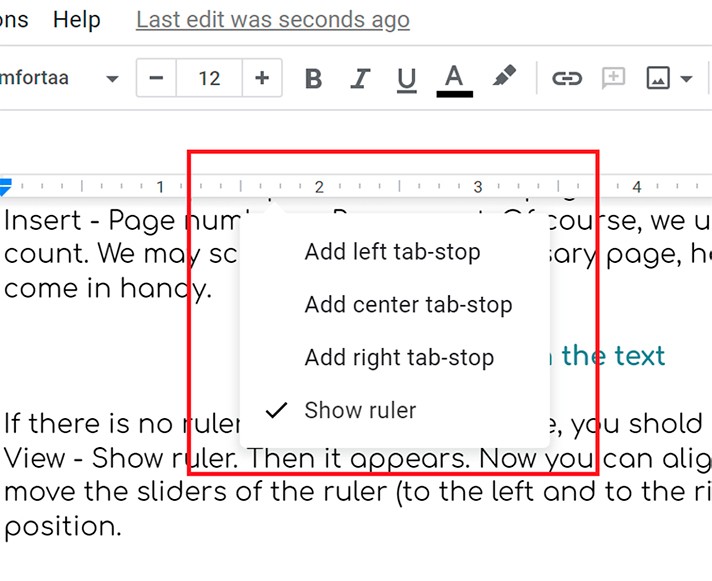
If there is no ruler at the top of the page, you should activate it by clicking View - Show ruler. Then it appears. Now you can align your text. You can move the sliders of the ruler (to the left and the right) to find the required position.
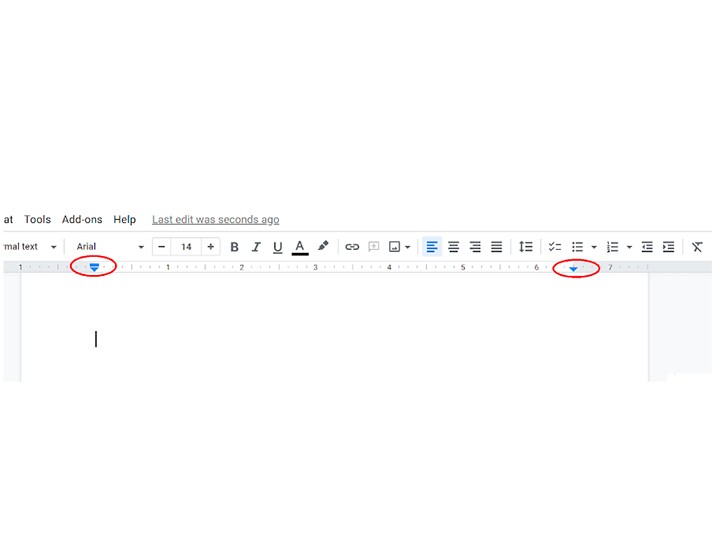
Moreover, you can add the tab-stops. Just left-click on the ruler, and you will see the options to choose.
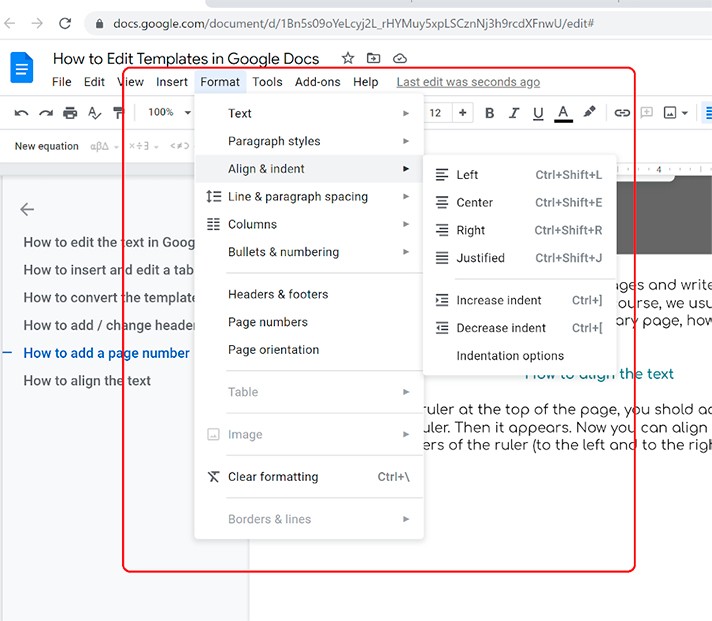
The good idea is to click Format - Align & indent. And there you will have lots of options to select.
Sample Template Editing
Below you will see the sample Google Docs template. We are going to offer several basic editing ideas for it.
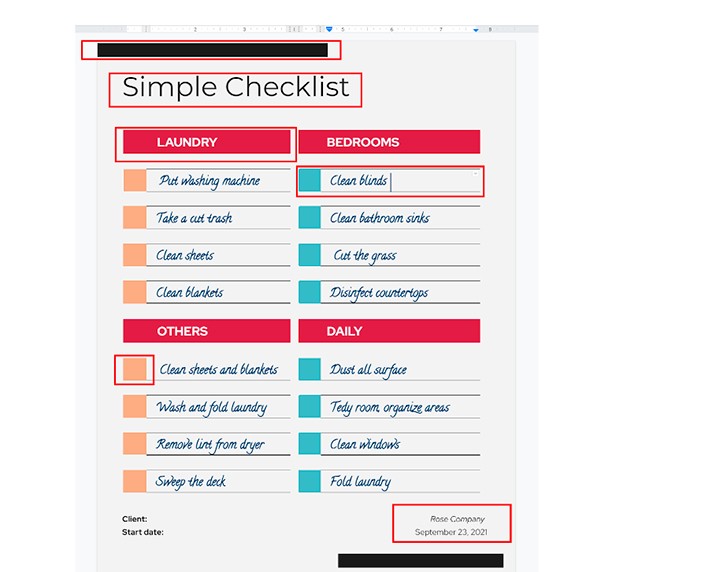
On the screenshot, there are the pointers to what we are going to customize. We take these ideas as an example only. So, we use all the suitable options and tools to edit the required things in the template.
Let us have a look at our template customization:
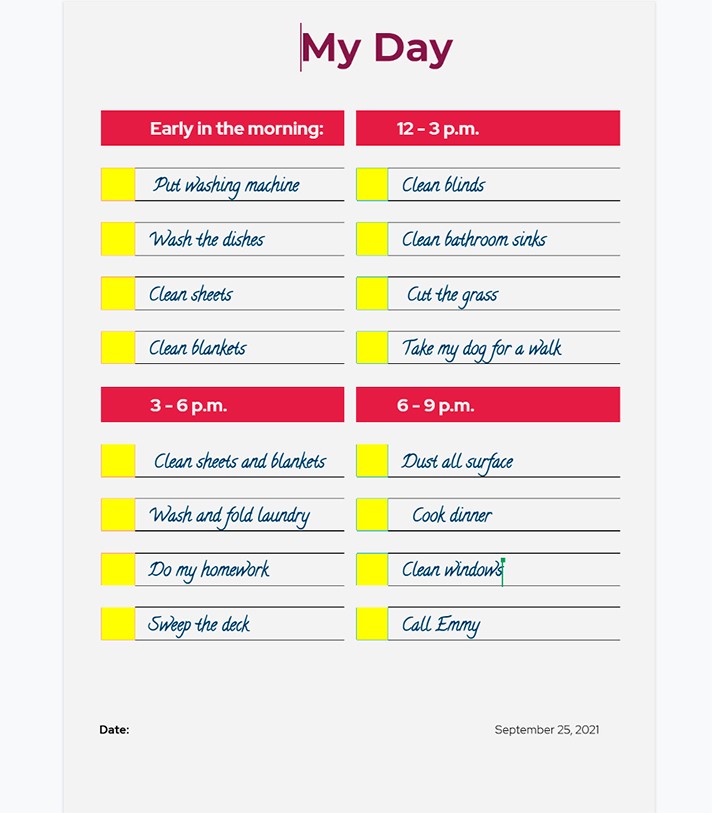
When we talk about editing Google Docs templates, we mean easiness, comfort, creativity, and usability. We can continue this list without stopping adding more and more positive adjectives to describe the way to edit the templates in Google Docs. But we highly recommend reading in detail and practicing using Google Docs templates, customizing them, and creating perfect documents. Good luck!

We are a team of creative people who dream of sharing knowledge and making your work and study easier. Our team of professional designers prepares unique free templates. We create handy template descriptions for you to help you choose the most suitable one. On our blog, you'll find step-by-step tutorials on how to use Google Products. And our YouTube channel will show you all the ins and outs of Google products with examples.


