How to Delete Rows in Google Sheets
In the digital age where data has become the new gold, Google Sheets has solidified its position as one of the most powerful and user-friendly tools for data management. Whether you're a student juggling homework assignments, a project manager tracking tasks, or a researcher analyzing data, Google Sheets can be an invaluable asset. But, as you deal with hundreds, or even thousands, of data entries, deleting unneeded rows can become a complicated task.
Why Delete Rows in Google Sheets?
Data can sometimes be messy. It might be filled with redundant information, errors, or irrelevant entries. In these cases, deleting unnecessary rows becomes crucial to maintain the integrity of the data and ensure your analysis remains accurate.
Deleting rows allows you to:
- Maintain data cleanliness. Keep your data organized and free of clutter.
- Improve data accuracy. Remove irrelevant or erroneous data that could skew your analysis.
- Enhance performance. Too many unnecessary rows can slow down the loading time of your sheet and make it cumbersome to navigate.
- Streamline data analysis. Less clutter means it's easier to spot trends, patterns, and outliers.
Who Can Utilize These Methods?
The beauty of Google Sheets lies in its accessibility and ease of use. As such, anyone, regardless of their technical expertise, can learn to delete rows.
- Students. To manage assignments, project work, or research data.
- Professionals. For efficient project management, data analysis, financial tracking, and more.
- Researchers. For cleaning datasets, making it easier to analyze and interpret results.
- Educators. To track student progress, assignments, or exam scores.
How to Delete Rows in Google Sheets
Now, let's dive into the step-by-step process of deleting rows in Google Sheets.
Open your Google Sheets document.
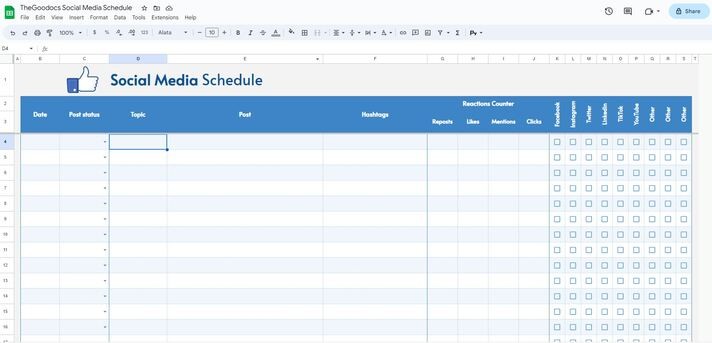
Select the row that you want to delete. You can do this by clicking on the row number on the left side of the sheet.
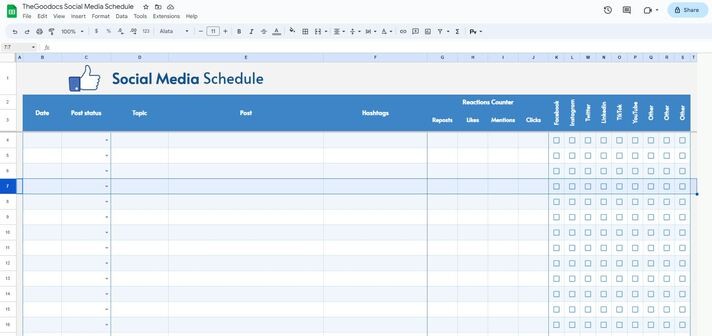
Right-click on the selected row to open a drop-down menu.
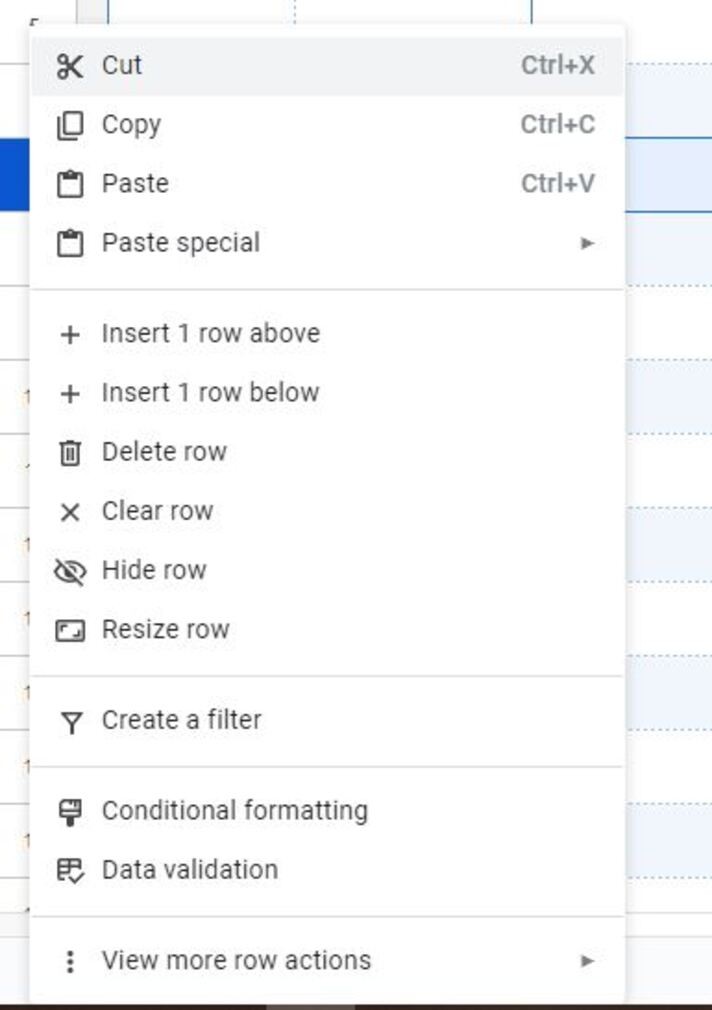
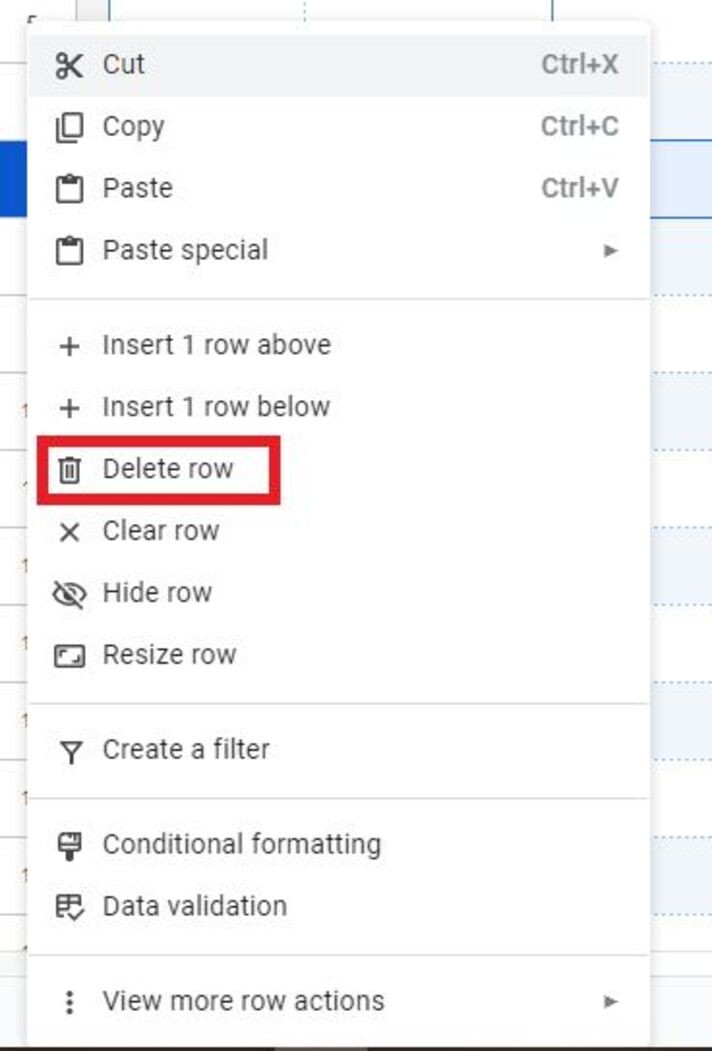
In the drop-down menu, find and click on the "Delete row" option. It will immediately remove the selected row from your Google Sheets document.
Remember, you can also select and delete multiple rows at the same time. Simply click and drag over the row numbers to select multiple rows, then right-click and choose "Delete rows”.

Advanced Deletion Techniques
For more complex datasets, you might need more advanced row deletion techniques. Google Sheets offers options like deleting duplicate rows or rows that meet specific criteria.
Delete Duplicates: Click the "Data" tab in the menu, and you'll find the "Data Cleanup" section, then find the “Remove Duplicates” option.
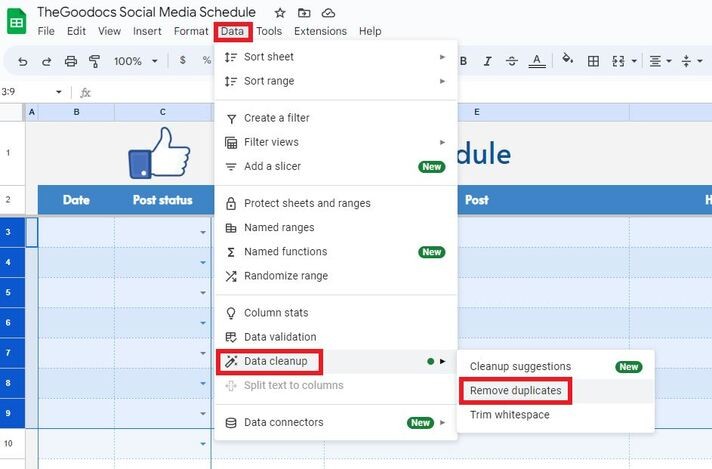
It will open a new window where you can specify the columns you want to consider for duplicate identification. Once you've made your selections, click "Remove duplicates" to delete the duplicate rows.
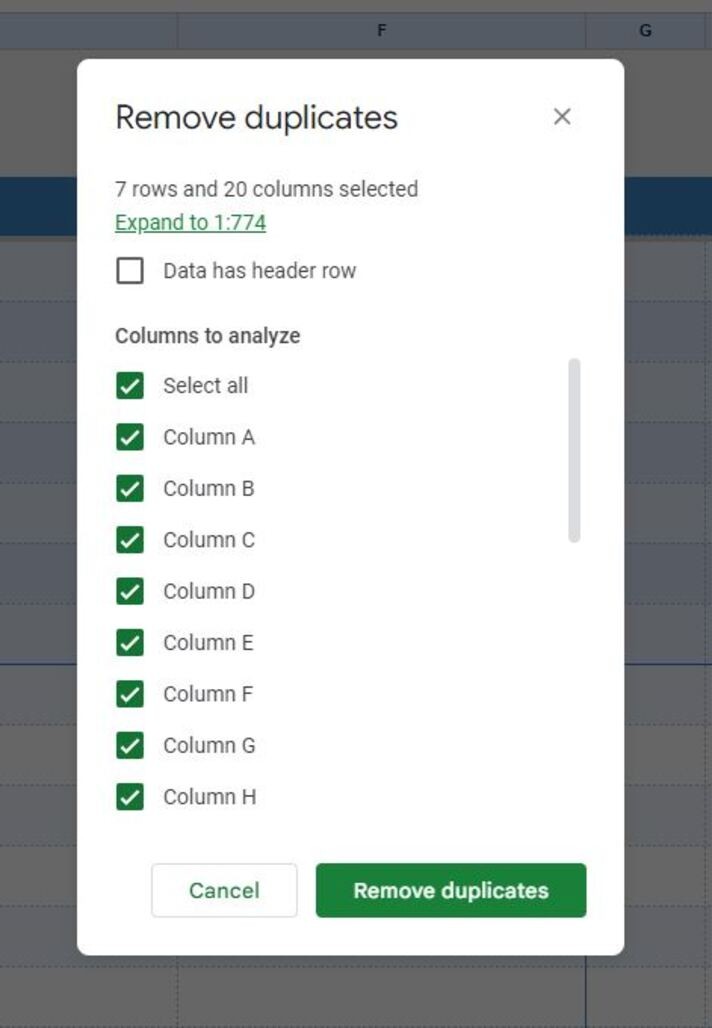
Delete Rows Based on Criteria: For this, you'll need to use the "Filter" function.
First, select the column based on which you want to delete rows. Click on "Data" in the menu and then "Create a filter."
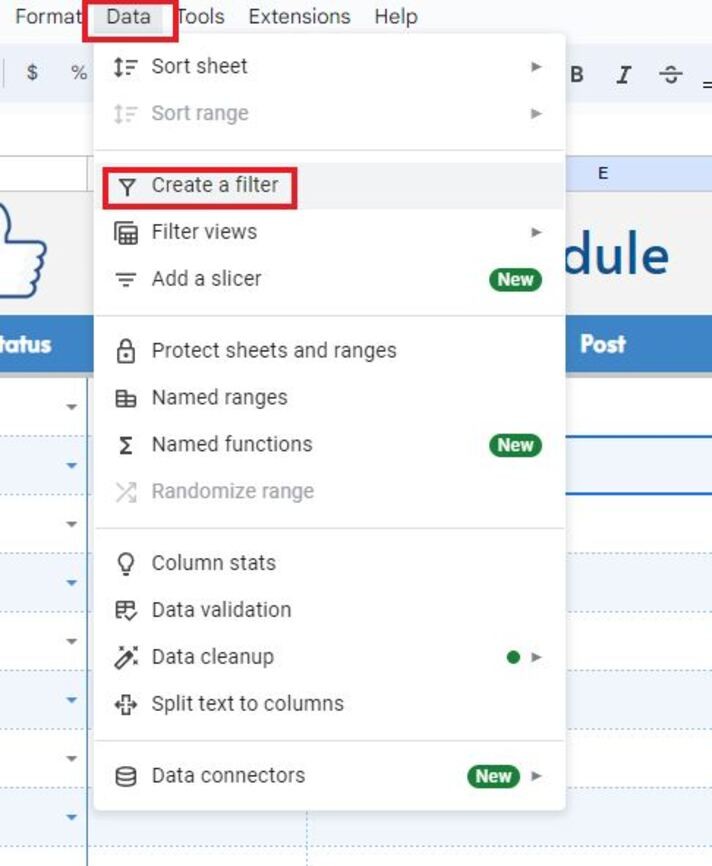
A small icon will appear in the column header, click on it, and set your criteria. Once your filter is applied, only the rows meeting the criteria will be visible. You can then select these rows and delete them as described above.
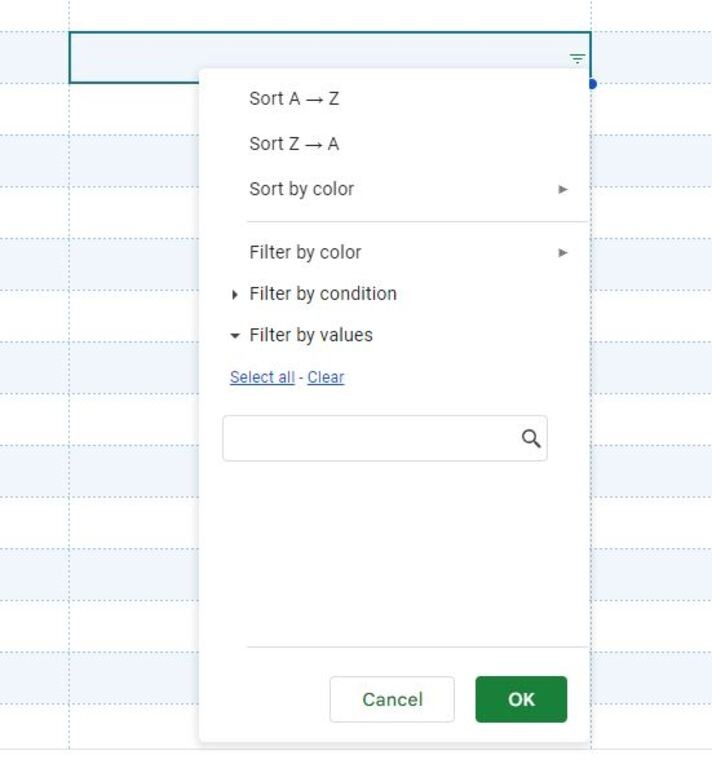
Deleting rows in Google Sheets is an essential skill that can help improve your workflow, ensuring you're working with the most relevant and accurate data. However, it's important to use this function carefully. Deleted rows cannot be recovered once the sheet is closed, so always double-check to make sure you're removing the correct data.
Saving Time with Keyboard Shortcuts
Another way to increase your efficiency when managing data in Google Sheets is by using keyboard shortcuts. To delete a row, select the row you want to remove, then press "Ctrl + Shift + -" on Windows or "⌘ + Shift + -" on Mac. This will delete the selected row, saving you a few extra clicks.
Beneficial Extensions and Add-Ons
Google Sheets supports various extensions and add-ons that can further enhance your data management capabilities. One notable add-on is "Remove Blank Rows." This extension, as the name suggests, can automatically detect and remove blank rows in your sheet, which can save considerable time if you're working with large datasets.
Conclusion
Deleting rows in Google Sheets is a fundamental skill for anyone seeking to work efficiently with data. Whether you're a student, a professional, a researcher, or an educator, mastering this feature will greatly enhance your data management capabilities, leading to cleaner, more accurate, and more manageable datasets.
The beauty of Google Sheets, and indeed most Google Workspace applications, is their user-friendly design. This makes them accessible to a wide range of users, regardless of technical expertise. So, whether you're just starting with Google Sheets or looking to brush up on your skills, understanding how to delete rows effectively is a vital step on your journey to becoming a proficient Google Sheets user.
Remember, while deletion is a powerful tool, it's also permanent. Always double-check your selections before deleting any rows to ensure you're not removing any important data. By following the steps and tips outlined in this article, you'll be well on your way to mastering row management in Google Sheets.
The next time you're faced with a cluttered dataset, don't despair. With these skills in your arsenal, you'll be able to quickly and easily clean up your Google Sheets, making your data analysis more efficient, accurate, and insightful. Happy data management!

We are a team of creative people who dream of sharing knowledge and making your work and study easier. Our team of professional designers prepares unique free templates. We create handy template descriptions for you to help you choose the most suitable one. On our blog, you'll find step-by-step tutorials on how to use Google Products. And our YouTube channel will show you all the ins and outs of Google products with examples.


