How to Add Lines in Google Docs?
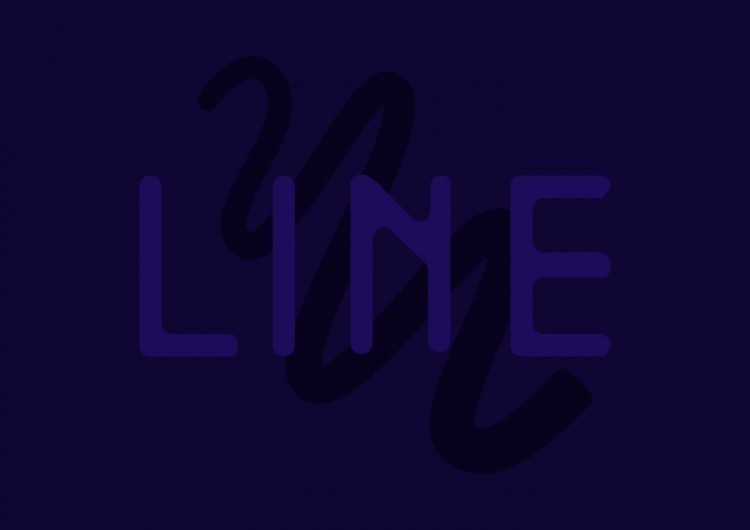
In this tutorial, we draw lines on an image in Google Docs. Except for simple lines, Google Docs lets you create arrows, connection and curved lines, polylines, and even scribbles by hand, and, of course, customize them the way you want. Drawing lines in Google Docs means creating an image at first; that’s just how it’s made here. And in Google Docs, we do that via a drawing canvas. So, let’s get there.
Watch the video from https://thegoodocs.com/ and find out how to add lines in Google Docs:
Entering the Drawing Mode and Uploading an Image
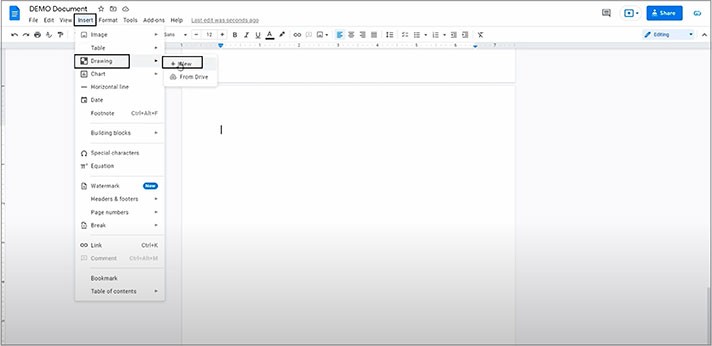
- We start by clicking on the “Insert” item on the toolbar on top of the page, and then in the menu, we go down to the 3rd item “Drawing”, and now clicking “New” on the right
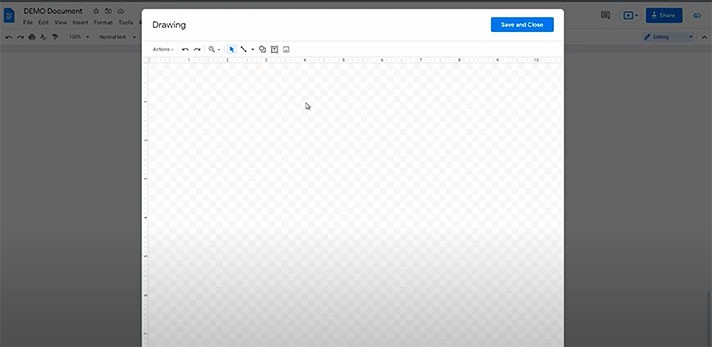
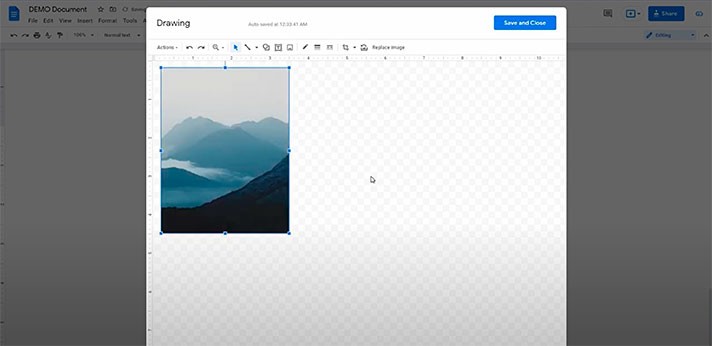
- That opens a drawing canvas that is really easy to work with. Usually, at first, you create textboxes or upload an image to draw over it. So, let us quickly get one from our computer
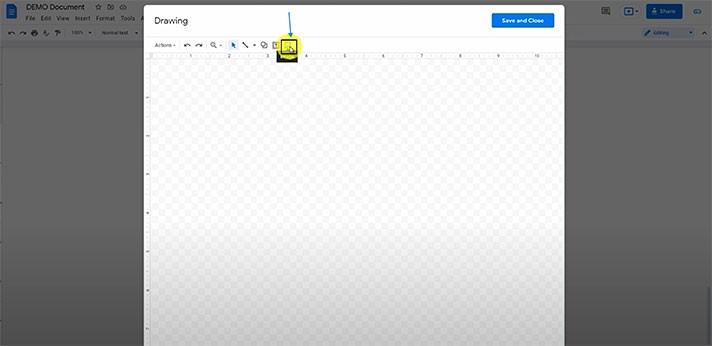
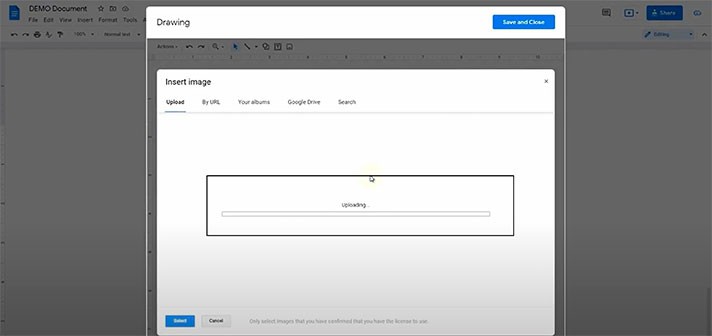
- We press this rightmost icon for the image, and then we are just dropping it here from our PC
Drawing a Line and Customizing It
- Now it’s time to draw the lines, and for that, we need namely this icon on the toolbar with a line
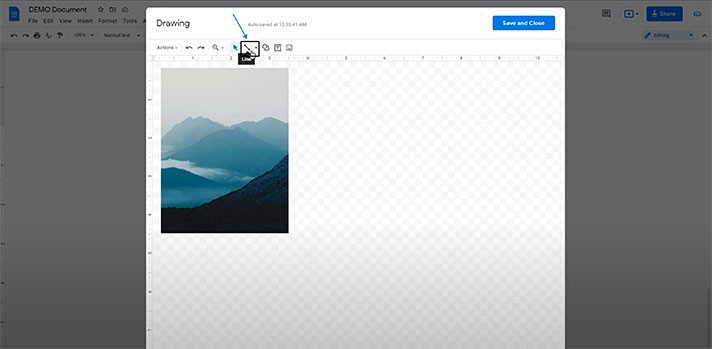
- Once you press it, you can go on and draw a line. Put the mouse pointer where you want the line to start, press-hold and move it to the end point. Now release and here it is
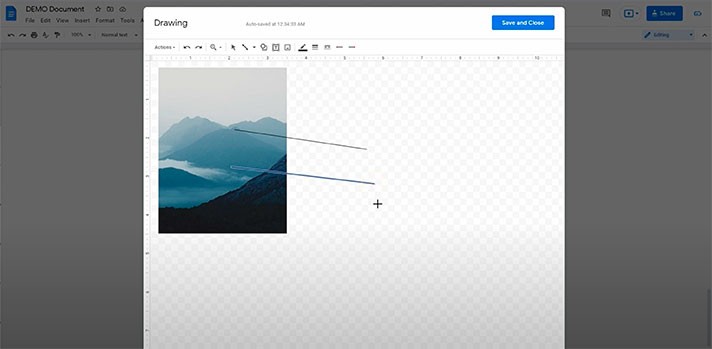
- If you want to move it somewhere else, press “Esc” to exit the drawing mode. Then press-hold on the line and drag it where you want it to be
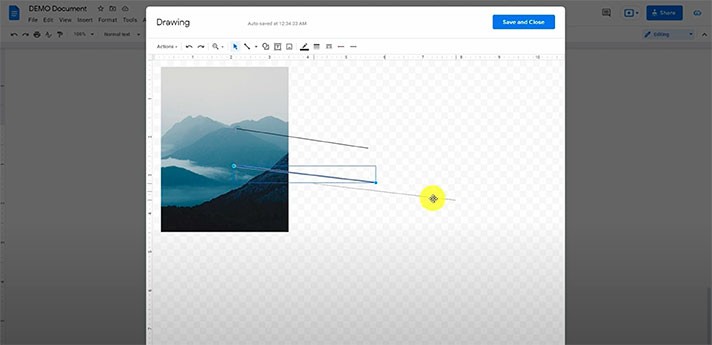
- If you want to resize it and change the start and end points, pull from either end of the line, where you see these circles, and you’ll be able to rearrange line end and start points
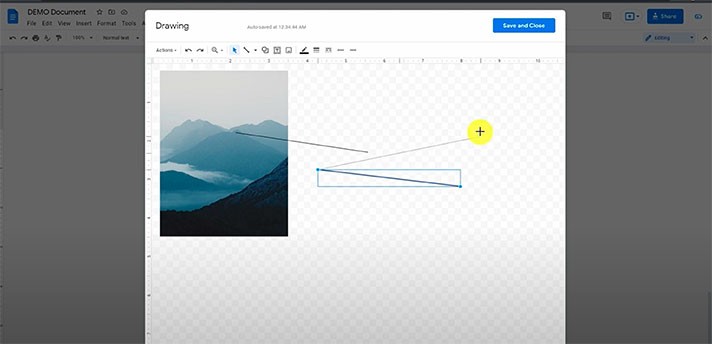
- Now from here, we customize the looks of the line. And here, on the toolbar, these are the tools for doing that
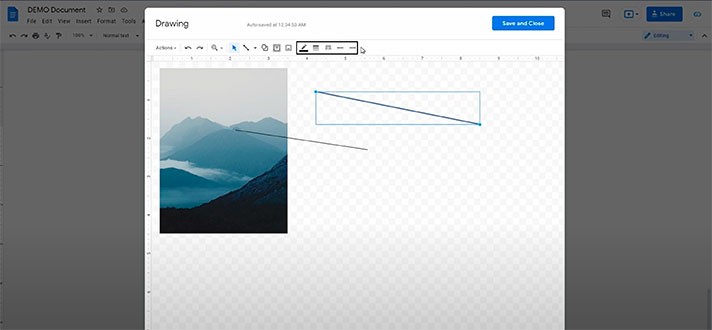
- The first is the “Line color” item where you pick either some standard one or do a custom color with this plus icon. We will pick a red one as a sample to just show you how it looks like
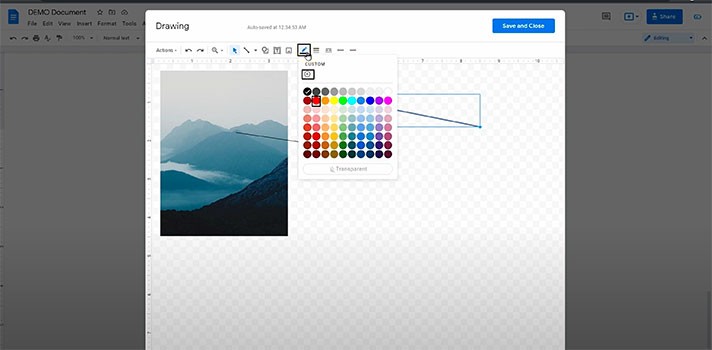
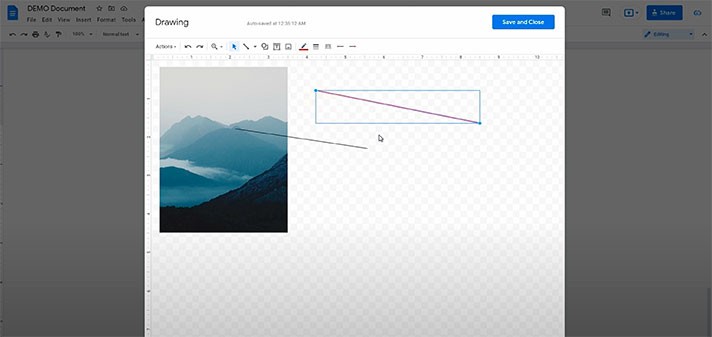
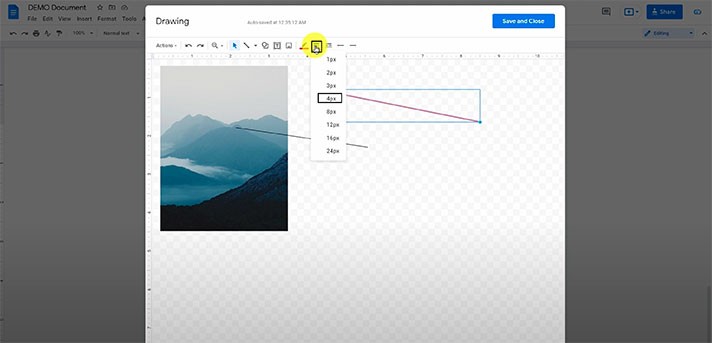
- Next on the menu, we have the “Line weight” item, where you basically select how thick you want your line to be. For example, let’s do 4 px
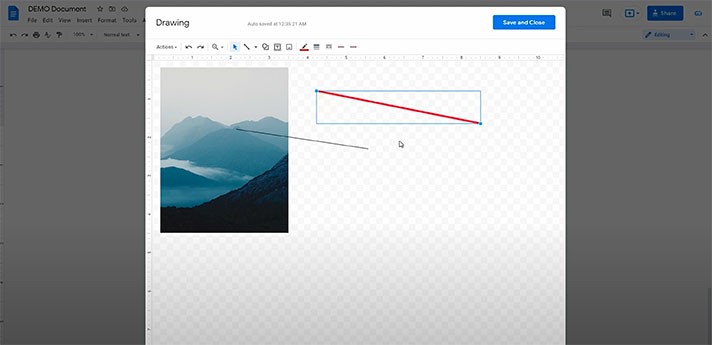
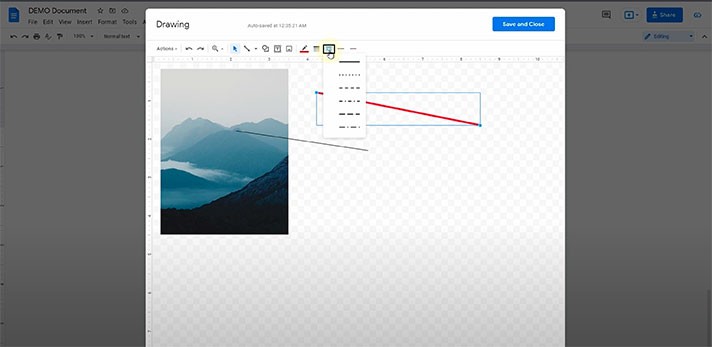
- Then it's the “Line dash” item if you’d like
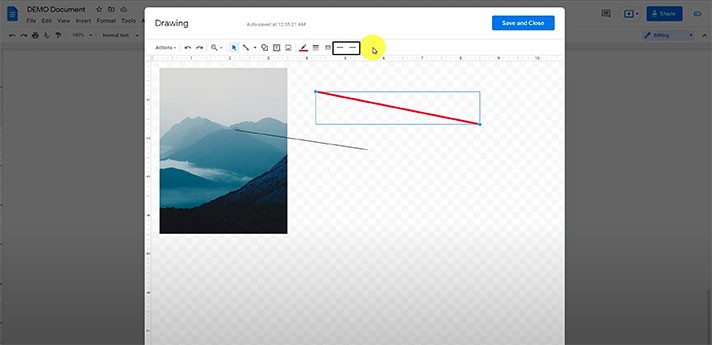
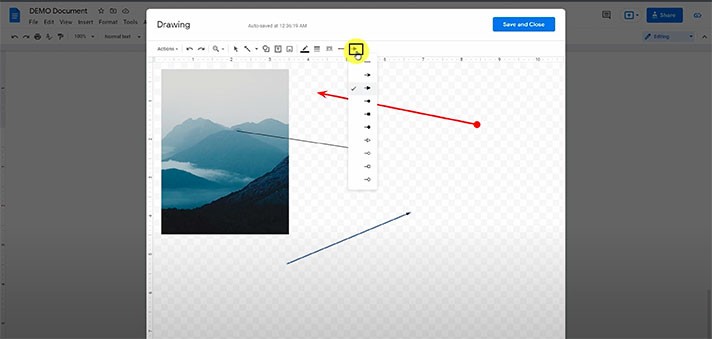
- And here are the buttons to create arrow pointers at the start or the end of the line (“Line start” and “Line end” respectively). For instance, we will choose the start and end points that we like here
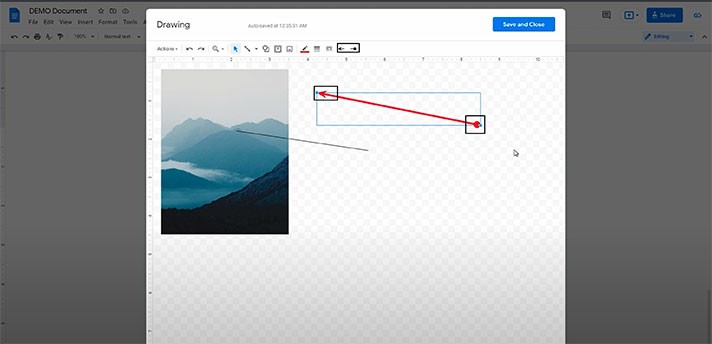
Drawing Other Types of Lines
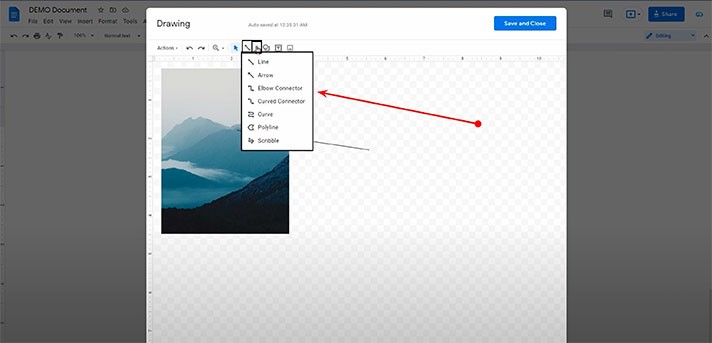
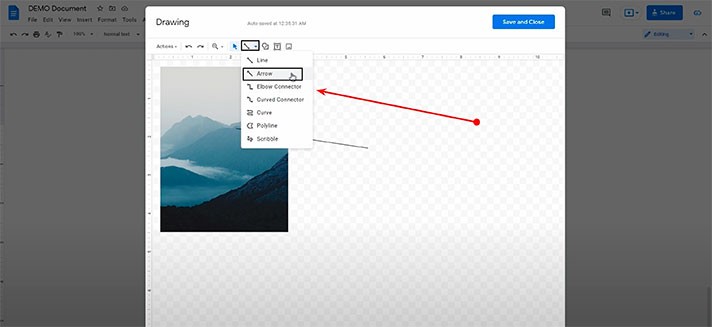
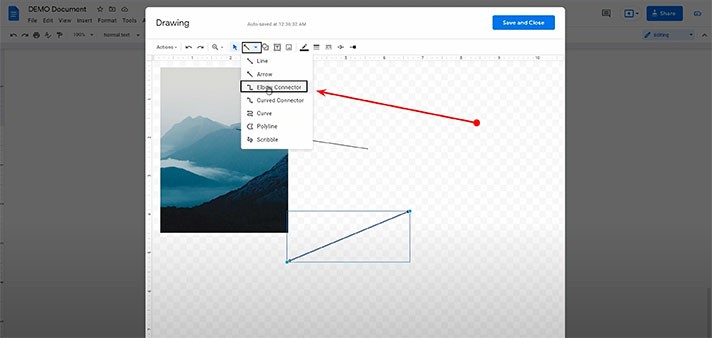
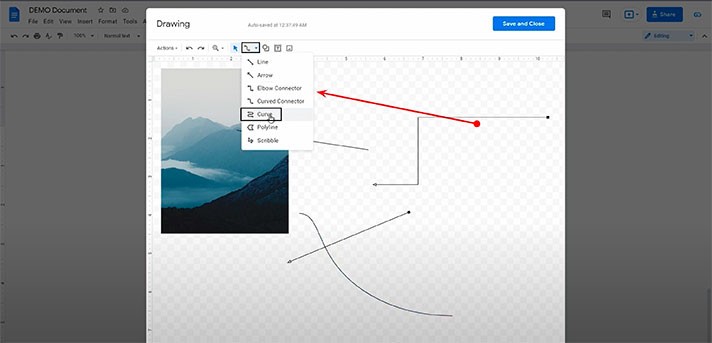
Concerning other options that we have, click on this little down arrow next to the line symbol and you’ll see other types of lines you can draw. Let’s quickly overview each, resuming from the “Arrow” item.
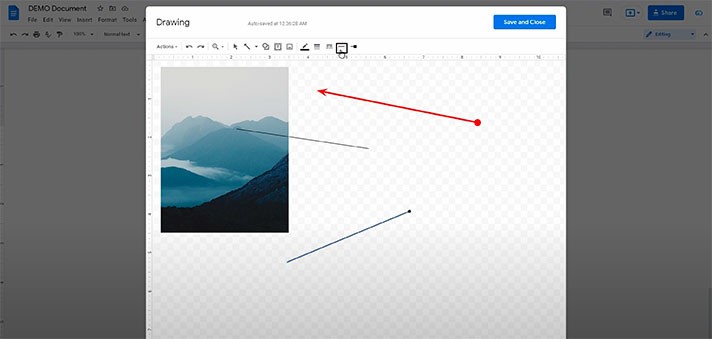
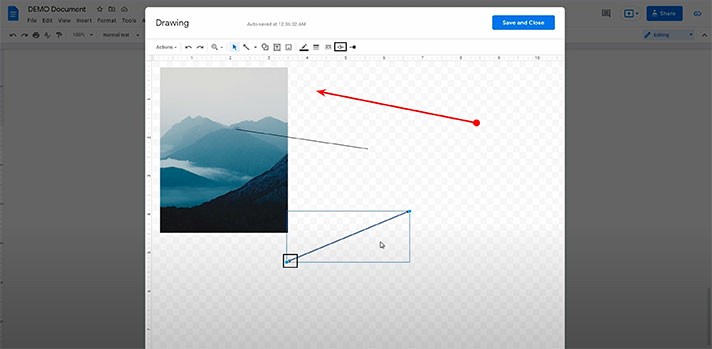
- So, when the arrow is active, you draw a line as usual, but its end point will have an arrowhead on it, as you can see. You can customize it if you need and you can also add an arrow to the start point of the line. For customizing the start and end points of the line, press the necessary item on the toolbar (you will see these items in the screenshots below). We will show you our random customization just as a sample
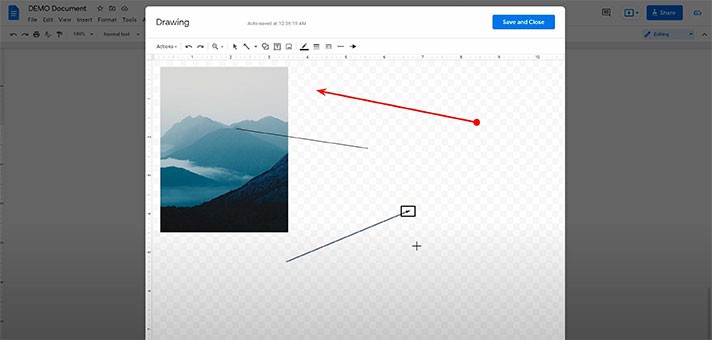
- Getting back to the line selection, and the next one is “Elbow Connector”, which looks like what it sounds: the line that is bent in the middle, and when you draw it, it adapts to where you plan to place the end point. And you can rearrange its ends by exiting the creation mode with “Esc” and then pull either end of the line and place it how you like. Additionally, you can move this bent line in the middle. For that, select the figure and then pull this small yellow rhombus in the middle right or left. There we go
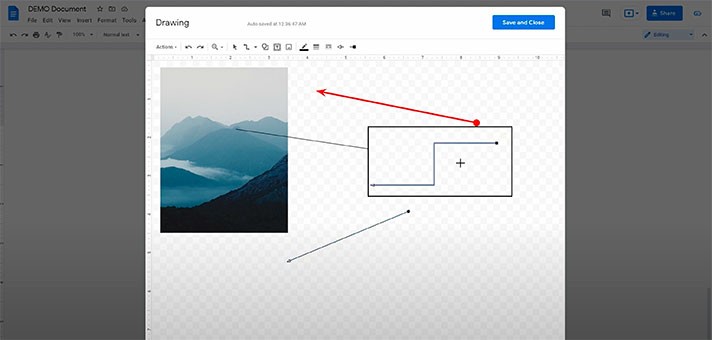
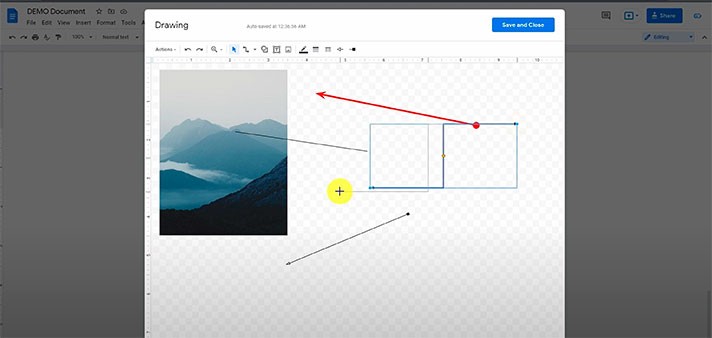
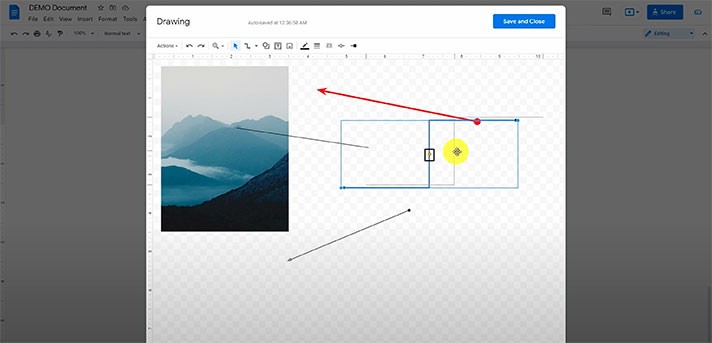
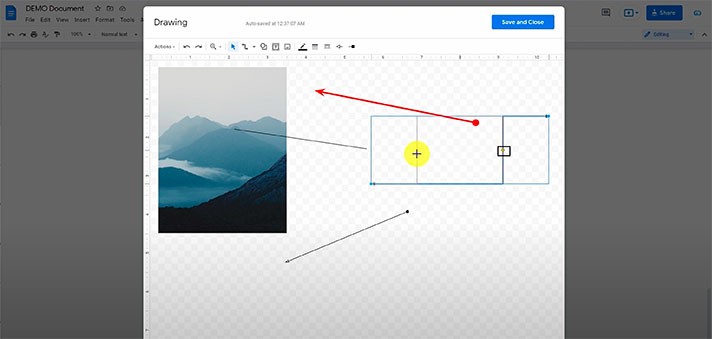
- Then on the menu, we have a common curve line “Curved Connector” which main difference is that you can change its curve angle by pulling this small yellow rhombus in the middle
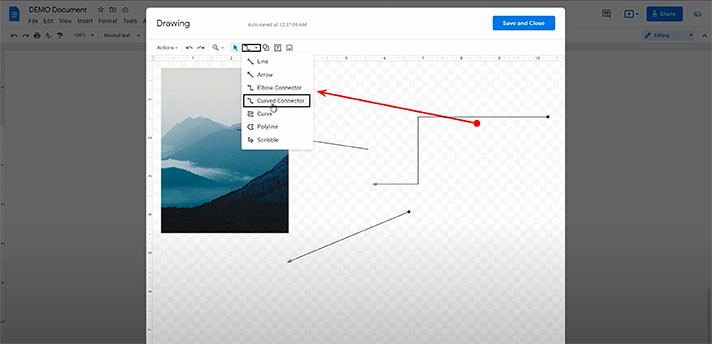
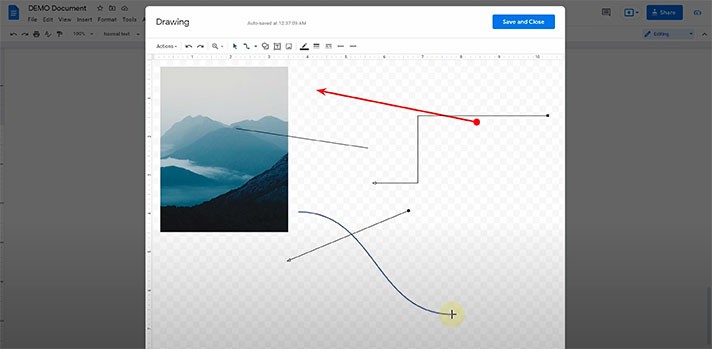
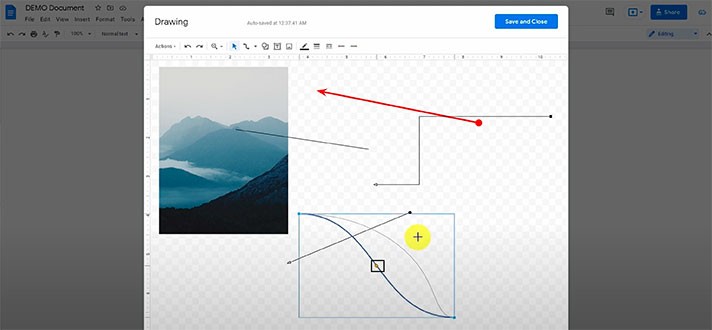
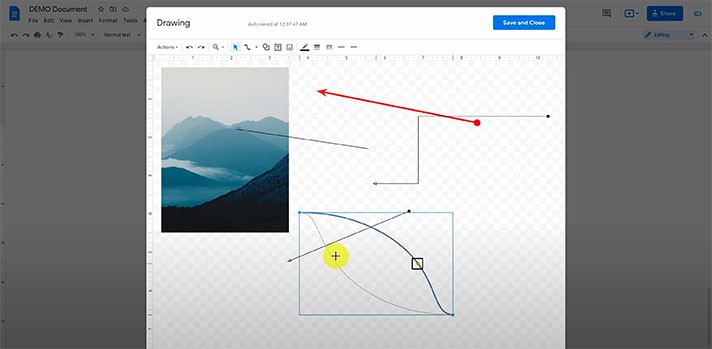
- We go back to the menu. The next item is “Curve” which is similar but allows you to make one unbroken figure with multiple curves at once. For that, click on the start point with no need to hold the mouse, and then choose the end point of the current line. But it doesn’t end here. Your next move will curve this line like this, and then click to create one more middle point. With the next click, you curve it again and you can keep going. To quit drawing the curve, press on the last created point, and here it is (you will see our sample in the screenshots below)
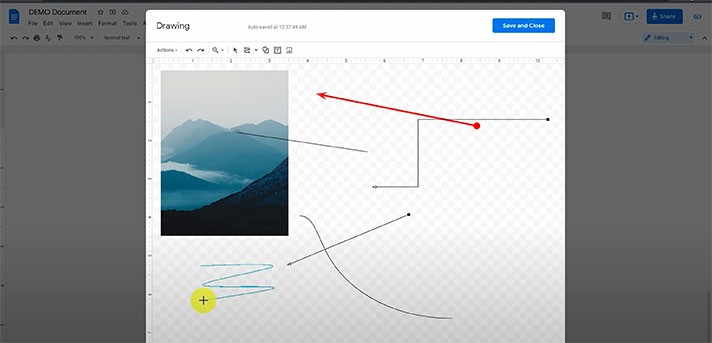
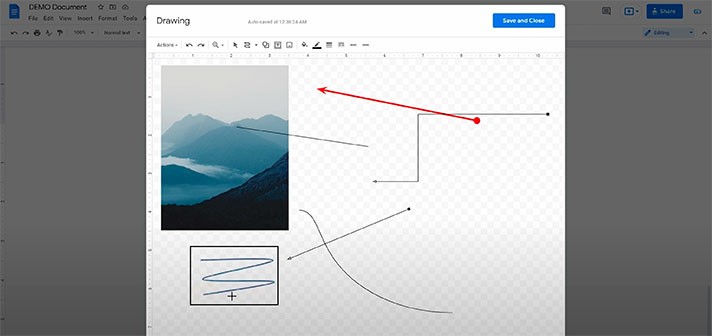
- We return to the menu. We are skipping the “Polyline” item since this is kind of a tool to create shapes. And the last item here is “Scribble”, which is what it sounds like meaning drawing any line you want by hand. This is frequently used for signatures, for example. And then you customize it like the normal line. We will show you our random customization
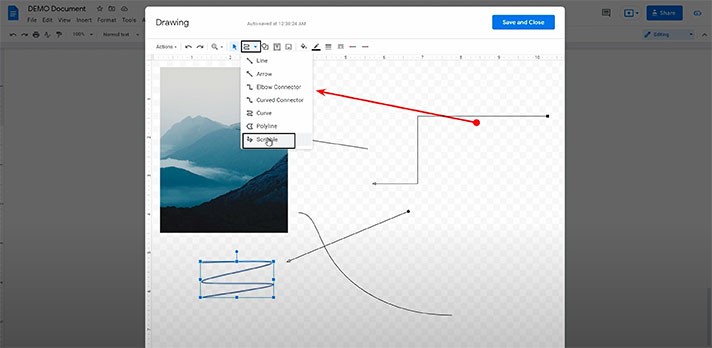
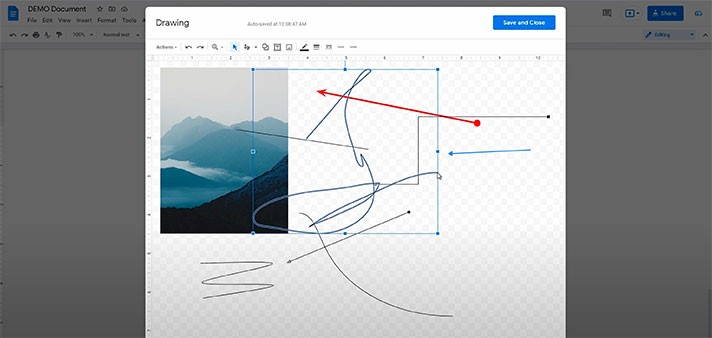
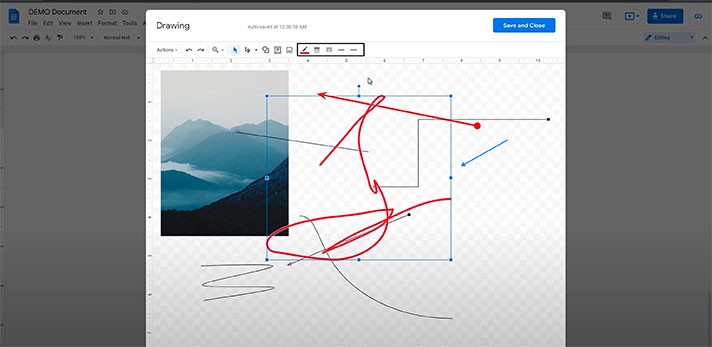
- When you’re done, press “Save and Close” at the top right corner. And here you have your drawings in the document
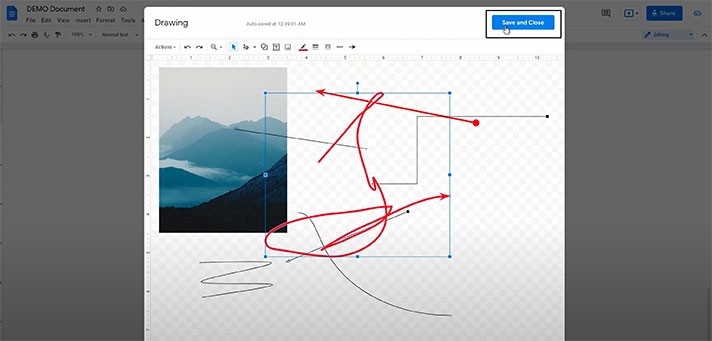
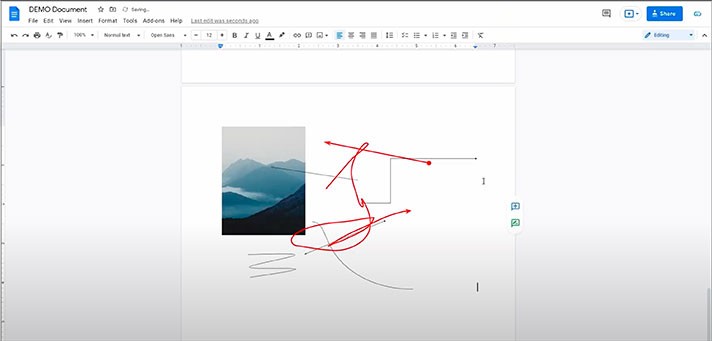
We hope this tutorial will help you learn how to add lines in Google Docs. Good luck!

We are a team of creative people who dream of sharing knowledge and making your work and study easier. Our team of professional designers prepares unique free templates. We create handy template descriptions for you to help you choose the most suitable one. On our blog, you'll find step-by-step tutorials on how to use Google Products. And our YouTube channel will show you all the ins and outs of Google products with examples.


